Quick start, 2 quick start – SOYO STH-DCAM User Manual
Page 4
STH-DCAM U
SER
’
S
M
ANUAL
2001 V
IDERE
D
ESIGN
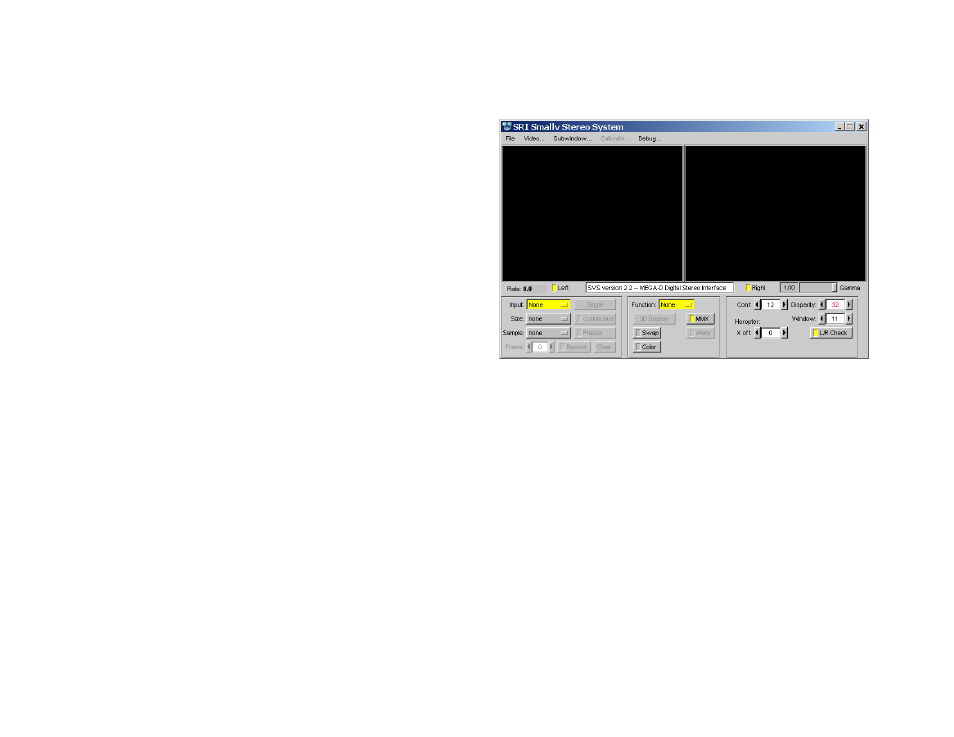
Figure 2-1 Video capture program window.
2 Quick
Start
The STH-DCAM comes assembled, with 3.6 mm lenses as standard.
To set up and test the STH-DCAM, you will need the following:
1. Host computer with a 1394 PCI or PCMCIA card, OHCI
compliant.
2. 1394 6-pin cable.
3. Capture software or Small Vision System installed on the host
computer.
Install the 1394 host card, if necessary, according to the directions in
Section 7.1. Install the video capture software (included with the STH-
DCAM) or Small Vision System software (see Section 7.2). This is the
not-so-quick part of the Quick Start.
The STH-DCAM has a single IEEE 1394 port, for plugging in an IEEE
1394 cable. Plug one end of a 6 pin – 6 pin IEEE 1394 cable into the port,
and the other end into any port of the host card. Note: for PCMCIA cards,
and laptops with a 4-pin Sony iLink port, an external power supply should
be plugged into the STH-DCAM to supply power to the stereo head, using
the 2.1 mm power jack. Standard IEEE 1394 PCI cards supply enough
power, and the power adapter is not necessary.
Start the video capture program, smallvcap(.exe), on the host
computer. You should see a screen as in Figure 2-1. The message window
should indicate that the STH-DCAM interface is present. If not, go back to
software installation (Section 7.2), and follow the instructions for
configuring the correct capture library.
Pull down the Input chooser, and select the Video option. If everything
has been set up, the driver software will recognize and configure the stereo
head after a few seconds, and a success message will appear in the info text
window. If not, the Input chooser will go back to None, and an error
message will appear in the info window. Please see Section 7 for
troubleshooting.
To view stereo video, press the Continuous button. Left and right
images should appear in the application windows. If the message “Image
timed out” appears, then there is a problem with the IEEE 1394 drivers;
please see Section 7. After a few seconds, the images, which are initially
dark, should lighten as the auto exposure mode adjusts to ambient lighting
(Section 6.2). Images can be saved using the File menu.
A more complete description of the video capture program is in Section 6.
The SVS programs are described in the documentation that comes with that
software. It is helpful to review Section 6 in conjunction with the SVS
documentation.
4