Soleus Air KFHHP-12-OD User Manual
Page 14
- 12 -
◆Installation
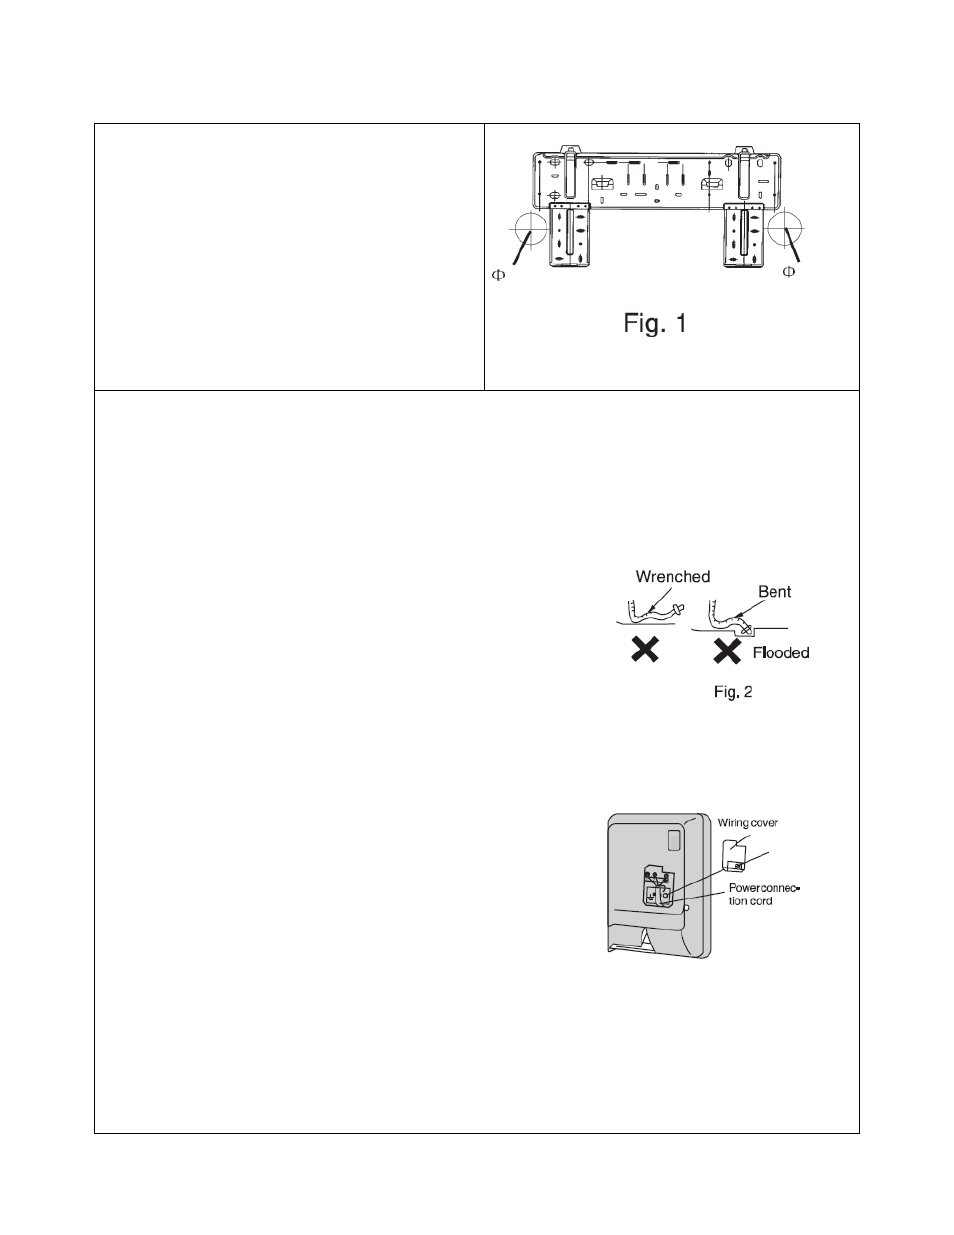
• Install the rear panel
1. Always mount the rear panel horizontally.
Because the mouth of drainage pipe is at the left
side and the left side of the rear panel is better to
adjust slightly lower.
2. Fix the rear panel on the selected location with
screws supplied with the unit.
3. Be sure that the rear panel has been fixed firmly
enough to withstand the weight of an adult of
132.3 lbs; furthermore, the weight should be
evenly shared by each screw.
• Install the piping hole
1. Make the piping hole (Φ50) in the wall at a slight downward slant to the out door side. (Shown in
Fig. 1)
2. Insert the piping-hole sleeve into the hole to prevent the connection piping and wiring from being
damaged when passing through the hole.
• Install the drainage hose
1. For well draining, the drain hose should be placed at a
downward slant.
2. Do not wrench or bend the drain hose or flood its end by
water.
3. The extended drainage pipe in the room should be wrapped
with the insulating materials.
• Install the connection pipes
Connect the connection pipes with the relevant union pipes of the indoor unit and tighten the flare nut of the
connection pipes (Shown in P16 “Install the connection pipes”).
NOTE:
1. Connect the connection pipes with the indoor unit first
and the outdoor unit second.
2. Be careful in bending the connection pipes, or you will
damage the pipes.
3. Do not over tighten the flare nut. There is a possibility
of leakage.
• Electric wiring
1. Open the surface panel.
2. Remove the fixed screw from the wiring cover as shown at the right side.
3. Route the power connection cord from the back of the indoor unit and pull it toward the front through
the wiring hole for connection.
50
50