Charging your battery – Sears 200.71234 User Manual
Page 10
9
Charging Your Battery
NOTE: A marine (boat) boat battery must be removed
and charged on shore. To charge it on board requires
equipment specially designed for marine use.
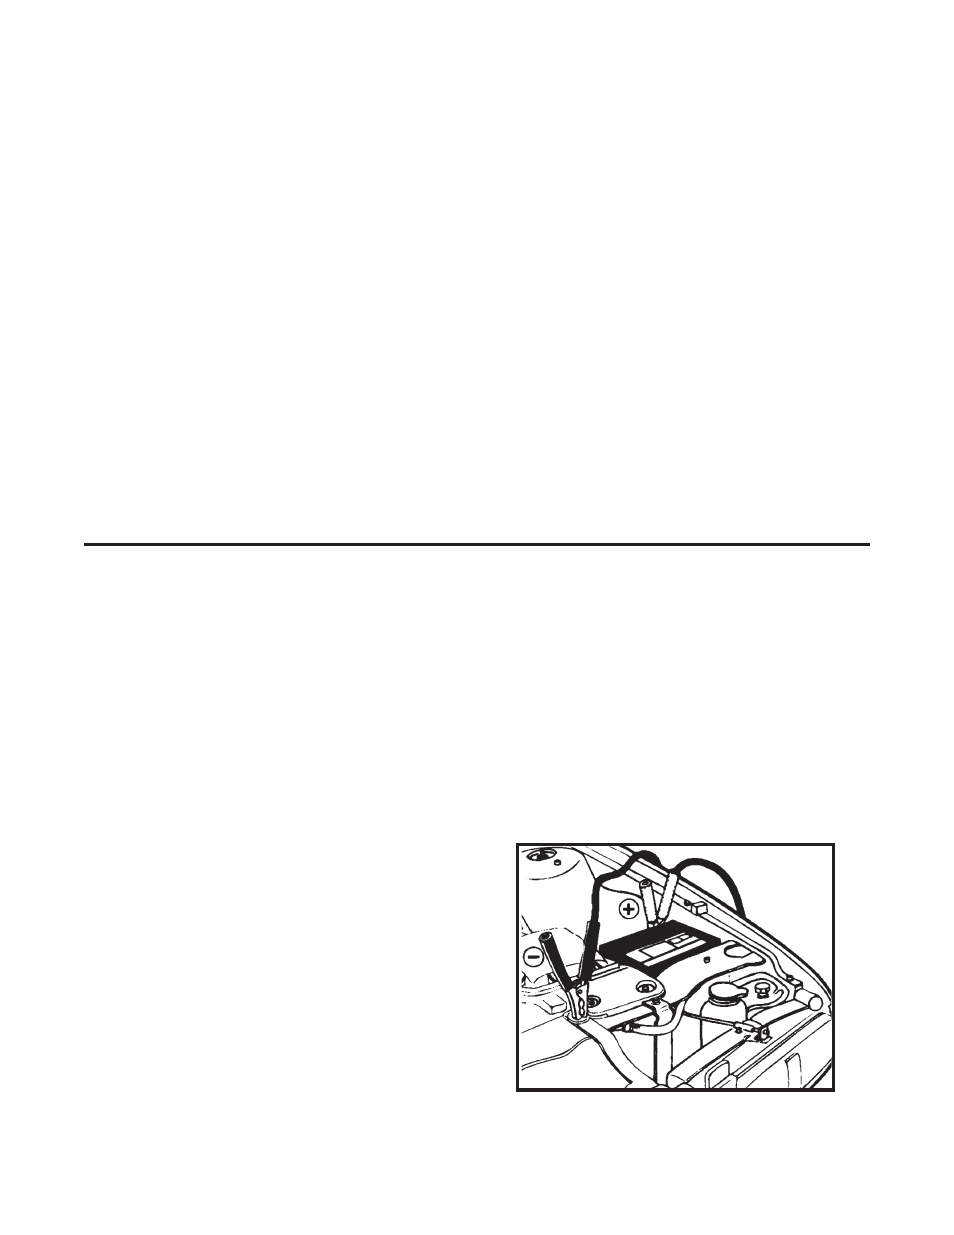
Charging your battery in the vehicle:
1.
Arrange the power cord and charging leads
carefully in order to avoid damage that could be
caused by the hood, door, or moving engine parts.
2.
Keep hands, hair, clothing and jewelry clear of the
fan blades, belts, pulleys, and other parts that can
cause injury.
3.
Check the polarity of the battery posts using the
identification marks on the battery case: POSI-
TIVE (POS, P, +) and NEGATIVE (NEG, N, -).
4.
Identify which battery post is grounded or con-
nected to the chassis. THE NEGATIVE POST IS
NORMALLY THE ONE THAT IS GROUNDED.
5.
To charge a negative grounded post system:
Connect the red (POSITIVE) charger clamp to the
ungrounded POSITIVE (POS, P, +) post of the
battery. Next, connect the black (NEGATIVE)
clamp to an unpainted, heavy metal part of the
chassis or engine block, away from the battery. Do
not connect clamp to carburetor, fuel lines, or
sheet metal parts.
To charge a positive grounded post system:
Connect the black (NEGATIVE) charger clamp to
the ungrounded NEGATIVE (NEG, N, -) post of
the battery. Then connect the red (POSITIVE)
clamp to an unpainted, heavy metal part of the
NEGATIVE GROUNDED SYSTEM
• METER: Besides showing amps, volts, and time, the
meter displays information:
—A—
Charge Rate in amps
—V—
Voltage
MAN
Charger is in Manual mode
AUTO
Charger is in Automatic mode
RDY
Charger is ready for cranking
(Engine Start)
WAIT
Wait until the charger is ready before
cranking again
FULL
Battery is charged (Automatic mode)
OFF
Time has expired (Manual or
Timer mode)
HR
Hour(s)
CHK BATT
There is a problem with the battery or
connections
OL
Too high a charging rate; lower rate
to continue
chassis or engine block, away from the battery. Do
not connect clamp to carburetor, fuel lines or
sheet metal parts.
IMPORTANT: Wear safety glasses and face away
from the battery while making connections.
6.
Twist or rock clamps back and forth to make a
solid connection. This will help make better
contact and help keep them from slipping off and
causing sparks.
7.
Make sure the POWER switch is set to the OFF
position. Next plug the power cord into a 3-prong
grounded 120V AC electrical wall outlet.