Connecting electricity and ducting – Sirius Range Hoods SUF1 User Manual
Page 6
3
I N S T A L L A T I O N
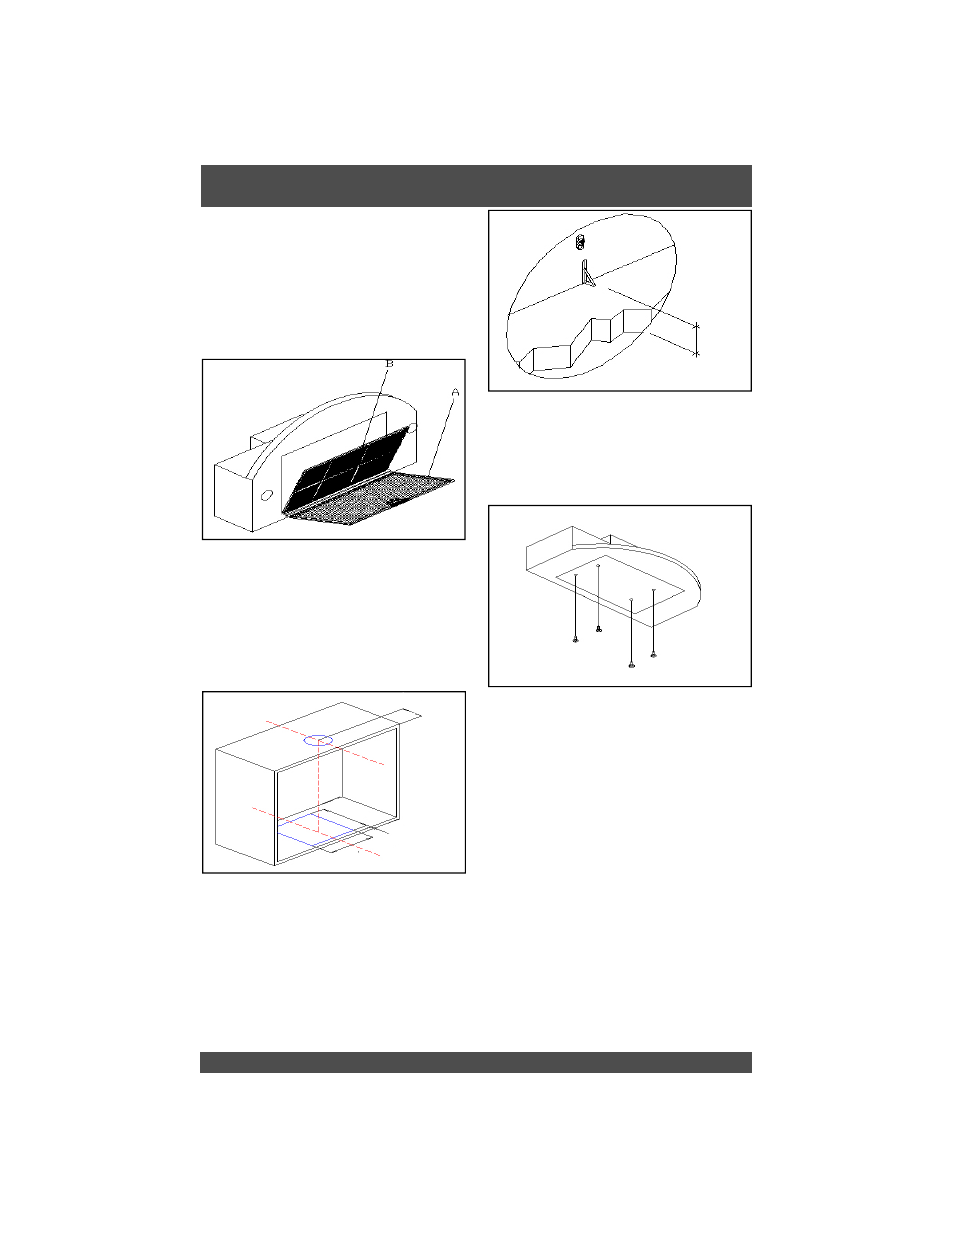
Before installing the appliance, in
order not to damage the appliance
itself, the metal grease filter should
be removed by pushing the special
filter handle toward the back side of
the cooker hood and turning it
downwards so to unfasten it from its
slot (refer to figure 2A).
Make a cut-out on the bottom of the
cabinet to hold the appliance by us-
ing the drilling jig provided. This
opening must be 9.8” x 10.2” and at
a distance of 1” from the front edge
of the cabinet (refer to figure 3)
Figure 2
1”
10.2”
9.8”
Cen
ter
of th
e ho
od
4.5”
To install the appliance adjust the
position of the stop side-springs
using the appropriate screws,
according to the thickness of the
board. The base of the cabinet must
be from 0.4” to 1” thick (refer to
figure 4).
Min: 0.4”
Max: 1”
Figure 3
Figure 4
Insert the built-in unit in the hole
made in the cabinet until the stop
click of the side-springs is heard and
the hood is temporary held in
position.
Connecting Electricity and
Ducting
Please refer to the Electrical Supply
section on page 2 for the required
location of the electrical supply.
CAUTION: Make sure the power is
turned off at source. Make electrical
connections (refer to Figure 8).
Insert the screws provided in the
holes inside the range hood (refer to
figure 6).
Figure 5