Swann ADW-300/X User Manual
Page 4
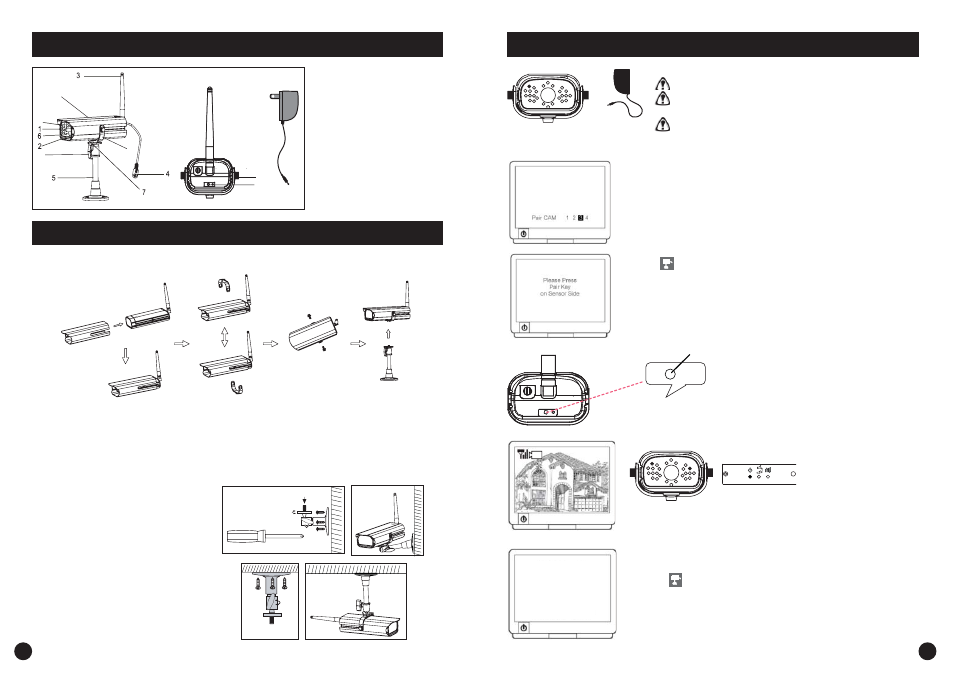
Camera & Receiver Layout
Camera Parts
1. Camera
Lens
2. IR
LED
3. Antenna
4. Power
Jack
5. Camera
Stand
6. 1
CDS
7. Microphone
8. Cam
Pair
9. Power
adaptor
10. Power LED
11. U holder / U holder screw
12. T- bolt
13. Sunshield
4
Installation
Back side
Camera Assembly / Adjustment
A. Loosen U holder screws; slide the sunshield to ideal position.
B. U bracket can be installed on camera top side for ceiling mount.
C. Secure U holder with screws when done.
D. Adjust camera for proper view angle. Secure the stand with T-bolt when done.
Hardware Set Up
5
Pairing Cameras
Pairing Camera(s)
This function is available for multi-camera users
It is highly recommended to pair the camera before
hardware installation.
Before pairing the camera, make sure camera is power
ON, camera status indicators shown:
A. Simply pair the camera by selecting the desired channel in the
OSD menu of the existing receiver (not included).
B. Only assign one camera to one channel. Channel memory will be
overwritten if the next camera is assigned to the same channel.
C. Pairing new camera to channel 3, settings as shown:
D. Press
(Pair).
E. System will count down within 60 seconds, system message as
shown:
F. Within 10 seconds, press the Pair Key on
the back of camera.
60
G. Once pairing completed, camera and
receiver status indicators appear as
shown
Camera Wall / Ceiling Mounting
A. Secure camera stand to the wall
B. Secure camera U bracket to the
stand.
C. Adjust proper view angle then
secure the joint with T-bolt.
Connect Antenna & Power Adapter
A. Secure Antenna to the camera
B. Connect the Power Adapter
included in this pack to the camera
C. Plug in Power Adapter to power
point
Reset
Reset
A. Select the item “Reset” in the menu.
B. Press
.
C. The original default settings of the system will be restored.