Sony DAV-IS10 User Manual
Page 84
masterpage:Left
specdef v20060111
filename[G:\FM\Sony\0508\3212589121\3212589121DAVIS10\gb12adv.fm]
model name [DAV-IS10]
[3-212-589-12(1)]
84
US
1
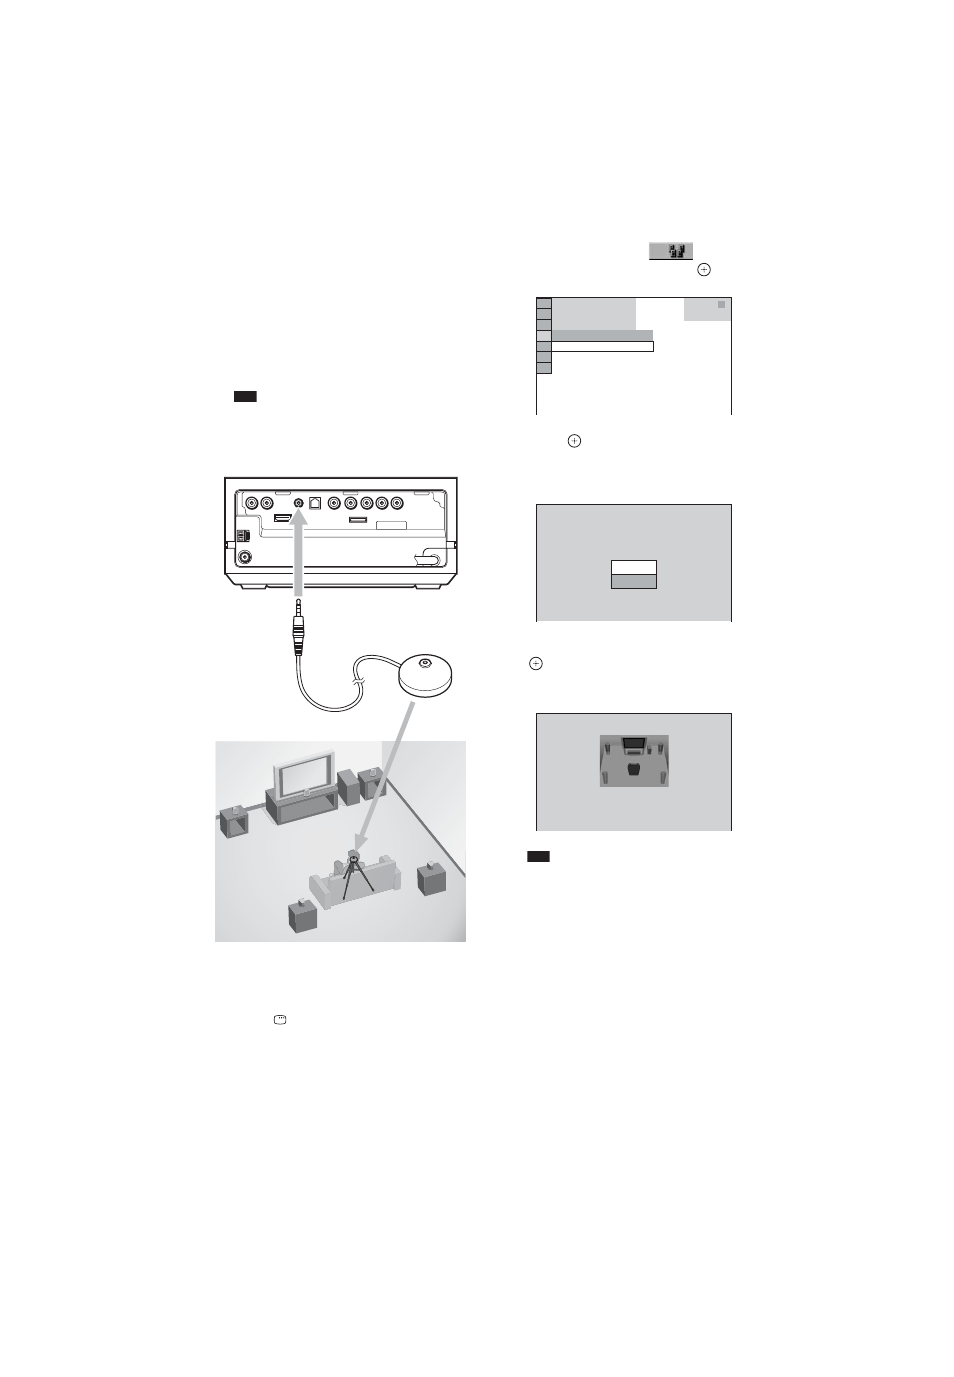
Connect the calibration mic to the
ECM-AC2 jack on the rear of the control
unit, and set it up at the ear level using
a tripod, etc. (not supplied).
The front of each speaker should face the
calibration mic, and there should be no
obstruction between the speakers and the
calibration mic.
Note
• The ECM-AC2 jack is used for the supplied
calibration mic only. Do not connect other
microphones.
2
Press FUNCTION repeatedly until
“DVD” appears in the front panel
display.
3
Press
DISPLAY when the system is
in stop mode.
The Control Menu display appears on the
TV screen.
4
Press
X/x to select
[AUTO
CALIBRATION], then press
.
5
Press .
The [AUTO CALIBRATION] display
appears.
6
Press
X/x to select [YES], then press
to start [AUTO CALIBRATION].
Be quiet during the measurement.
Note
• Avoid being in the measurement area and
making noise during the measurement (about 1
minute), to avoid measurement failure. During
the measurement, test signals are output from
the speakers.
• The environment of the room in which the
system is installed may affect measurements.
DMPORT
Calibration mic
Rear of the control unit
To ECM-AC2 jack
START
T 0 : 0 3 : 0 4
3 ( 2 8 )
1 ( 4 4 )
DVD VIDEO
AUTO CALIBRATION
Connect calibration mic. Start
measurement?
YES
AUTO CALIBRATION
NO
Measuring. Please wait a moment.