SOYO SY-6IZM/3 User Manual
Page 10
SY-6IZM/3 Quick Start Guide
10
Hardware Installation
Step 9.
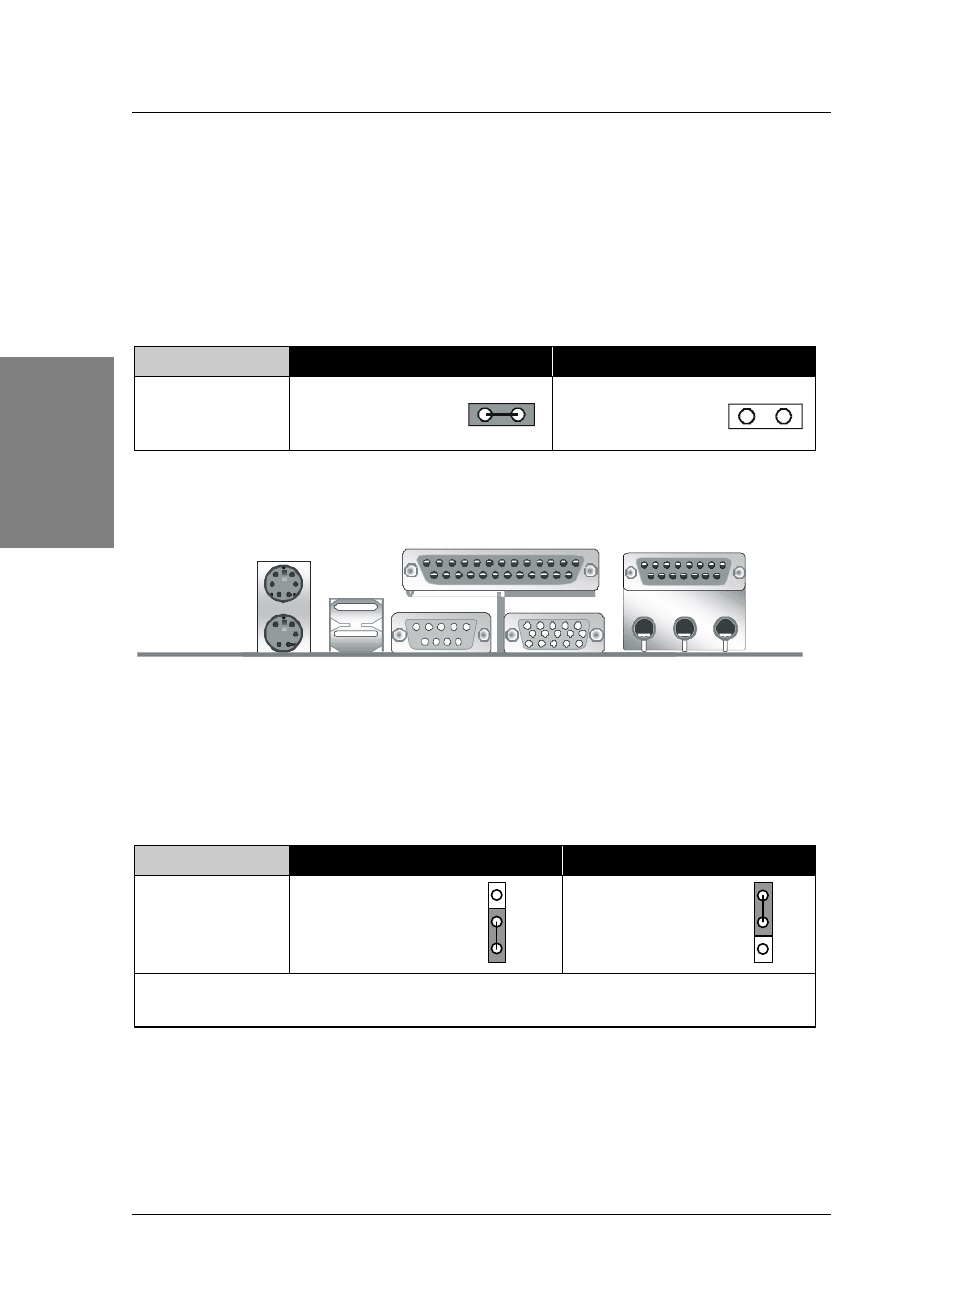
Enable/Disable Onboard VGA(JP7)
The onboard VGA features of your Motherboard are controlled by jumper JP7.You can
choose to enable or disable the available VGA function by setting JP7 accordingly.
l Leave JP7 open to enable the onboard VGA function. Then, you can plug your VGA
device monitor, after the Motherboard is installed. (You do not need to install any VGA
card.)
l To disable the onboard VGA options short pin JP7.
Onboard VGA
Disable
Enable
JP7 Setting
Short pin to disable
the onboard VGA
function.
Open pin to enable
the onboard VGA
function.
Step 10.
Back Panel Connector
Step 11.
Clear CMOS Data (JP5)
Clear the CMOS memory by momentarily shorting pin 2-3 on jumper JP5 for at least 5
seconds, and then by shorting pin 1-2 to retain new settings. This jumper can be easily
identified by its white colored cap.
CMOS Clearing
Retain CMOS Data
Clear CMOS Data
JP5 Setting
Short pin 1-2 to retain
the new settings.
Short pin 2-3 for
at least 5 seconds
to clear the CMOS.
Note: You must unplug the ATX power cable from the ATX power connector when
performing the CMOS Clear operation.
2
1
3
2
1
3
PS/2 KB
Connector
PS/2 Mouse
Connector
USB1
USB2
COM1
PRT
USB1
VGA
LINE-OUT
LINE-IN
MIC JACK
JOYSTICK