English – Sony PSS-610 User Manual
Page 12
12
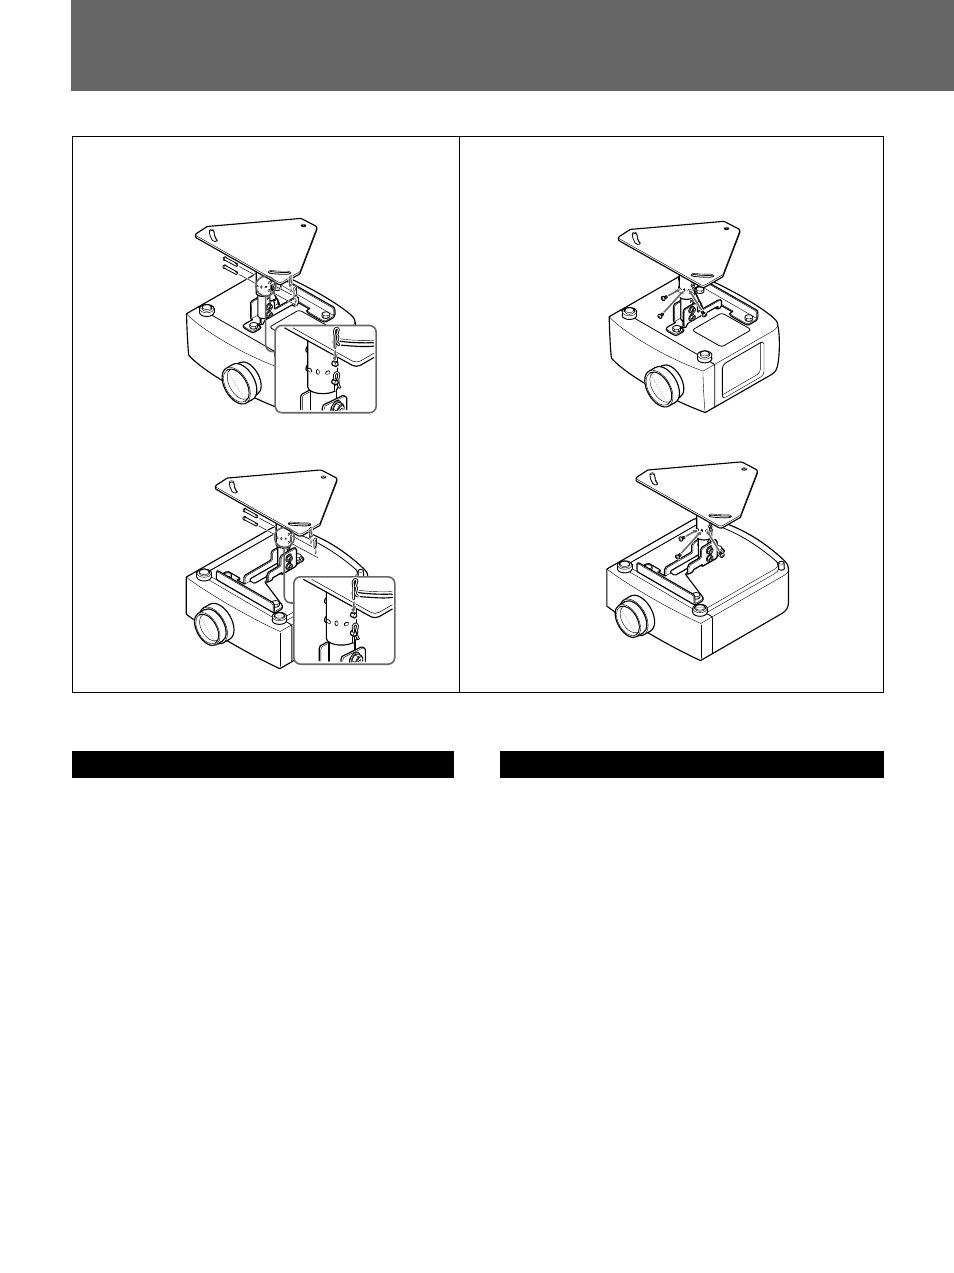
/Attaching to the ceiling/
Montage au plafond/Montage an der Decke/Montaje en el techo/
5
6
English
5
Insert the adjustment pipe into the upper ceiling
mount bracket (a). Attach the pipe with the two 6
mm pins (k) and the two snap pins (l).
Pipe (b) can be adjusted to a height of 150/175/200
mm (6/7/7
7
/
8
inches); pipe (c) can be adjusted to a
length of between 250/275/300 mm (9
7
/
8
/10
7
/
8
/11
7
/
8
inches).
6
Secure the upper ceiling mount bracket (a) and the
adjustment pipe you attached in step 5.
Use six M4
× 6 screws (g).
Then, tighten the bolts you attached in step 3 to
secure the adjustment pipe.
5
6
B
A
(k)
(l)
(k)
(l)
B
A
(g)
(g)
See also other documents in the category Sony Furniture:
- SU-W210 (40 pages)
- SU-W210 (148 pages)
- SU-W210 (1 page)
- SU-WL700 (6 pages)
- SU-WL700 (68 pages)
- SU-WL700 (7 pages)
- SU-WL500 (1 page)
- SU-RG11MA (2 pages)
- SUWH500 (2 pages)
- SU-WL500 (7 pages)
- SU-WL500 (204 pages)
- SU-GW3 (2 pages)
- SU-GW3 (1 page)
- SU-PW2 (32 pages)
- SU-PW2 (1 page)
- SU-PW2 (44 pages)
- SU-P42T1 (32 pages)
- SU-WTS1 (68 pages)
- SU-P42T2 (1 page)
- SU-P42T2 (36 pages)
- SUB463S (35 pages)
- SU-B461S (60 pages)
- SU-36HX1 (16 pages)
- SU-FL300L (292 pages)
- SU-FL300L (36 pages)
- SU-PF1L (36 pages)
- SU-FL61 (211 pages)
- SU-W100 (28 pages)
- SU-W100 (1 page)
- SU-32HX1 (16 pages)
- SU-RS51U (64 pages)
- WSX10FB (2 pages)
- SU-LW1 (264 pages)
- SU-LW1 (64 pages)
- SU-B461S (255 pages)
- RHTG2000 (36 pages)
- HVL-HL1 (2 pages)
- HVL-LBP (2 pages)
- SU-30HX1 (16 pages)
- SPM-TRI/C (6 pages)
- SU-PF2 (40 pages)