Soleus Air FS3-40R-30 User Manual
Page 4
4
ASSEMBLY
WARNING: DO NOT plug in fan before assembly.
Tools required: Phillips screwdriver (not included)
Base and Pole Assembly:
1. Unscrew the “L” screw from the bottom of the lower pole. Slide the bottom of the lower pole into the
hole on the base. Use the “L” screw removed earlier to secure the pole to the base.
2. Now slide the top pole (the piece that contains the control panel and fan head) onto the chrome end of the
lower pole that was just inserted into the base. Secure these pieces together using the fastener on the back
of the top pole.
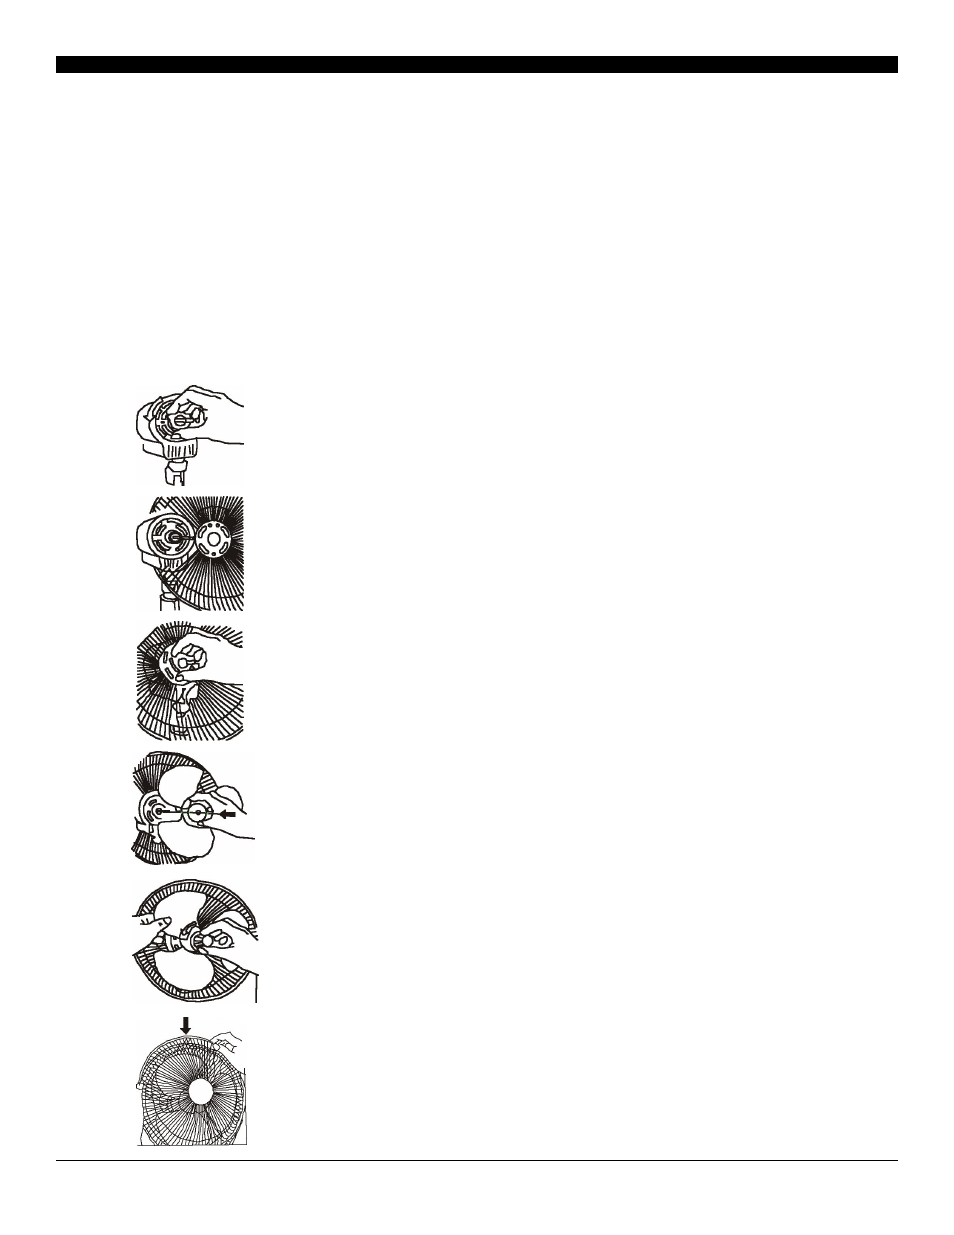
Fan Head Assembly:
Unscrew the mounting nut counter clockwise from the motor shaft.
Position the back grill over the motor shaft, fitting the holes in the
back grill over the knobs that protrude from the front of the mo-
tor. Make sure the rear grill fits securely against the motor housing.
Secure the back grill by screwing on the mounting nut. Turn clockwise
and tighten firmly.
Slide the fan blade onto the motor shaft with the fan blade’s shaft
sleeve facing the motor. Make sure the groove in the shaft sleeve
fits over the spring bolt on the motor shaft.
Attach the fan blade by screwing the securing knob onto the motor
shaft counter clockwise.
Position front grill so logo is horizontal. Attach the grills together by
positioning the top tab of the front grill over the back grill. Firmly
press the black ring of the front grill onto the back grill, snapping
into place. This completes the assembly.