The extended menu “advanced menu, The extended menu “ advanced menu, Adjustment tips and functions 38 – Sennheiser Rack-mount Receiver EM 300 G3 User Manual
Page 39
Adjustment tips and functions
38
The extended menu “
Advanced Menu
”
To get into the extended menu “
Advanced Menu
”:
̈
From the main menu, select “
Advanced
”.
Setting the receiving frequencies and the frequency banks “U1” to “U6
Via the “
Tune
” menu item, you can set a receiving frequency to be stored
in the current channel
or
you can select a different channel in one of the
frequency banks “
U1
” to “
U6
” and assign this channel a receiving
frequency.
Setting a receiving
frequency for the
current channel
̈
Set the desired frequency.
Squelch
Easy Setup
Setup
Frequency Preset
Name
AF Out
Equalizer
Auto Lock
Advanced
Exit
Menu
Tune
Sync Settings
Pilot Tone
Warnings
LCD Contrast
Reset
IP-Address
Software Revision
Exit
Advanced Menu
When you have selected one of the system banks and then select
the “
Tune
” menu item, the receiver automatically switches to
channel 1 of the frequency bank “
U1
”. In this case, “
U1.1
” briefly
appears on the display panel.
Upon delivery, the channels of the frequency banks “
U1
” to “
U6
”
are not assigned a receiving frequency.
It is vital to observe the notes on frequency selection on page 44.
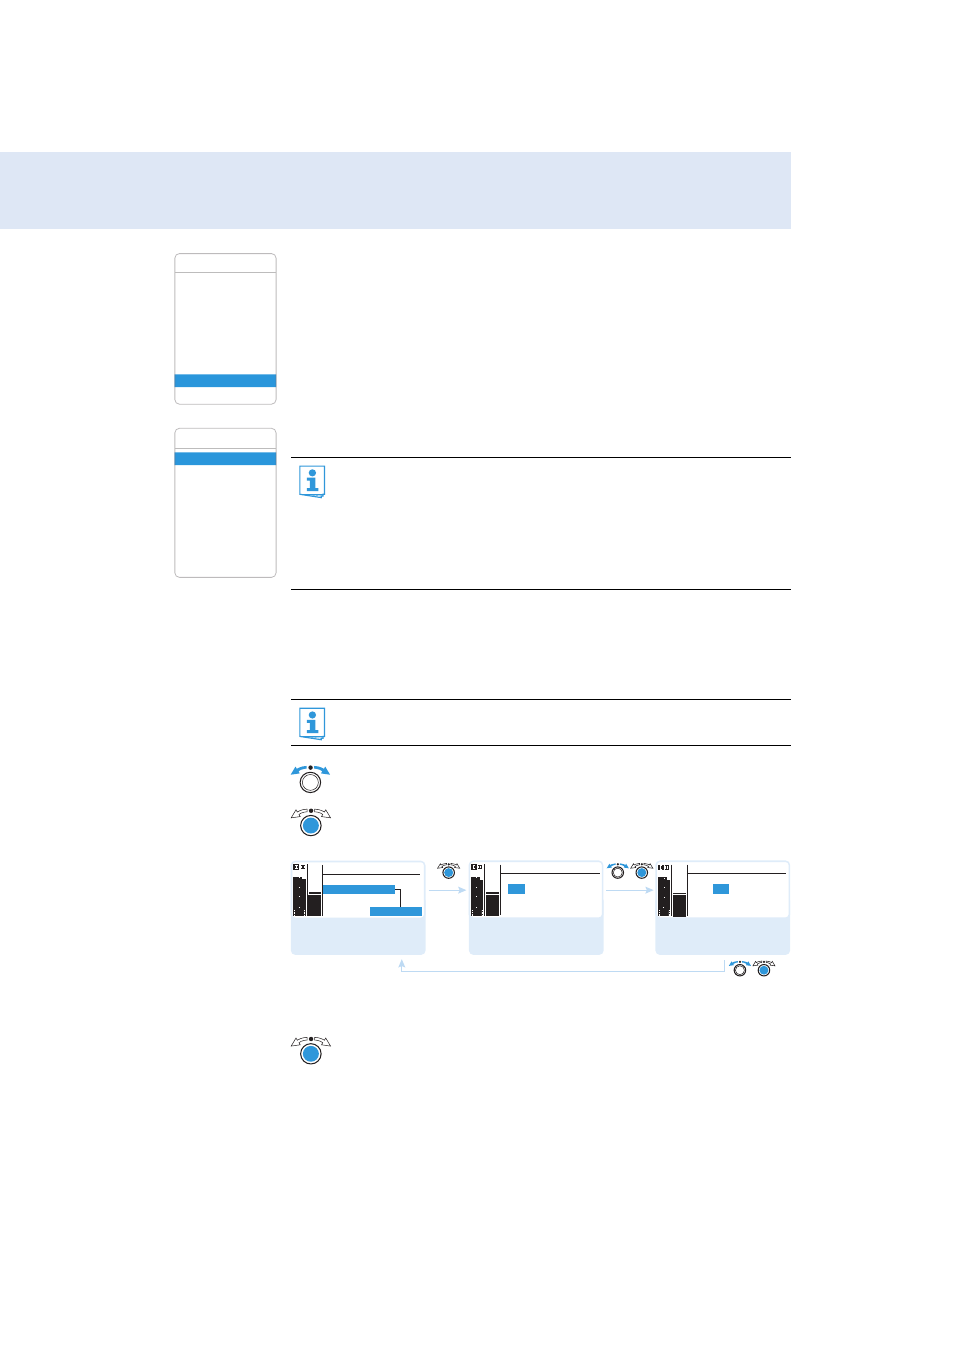
̈
Turn the jog dial until the “
Tune
” menu item appears.
̈
Press the jog dial.
The frequency selection appears.
̈
Press the jog dial.
Your settings are stored.
You are back to the operating menu.
Call up “Tune”
Select the MHz value
and confirm
Select the kHz value;
store the setting
Advanced Menu
531.375 MHz
Tune
B.Ch: U1. 1
531
.375 MHz
Tune
B.Ch: U1. 1
534.
208
MHz
Exit
Tune
Sync Settings
“Stored”
PEAK
-10
0
40
30
20
10
-20
-40
AF
RF
-30
PEAK
-10
0
40
30
20
10
-20
-40
AF
RF
-30
PEAK
-10
0
40
30
20
10
-20
-40
AF
RF
-30