Special features, Copying a video tape – Symphonic SD7S3 User Manual
Page 21
– 21 –
EN
1L25
COPYING A VIDEO TAPE
SPECIAL FEATURES
You can make copies of video tapes made by friends or
relatives for your enjoyment.
You can not copy a DVD to a videotape.
Warning:
Unauthorized recordings of copyrighted video tapes
may be an infringement of copyright laws.
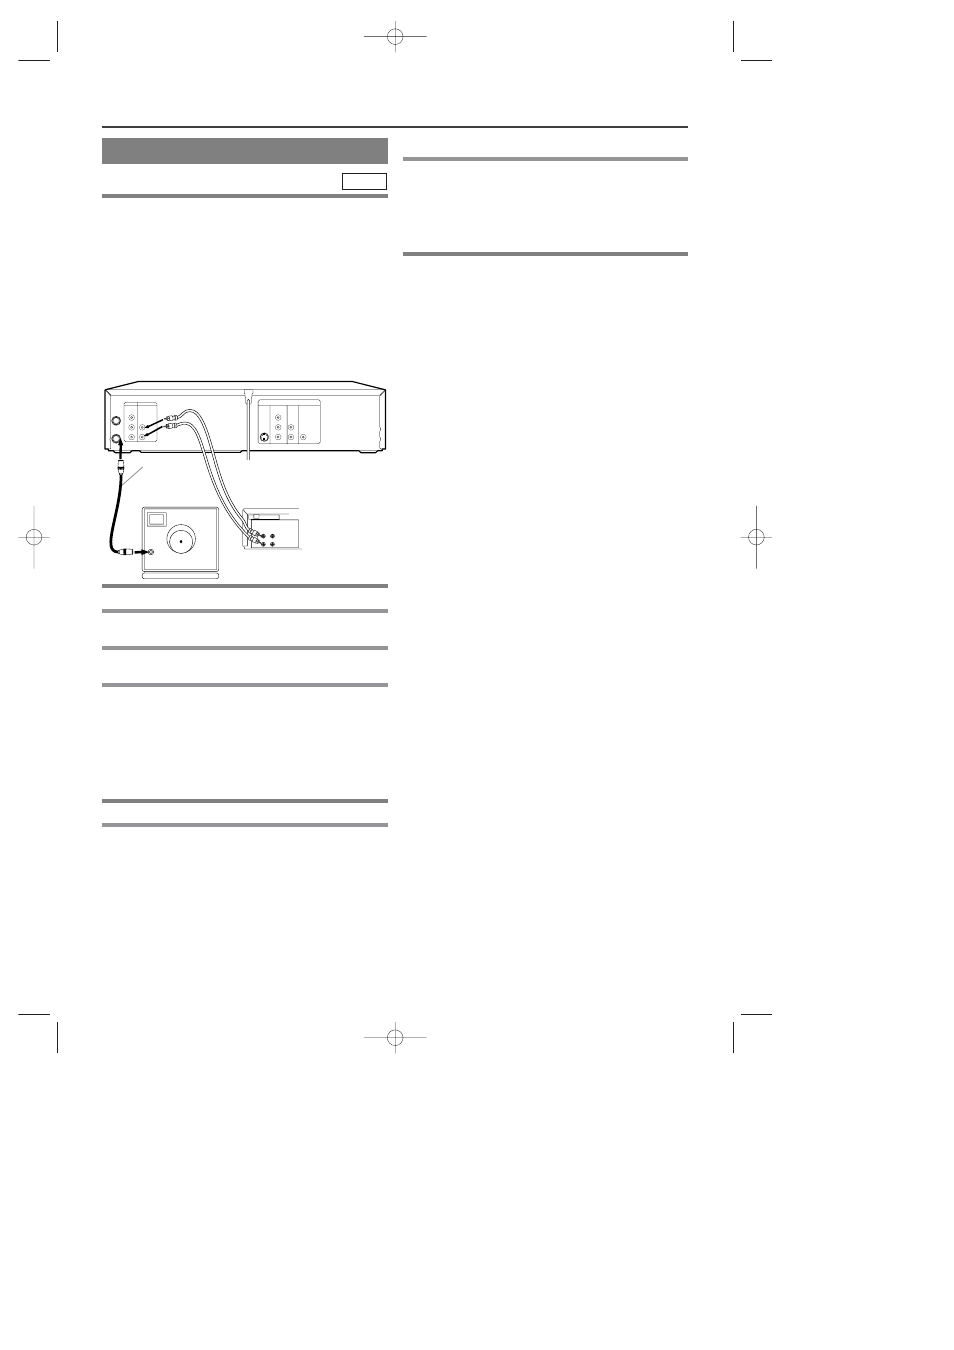
Connect the recording VCR (this unit), the playing
VCR (another source) and your TV using the follow-
ing diagram.
¡
You can use the AUDIO/VIDEO input jacks on the
front panel of the DVD/VCR instead of using the
jacks on the back.
VCR
IN
OUT
AUDIO
VIDEO
DVD/VCR
VCR
AUDIO OUT
AUDIO IN
VIDEO OUT
VIDEO IN
S-VIDEO
OUT
COMPONENT
VIDEO OUT
AUDIO
OUT
DVD
Y
Cb
L
Cr
R
ANT-IN
ANT-OUT
L
R
DIGITAL
AUDIO OUT
COAXIAL
ANT in
[TV set]
(Use for monitoring)
RF cable
(supplied)
Audio/Video cables
(not supplied)
[Recording VCR]
(this unit)
[Playing VCR]
(another source)
1
Insert a pre-recorded tape into the playing VCR.
2
Insert a tape with a safety tab into the
recording VCR.
3
Press SPEED on the recording VCR to select the
desired recording speed (SP/SLP).
4
Select the “L1” or “L2”position on the
recording VCR.
¡
When you use the A/V input jacks on the back of the
DVD/VCR, select "L1" position by pressing [0], [0], [1]
on the remote control or the CHANNEL buttons (o/p).
¡
When you use the A/V input jacks on the front of the
DVD/VCR, select "L2" position by pressing [0], [0], [2]
on the remote control or the CHANNEL buttons (o/p).
5
Press REC/OTR on the recording VCR.
6
Begin playback of the tape in the playing
VCR.
¡
For best results during dubbing, use the VCR’s front
panel controls whenever possible. The remote con-
trol might affect the playing VCR’s operation.
¡
Always use video-quality shielded cables with
RCA-type connectors. Standard audio cables are not
recommended.
¡
You can use a video disc player, satellite receiver, or
other audio/video component with A/V outputs in
place of the playing VCR.
TO MONITOR THE RECORDING
1
Turn on the TV and set the TV to channel 3.
¡
If noise appears, change the RF output channel of
the VCR to channel 4 by pressing PLAY for 3 sec-
onds during playback. Then select the same channel
(CH4) on your TV. (See “RF OUTPUT
CHANNEL” on page 13 for the detail).
2
Press VCR/TV on the recording VCR.
H94A3UD.QX3 03.8.20 11:43 AM Page 21