Initial setup & assembly – Snapper 1694874 User Manual
Page 20
18
Initial Setup & Assembly
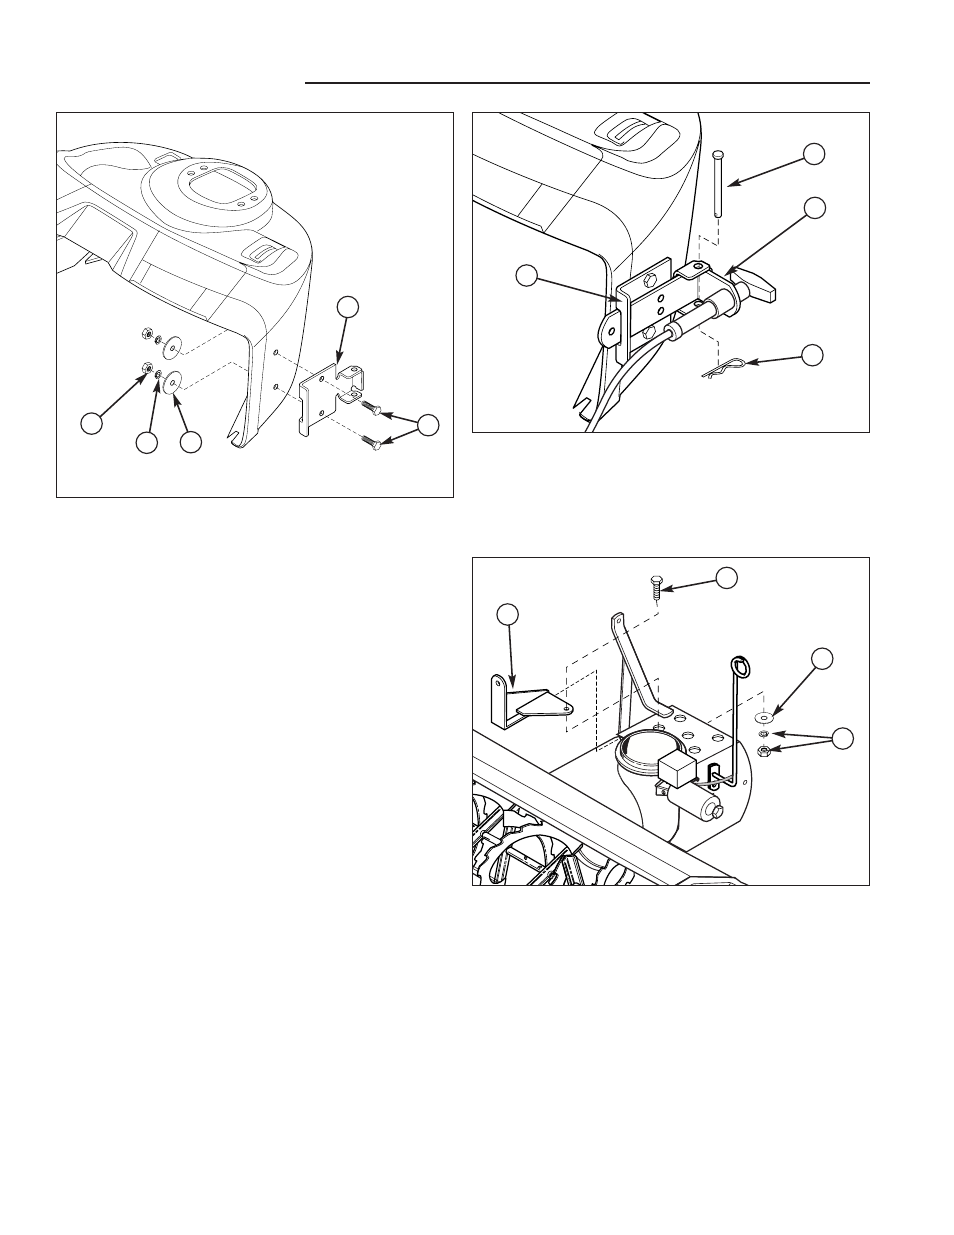
Figure 22. Install Remote Deflector Control
A. Clevis Pin
B. Deflector Control Handle
C. Mounting Bracket
D. Hair Pin Clip
A
B
C
D
Mount Remote Deflector Control
1. Using the template included in the back of this manu-
al, drill two 9/32” holes in the dashboard to mount the
remote chute control. See MOUNTING REMOTE
DEFLECTOR CONTROL in the back of this book.
2. Mount the mounting bracket (E, Figure 21) to the
dashboard. Secure with two 1/4-20 x 7/8 capscrews
(A), lockwashers (C), and large flat washers (B).
3. Install the remote deflector control handle (B, Figure
22) in the mounting bracket (C) and secure with a
clevis pin (A) and hair pin clip (D).
Mount Lift Assist Bracket
(Manual Lift Models Only)
1. Mount the lift assist bracket (A, Figure 233) to the
snowthrower. Slide the bracket back so that it
engages the snowthrower housing. Secure using a
5/16-18 x 1 capscrew (B), large washer (C), lock-
washer and nut (D).
Figure 21. Mount Control Bracket - Current Models
A. 1/4-20 x 7/8 Capscrews
D. 1/4-20 Nuts
B. 1/4 x 1-1/4 Flatwashers
E. Mounting Bracket
C. 1/4 Lockwashers
A
B
C
D
E
Figure 23. Install Lift Assist Bracket
A. Lift Assist Bracket
B. Capscrew, 5/16-18 x 1
C. Large Washer
D. Lockwasher & Nut
A
B
C
D