Salton, Inc JVPM1B User Manual
Page 10
10
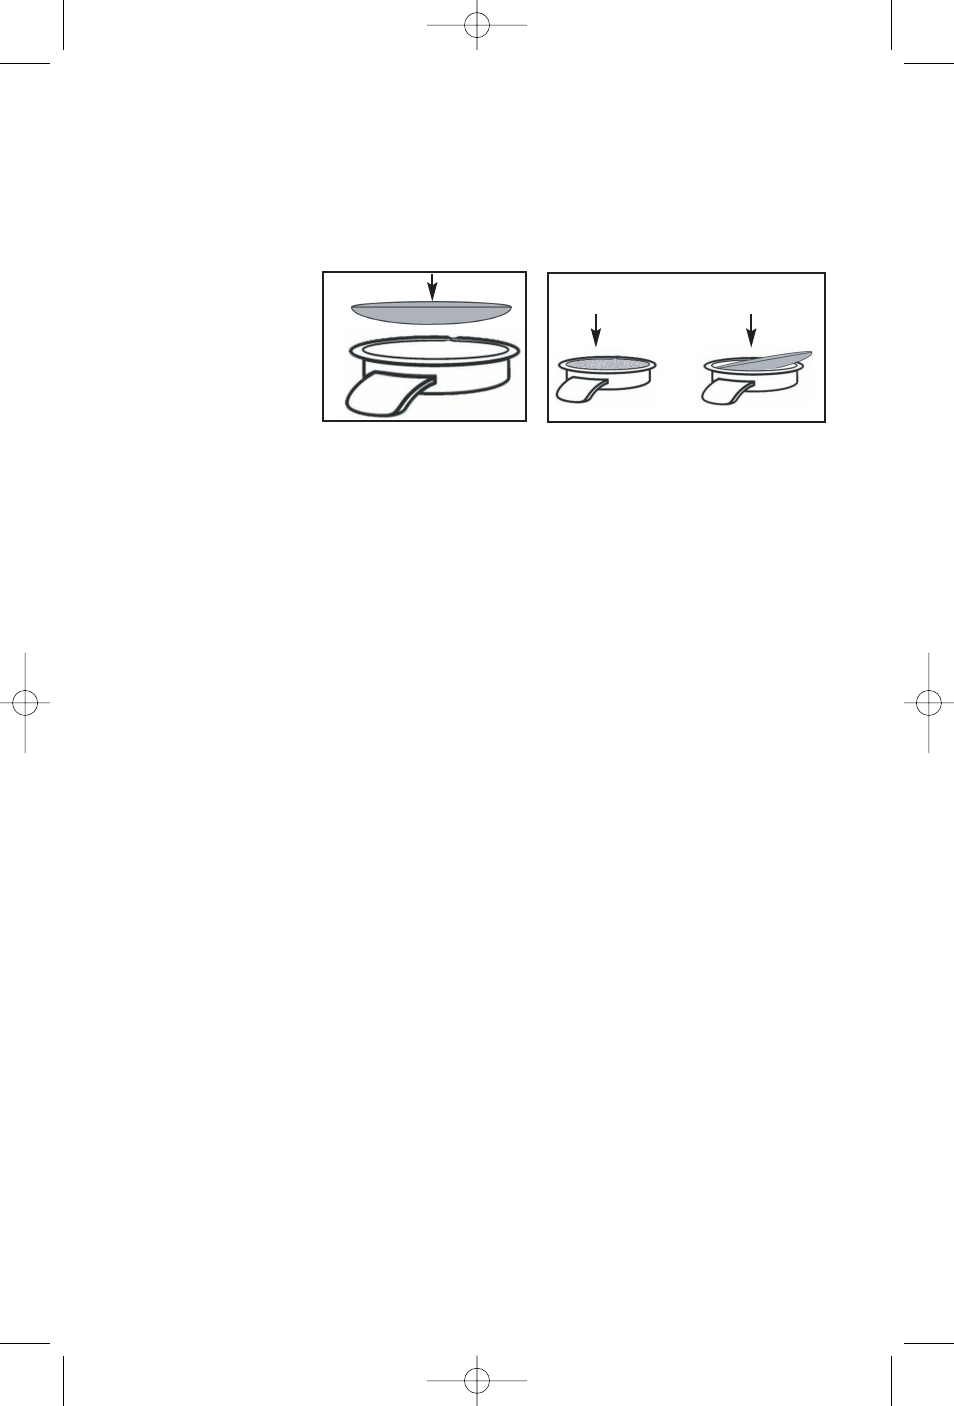
6. Place one coffee pod inside the Pod Holder. Press lightly on the
coffee pod to make sure it sits evenly in the Pod Holder. See
Figures 9 and 10 for correct pod insertion.
CAUTION: Use only pre-measured coffee pods in your Pod
Coffee Maker. The use of loose ground coffee may result in
inferior coffee, cause overflow and could possibly damage the
machine.
CAUTION: Never use torn coffee pods as this could clog the
machine and damage it. Each coffee pod is pre-portioned with
the optimal amount of coffee required per cup.
7. To close the Lid, press down firmly on the top of the Lid and hold
in place while pushing the Lever back so it is flush with the Lid
and locks into place.
8. Place a mug or cup under the Adjustable Brew Spout. The cup
should hold at least 7 to 10 ounces, depending on your
selection.
9. When the indicator light stops flashing, the coffee maker is
ready to use. If the indicator light flashes at rapid intervals, see
Troubleshooting on page 13.
10. Select the amount of coffee you wish to brew: either a 5 ounce
serving or an 8 ounce serving. The machine will begin the brew-
ing process. At the beginning of the brewing cycle, a small amount
of water is dispersed to pre-moisten the pod to ensure full extrac-
tion. Following a short pause, the machine will brew for about 50
seconds. You can manually stop the brewing process at any
time by pressing the Power Button.
CAUTION: Dripping may occur between brewing cycles.
11. Dispose of the coffee pod after use by removing the Pod Holder
from the Pod Chamber and emptying it. Do not use a pod more
than once. Repeated use may cause the pod to burst and result
in weak and inferior coffee.
Note: Regular rinsing of the Pod Holder will optimize the flavor of
the beverage.
FIGURE 9
FIGURE 10
correct
incorrect
JVPM1B-609 8/18/04 4:40 PM Page 10