Quick setup diagram, Rear panel functions – Stanton CM.203 User Manual
Page 5
8
5
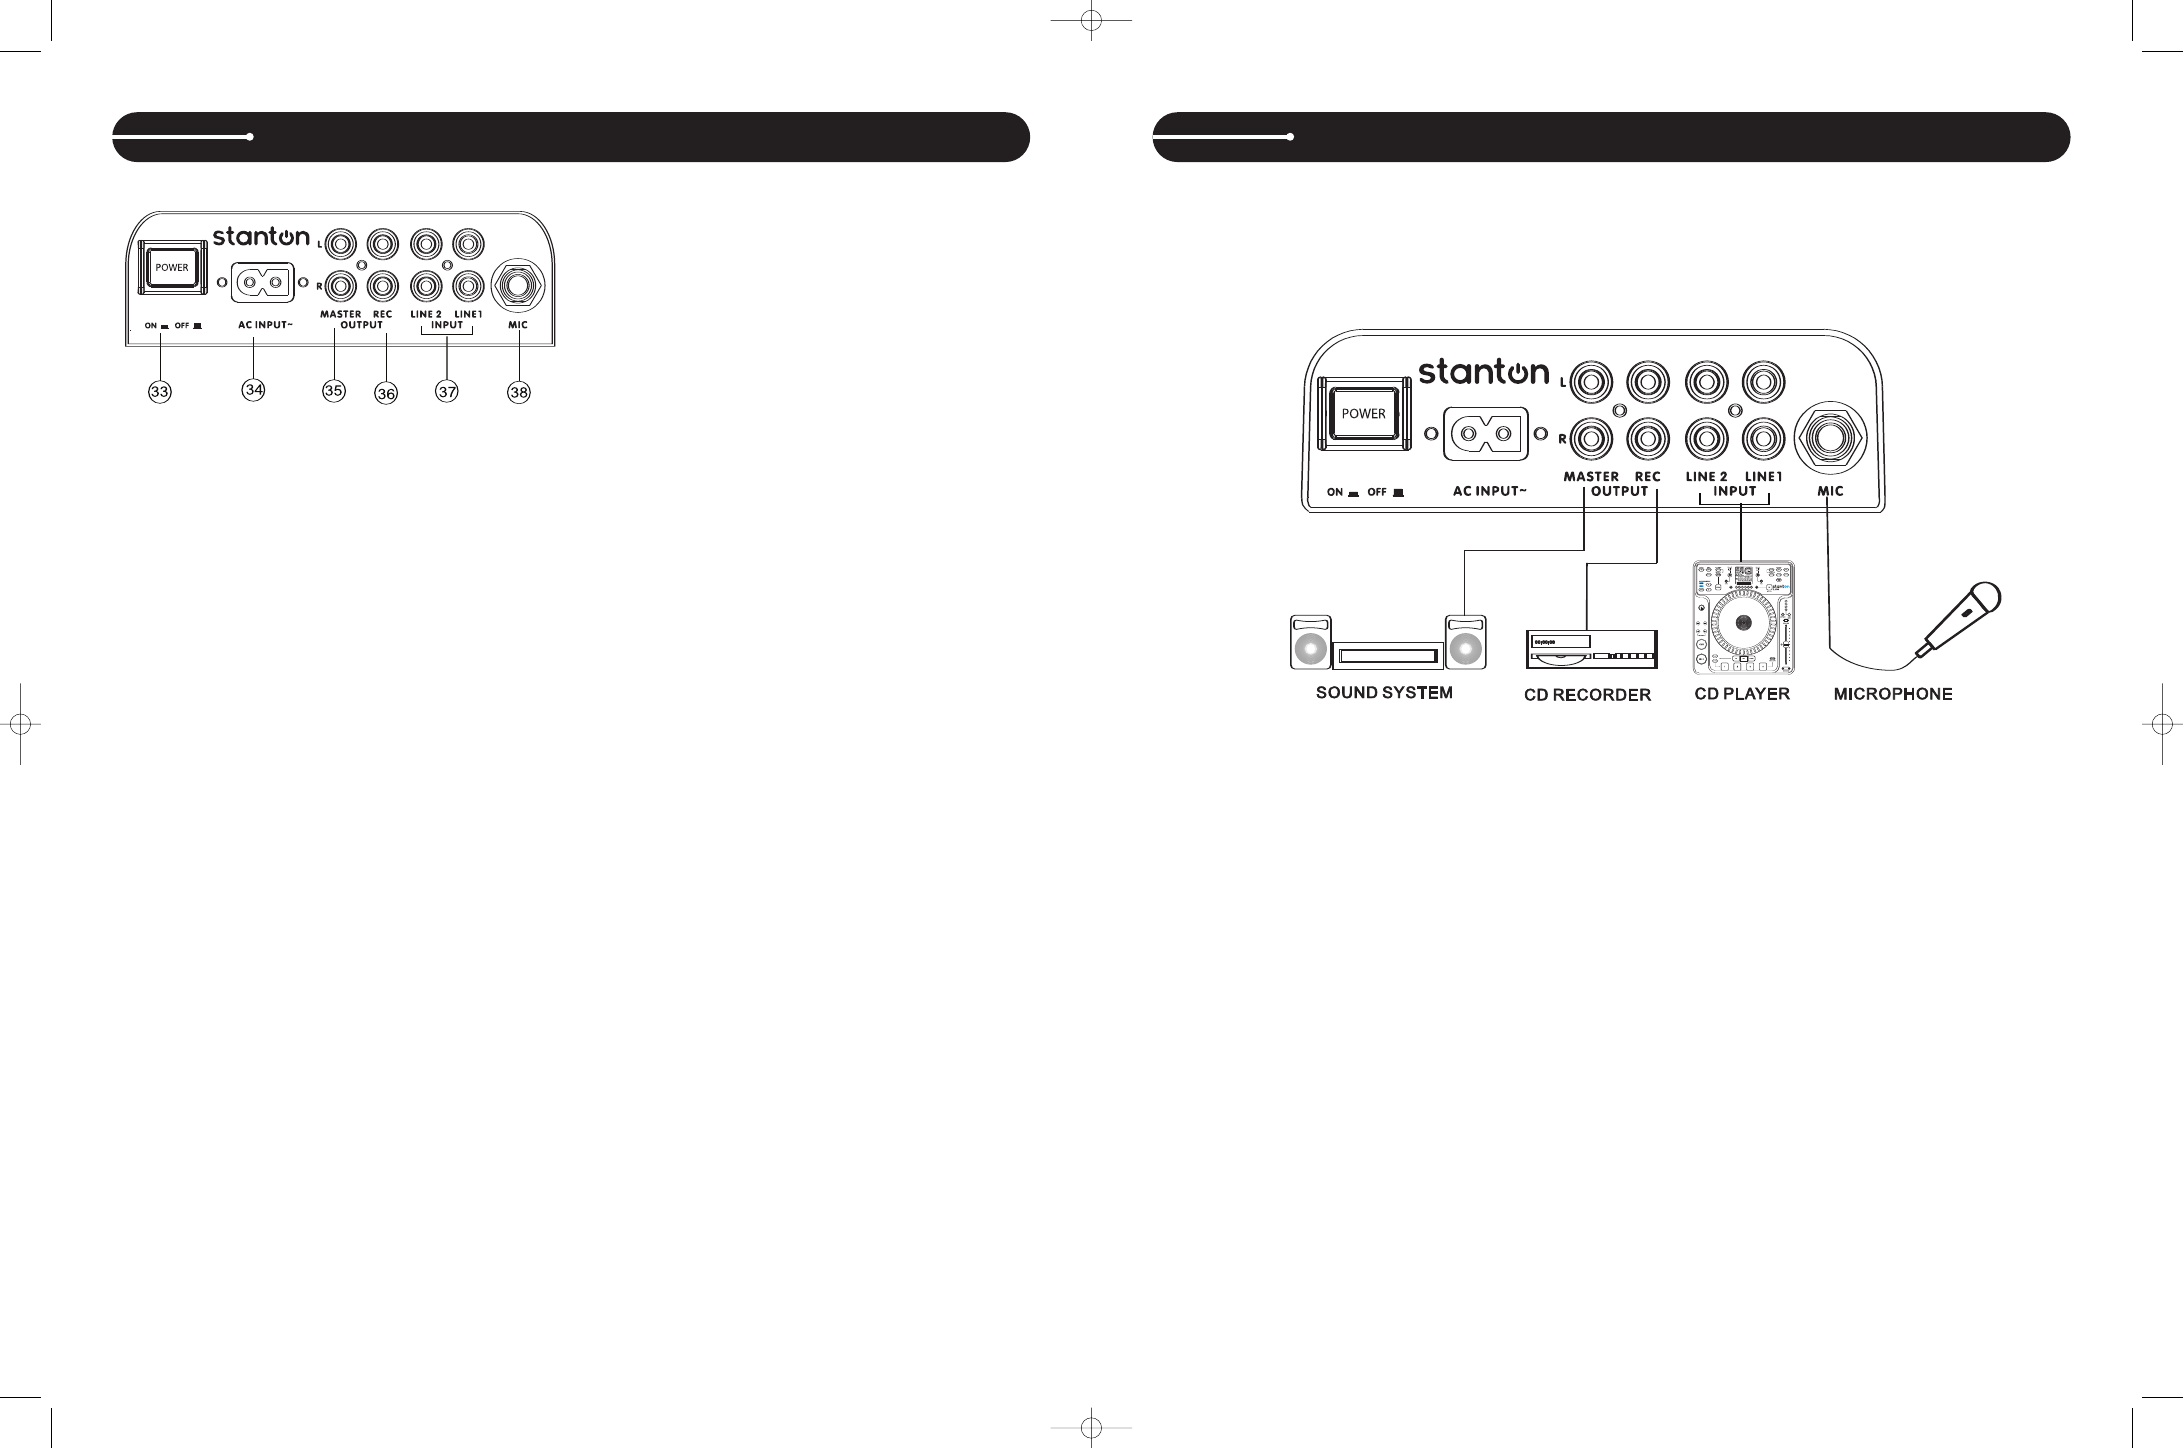
QUICK SETUP DIAGRAM
Study this setup diagram. Make sure all faders are at "zero" and all devices are off. First, connect all input sources and processors. Next, connect your
microphone and monitor headphones. Finally, connect the stereo outputs to the power amplifier(s) and/or audio receivers. Additionally, you can connect
the REC output to any recording device such as a CD or DVD recorder. Plug your mixer into AC power. Now you are ready to switch everything on.
IMPORTANT: Always switch on your audio input sources such as turntables or CD players first, then your mixer, and finally any amplifiers. When turning
off, always reverse this operation by turning off amplifiers, then your mixer, and then input devices.
REAR PANEL FUNCTIONS
33. POWER SWITCH – Turns unit off and on. Note*** Remember to turn
ALL volume levels down when turning on/off the unit.
34. AC INPUT – This is the connection for the supplied power cable.
35. MASTER OUTPUT – Unbalanced RCA connectors controlled by the
Master level.
36. REC OUTPUT – Unbalanced RCA jacks used to send the output of
the program to any connected recording device.
37. LINE INPUTS – Unbalanced RCA jacks for connecting stereo audio
from line level sources such as CD players, DVD, MP3 players can be
connected using the included RCA cable.
NOTE: Plug mono audio sources into both Left and Right inputs using
a "Y" cable connector.
38. MIC INPUT – Insert your Microphone with 1/4 ” plug here.
cm203_face.qxd 6/9/06 5:37 PM Page 5