Assembly – Southbend SB1354 User Manual
Page 2
3. Place the leg in the desired position, then
mark and pre-drill holes for the mounting
hardware you have chosen. Unless you
intend to do so, take care to avoid drilling all
the way through the bench top.
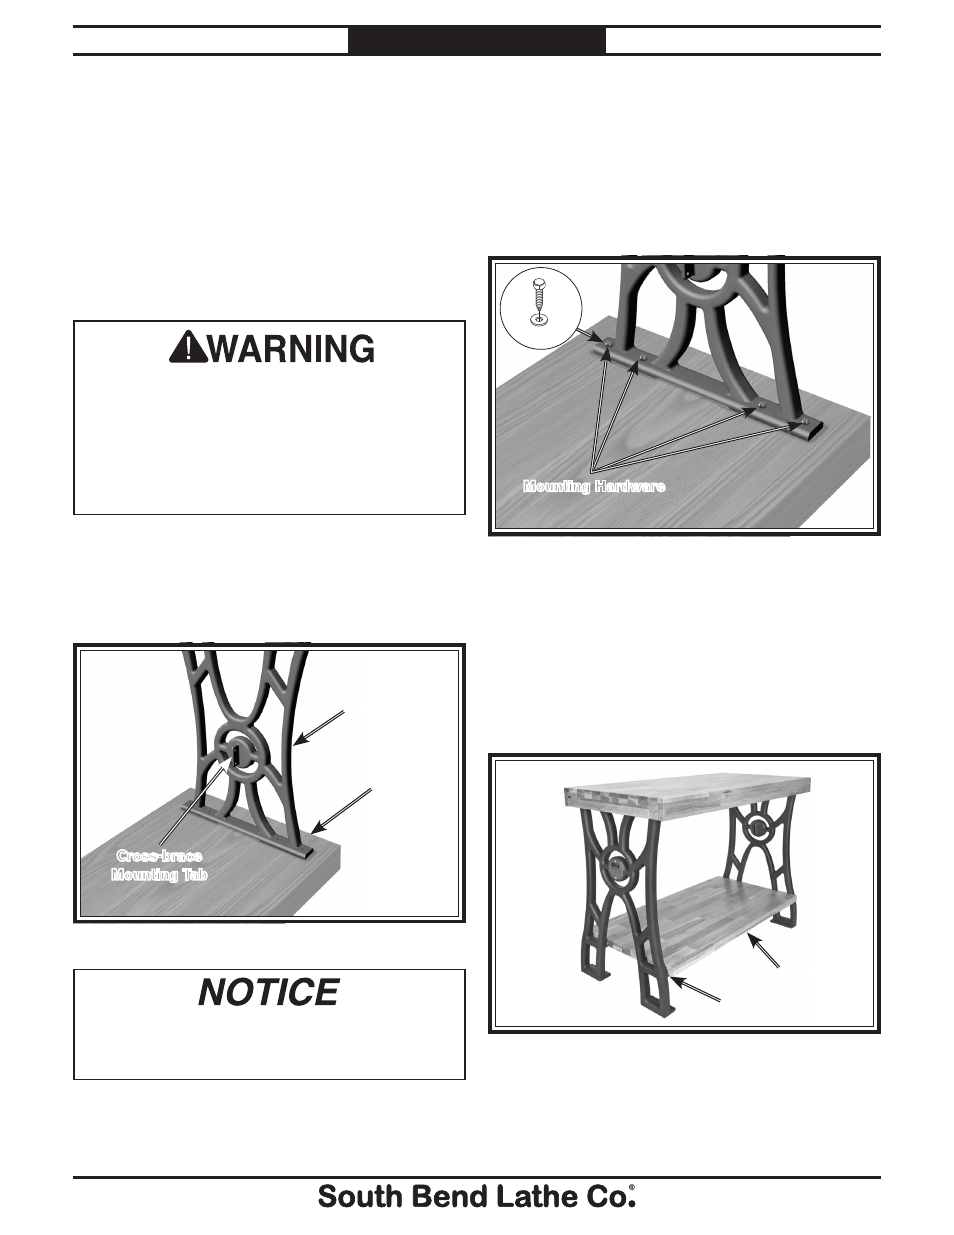
4. Use your chosen hardware to secure the leg
to the bench top, as shown in Figure 4.
5. Repeat Steps 2–4 for the second leg.
6. With additional people to help, carefully turn
the bench over.
7. Place your shelf onto the shelf brackets, as
shown in Figure 5, then mark drill holes
through the holes on the shelf brackets.
Figure 4. Securing leg to bench top.
Mounting Hardware
Figure 5. Shelf placement.
Shelf
Shelf Bracket
The procedure that follows describes the general
steps required for assembly. Since the bench top
and shelf are not included, individual assembly
steps will vary.
Assembly
To assemble the workbench:
1. Place a piece of cardboard or other protective
material on a flat, level, hard floor, then
place your bench face-down on it.
Figure 3. Leg placement.
Leg
Bench
Top
Cross-brace
Mounting Tab
The legs included in this kit weigh over 100
lbs. each. In the steps that follow, make sure
the legs are constantly stabilized to prevent
them from falling until they are secured to the
bench top in Step 4. Failure to do so could
allow the legs to fall, resulting in crushing
injuries, laceration injuries, or death.
2. With the help of one or two additional
people, place one of the legs upside-down
onto the inverted bench top, making sure the
cross-brace mounting tab points toward the
middle of the bench as shown in Figure 3.
Never attempt to weld onto the cast iron legs
or drill into them. Doing so can compromise
their strength and will void the warranty.
x 4
-2-
For Models Mfg. Since 7/10
Model SB1354
I N S T R U C T I O N S