Location and function of parts and controls, Front – Sony Ericsson PVM-20M4A User Manual
Page 6
6
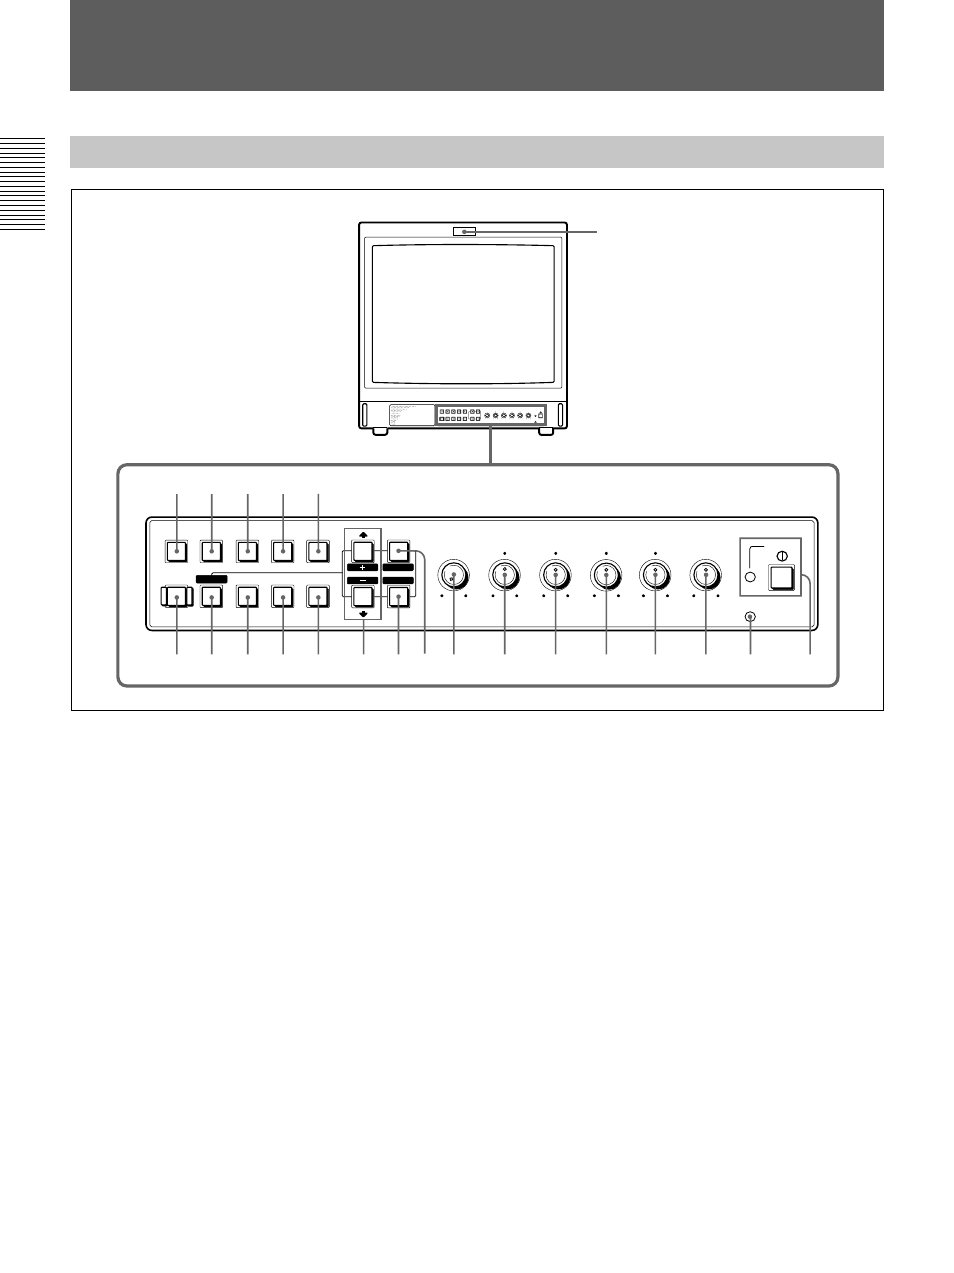
Location and Function of Parts and Controls
Front
REMOTE
POWER
VOLUME
CONTRAST
PHASE
CHROMA
BRIGHT
APERTURE
MENU
ENTER
MIN
EXT
SYNC
LINE/
RGB
C/
SDI
B/
COMPONENT
A/
RGB
BLUE
ONLY
DEGAUSS
UNDER
SCAN
H/V
DELAY
16:9
MAX
–
+
MIN MAX PUR GRN MIN MAX MIN MAX
E X I T
SELECT
RESET
2
3
4
5
6
7
8
9
!º
!¡
!™
!£
!¢
!∞
!§
!¶
!•
!ª
@º
@¡
@™
1
1
Tally lamp
Lights up when the video camera connected to this
monitor is selected, indicating that the picture is being
recorded.
For details on how to light the tally lamp, see page 19.
2
POWER switch and indicator
Depress to turn on the monitor. The indicator will light
green.
3
REMOTE indicator
Lights up when you select ON on the USER PRESET
menu (see page 13), or when you connect a supplied
cable to the REMOTE connector. The controls on the
front panel do not work when this indicator lights up.
For details on how to connect the cable, see page 19.
4
VOLUME control
Turn this control clockwise or counterclockwise to
obtain the desired volume.
5
CONTRAST control
Turn this control clockwise to make the contrast higher
or counterclockwise to make it lower.
6
PHASE control
This control is effective only for the NTSC and
NTSC
4.43
color systems. Turn it clockwise to make the
skin tones greenish or counterclockwise to make them
purplish.
7
CHROMA control
Turn this control clockwise to increase the color
intensity or counterclockwise to decrease it.
8
BRIGHT (brightness) control
Turn this control clockwise to increase the brightness
or counterclockwise to decrease it.
9
APERTURE control
Turn this control clockwise to increase sharpness or
counterclockwise to decrease sharpness.