Installation, Home automation, Phone number programming – Skylink AM-100 User Manual
Page 12
Phone Number Programming
You can program up to 5 Emergency Phone Num bers. When the system is in panic,
the control panel will call these phone numbers and announce its status.
The following will need to be programmed:
- Phone memory (from 1 to 5), this is where the phone numbers will be stored
- Phone number, up to 29 digits.
- Redial count, this is how many times that phone number will be called, from 1
to 9 times.
- Repeat count, this is how many times the emergency message will be repeated,
from 1 to 9 times.
**Note:
You may enter a 3-second pause between digits by pressing [Mute] if needed.
You may also enter consecutive multiple pause periods. For example, you may
enter a phone number: (123)-456-7890 [Mute] 1234. After the phone number
(123)-456-7890 is dialed, it will wait for 3 seconds, then dial 1234, which can be
a password to a paging system, or an access code for a phone dialing system.
–
10
–
INSTALLATION
You will hear [Enter
Redial].
You will hear [Enter
Repeat].
3 beeps for valid
password. 1 long beep
for invalid password.
During emergency, phone
memory 1 will be called first,
then phone memory 2, 3, 4, and
5. So phone memory 1 has
higher priority.
You will hear [Enter
phone memory].
You will hear [Phone
Accepted] indicating the
phone number and its
settings have been
programmed successfully.
Repeat is the number of times
that voice emergency message
will be played, from 1 to 9 times.
It is recommended to set up
the repeat time to 5 or more.
Redial is the number of times
that phone number will be
called. Each phone number
can have a different redial
count, from 1 to 9 times.
Phone number can be up to 29
digits.**
Enter master password to
programming mode
[1] to [9]
+ [Arm]
[1] to [9]
+ [Arm]
[1]
[1] to [5]
[PROG]
[MPIN]
[Phone
number]
+ [Arm]
Enter Repeat
count
Enter Redial
count
Enter
Programming
mode
Select phone
number
programming
Enter phone
number
Enter phone
memory
1
2
3
4
5
6
Step
Keys
Function
Description
Note
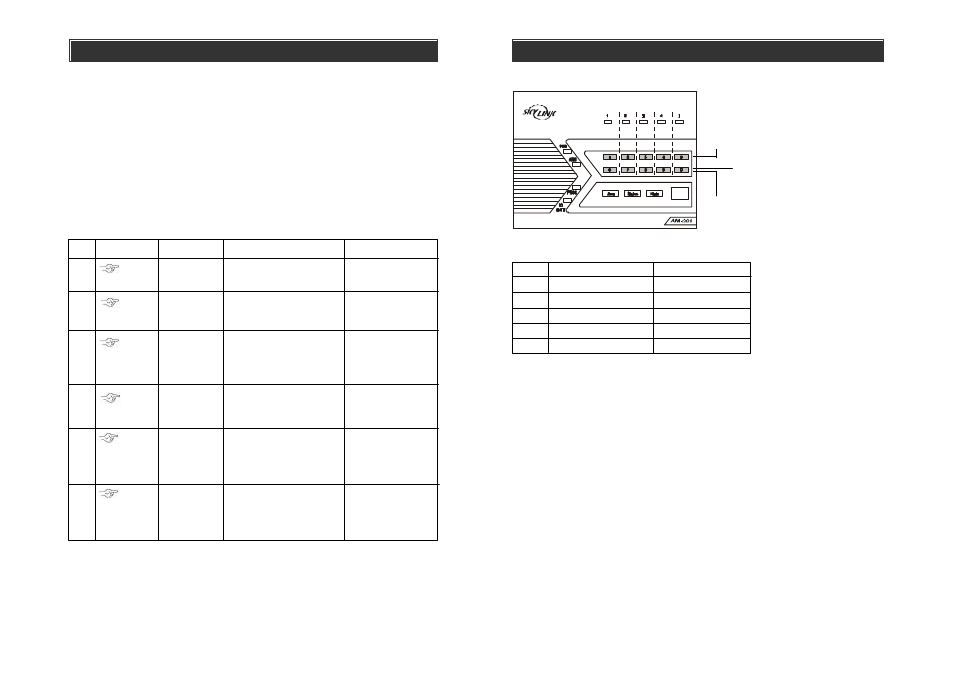
HOME AUTOMATION
DISABLE EVENT TRIGGER
ENABLE EVENT TRIGGER
This row :
Buttons to Disable Event Tigger
Zone LED : Off
This row
:
Buttons to Enable Event Trigger
Zone LED : 1) On (Event Trigger On)
2) Flash (Event Trigger Off)
®
Press once will enable “Event Trigger On”,
press again will enable “Event Trigger Off”.
This row of buttons operates in toggle manner,
between event trigger on and event trigger off.
–
43
–
Zone 1
Button [1]
Zone 2
Zone 3
Zone 4
Zone 5
Button [2]
Button [3]
Button [4]
Button [5]
Button [6]
Button [7]
Button [8]
Button [9]
Button [0]