Getting ready to print, Préparation à l’impression – Star Micronics LC-240 User Manual
Page 64
Chapter3.frame Black #5
55
❏
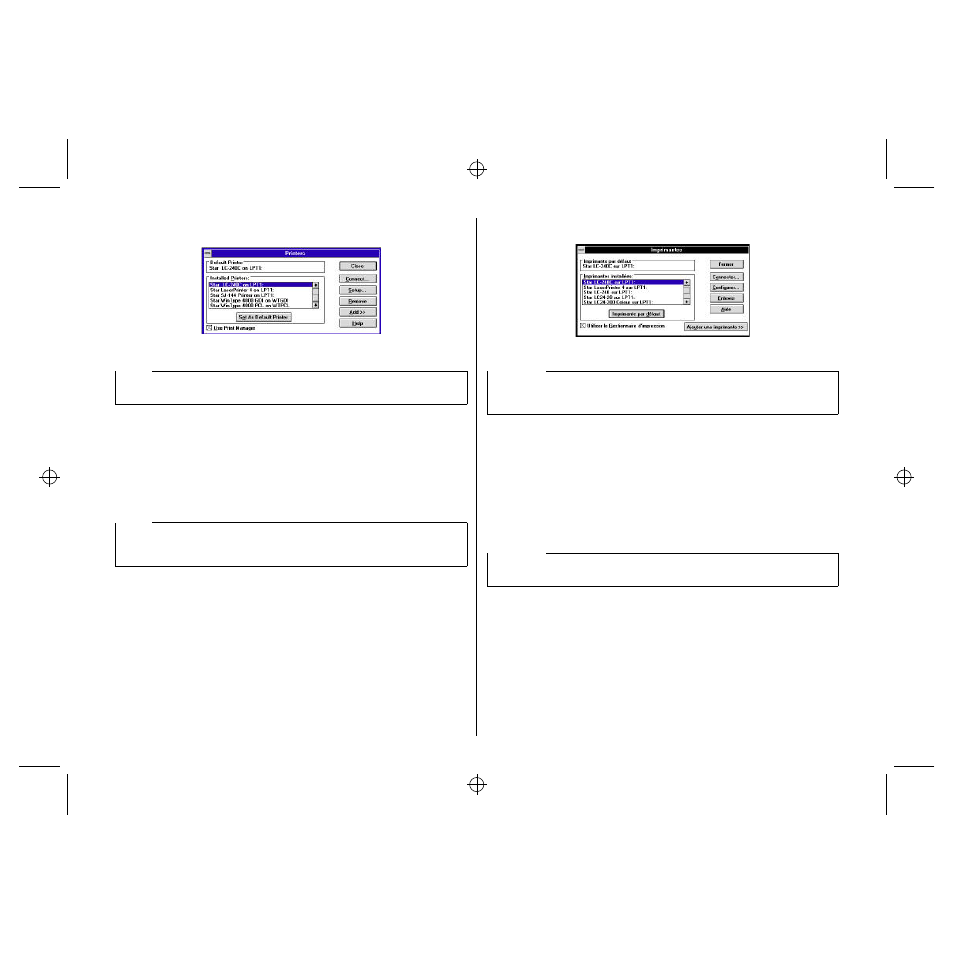
Double click on the name of the printer model you selected above to select it as
the default printer.
❏
Click on
Close
to clear the
Printers
window.
See “Installing TrueType fonts” on page 61 for information of how to install the
TrueType fonts that are supplied on the 3.5” floppy disk that comes with the printer.
Getting ready to print
Before printing, there are a number of things you must first do to set up the printer.
You must select the printer driver, and the paper source, size, and orientation. Use
the following procedure to make these selections.
❏
In the Windows Program Manager, open the
Main
group by clicking on its icon.
❏
Double click on the
Control Panel
icon.
❏
Double-click on the
Printers
icon in the
Control Panel
window.
❏
Double-click on the name of the printer model you selected above to select it as
the default printer.
Note:
Windows applications automatically print on the currently selected default printer.
If you want to print on a different printer, you must first select it.
Note:
You do not need to perform printer driver and paper selections mentioned above
each time you print, but only if there are any changes to the last selections you
made.
❏
Faites un double-clic sur le nom du modèle d’imprimante que vous avez
sélectionné plus haut pour en faire l’imprimante par défaut.
❏
Cliquez sur
Fermer
pour supprimer la fenêtre
Imprimantes
.
Pour plus de détails sur l’installation des polices TrueType figurant sur la disquette
3,5 pouces fournie avec l’imprimante, reportez-vous à la section «Installation des
polices TrueType», page 61.
Préparation à l’impression
Avant de pouvoir imprimer, vous devez configurer l’imprimante en définissant
certaines informations. Vous devez sélectionner le gestionnaire d’imprimante,
l’alimentation de papier, son format et son orientation. Pour le faire, procédez
comme indiqué ci-dessous.
❏
Dans le Gestionnaire de programmes de Windows, ouvrez le Groupe
principal
en cliquant sur l’icône associée.
❏
Faites un double-clic sur l’icône du
Panneau de configuration
.
❏
Faites un double-clic sur l’icône
Imprimantes
dans la fenêtre du
Panneau de
configuration
.
❏
Faites un double-clic sur le nom du modèle d’imprimante que vous avez
sélectionné ci-dessus pour en faire l’imprimante par défaut.
Remarque:
Les applications Windows impriment automatiquement sur l’imprimante courante
par défaut. Avant de pouvoir utiliser une autre imprimante, vous devez la
sélectionner.
Remarque:
Vous n’avez pas à effectuer ces procédures à chaque fois que vous avez besoin
d’imprimer, seulement lorsque les sélections effectuées ont été modifiées.