Installation wall mounting with adhesive, Wall mounting with screws – Salton, Inc WT51GY User Manual
Page 11
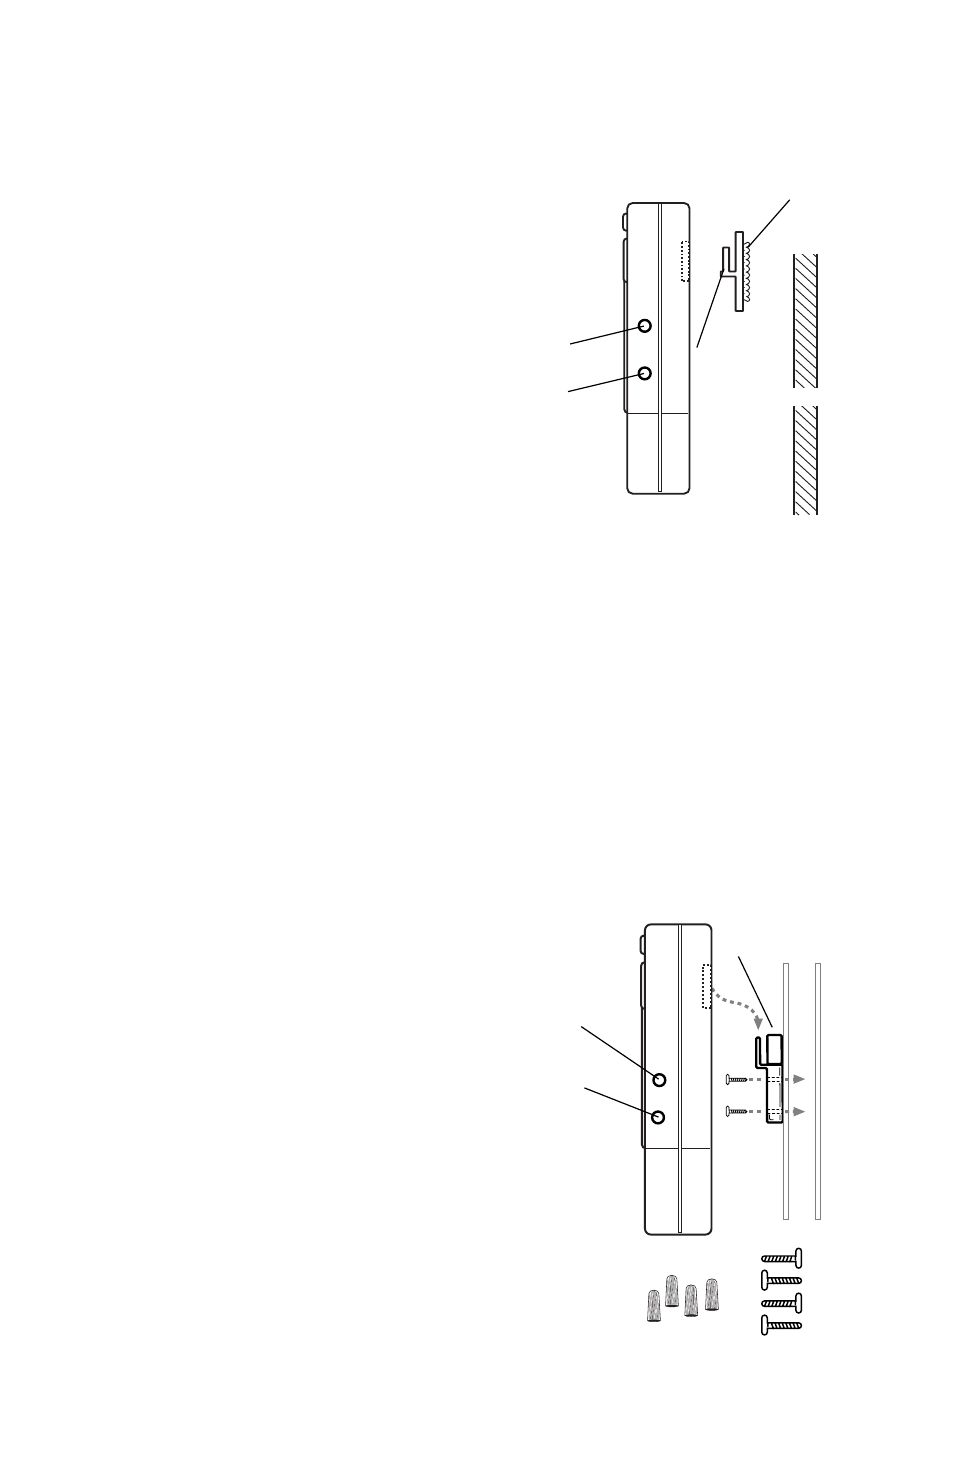
INSTALLATION
WALL MOUNTING WITH ADHESIVE
1. Select a spot on the wall that is
as smooth as possible, such as
a smooth ceramic tile.
Thoroughly clean the spot of all
soap, oil or other films using a
household cleaning solvent
such as Acetone or nail polish
remover. DO NOT use the tile
cleaner or other wax-based
substances. Allow area to dry
completely. Room temperature
should be at 60 to 70ºF.
2. For best results, hold adhesive tube
(supplied) at a 45-degree angle and apply sealant to Mounting
Plate, approximately 1/8” bead and 1/4” from edges. Use
entire contents. If additional adhesive is required, use silicone
caulking compound or you may order extra adhesive packets.
(P/N 01005)
3. Place Mounting Plate against clean wall surface using enough
pressure to displace air, but not adhesive.
4. Allow adhesive to cure for 24 hours.
5. Slide the Radio onto the secured Mounting Plate.
WALL MOUNTING WITH SCREWS
1. Place Mounting Plate against a
clean wall surface and mark the
spots on the wall where you will
be drilling. Remove the
Mounting Plate from the wall.
2. Drill 4 holes in the wall that
match the placement of the
holes in the Mounting Plate.
3. Insert a Screw Socket into
each of the 4 holes.
4. Place Mounting Plate against
the wall in the correct position
and drill in the 4 Screws.
5. Slide the Radio onto the
secured Mounting Plate.
*Color reference: BL, GY, OR, PB, PL, RD.
Mounting Plate
(P/N 10017*)
10
4 Mounting
Screws
4 Screw
Sockets
Wall
Mounting
Plate
(P/N
10017*)
Earphone
Jack
Adhesive
Bead
Wall
DC
Jack
DC
Jack
Earphone
Jack