Using the interface – JVC KD-LHX550 User Manual
Page 66
12
Using the Interface
The basic idea is that you import a source image, then select a part of it as the
starting frame, another part as the end frame, and the program fills in the frames
between to move from the beginning frame to the end frame, thus giving you an
animation. You can also make a still image from the source. You save the
animation or the still image, in preparation for writing it onto a CD-R for transfer
to or use in your JVC Car Audio unit*.
* When your JVC Car Audio is compatible with SD Memory Card, you can also
use an SD Memory Card to transfer the images.
Since all of the functions to make and save the image in the correct file format are
accessed from the program interface, understanding the interface will help you
use Image Converter effectively.
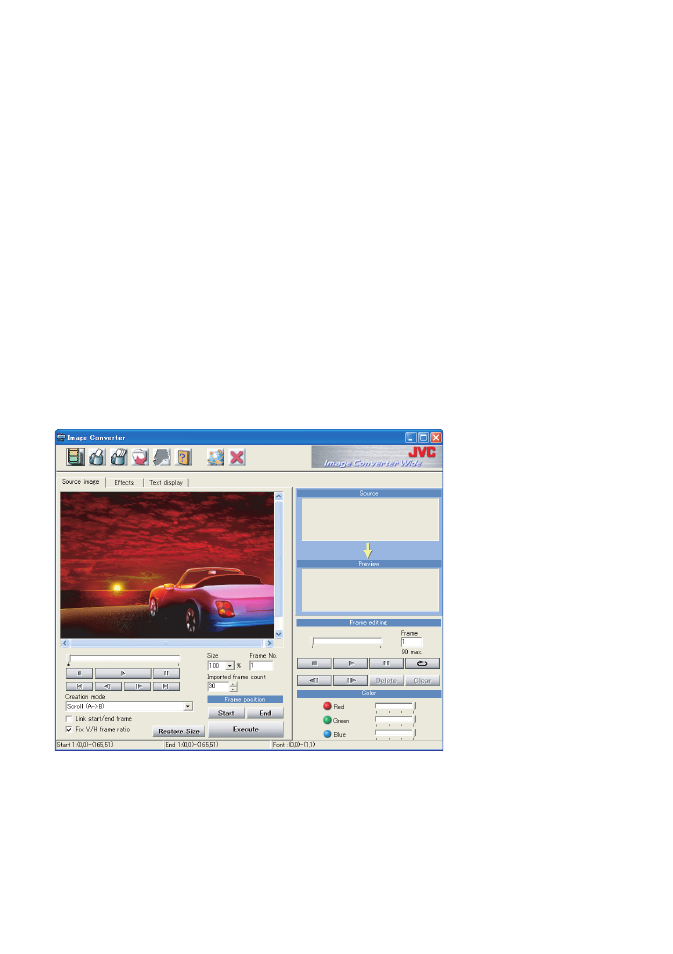
The Interface
The interface—what you see when you start Image Converter—has all the
functions on one screen. Just click on a tab or an icon to bring the screen you want
into view. Image Converter’s interface is a little different than many Microsoft
®
Windows
®
programs. All
the functions are accessed
from screens that show
up when you click on one
of the three tabs, and from
the Menu Bar along the
top, which is described on
the next page.
Opening Screen with Image Loaded
All the main screens are shown in the page 4
and 5 of this manual for your reference.