Timer recording, Express timer programing, Checking, canceling or changing program settings – JVC HR-J481MS User Manual
Page 8: Disengage timer, Access program check screen, Access program screen, Cancel or change program setting, Return to normal screen, Reengage timer recording standby mode
Timer Recording
Up to 8 timer recording programs can be made using Express
timer programing method as far as a year in advance. Remember,
the clock must be set before you can program the timer.
NOTES:
● If all the 8 programs have already been set, “PROGRAM FULL”
appears on the TV screen.
● After timer recording is completed, the recorder turns off
automatically.
● You can program the timer recording while a regular recording
is in progress; the menu screens will not be recorded.
● In case of a power failure after programming, the recorder’s
memory backup keeps your selections (if the lithium battery is
not exhausted).
Express Timer Programing
● Remember, the clock must be set before you can program the
timer.
● Load a cassette with the record safety tab intact. The recorder
turns on, and the counter is reset, automatically.
● Select the appropriate colour system with “PAL/MESECAM” and
“NTSC” in Function settings.
A
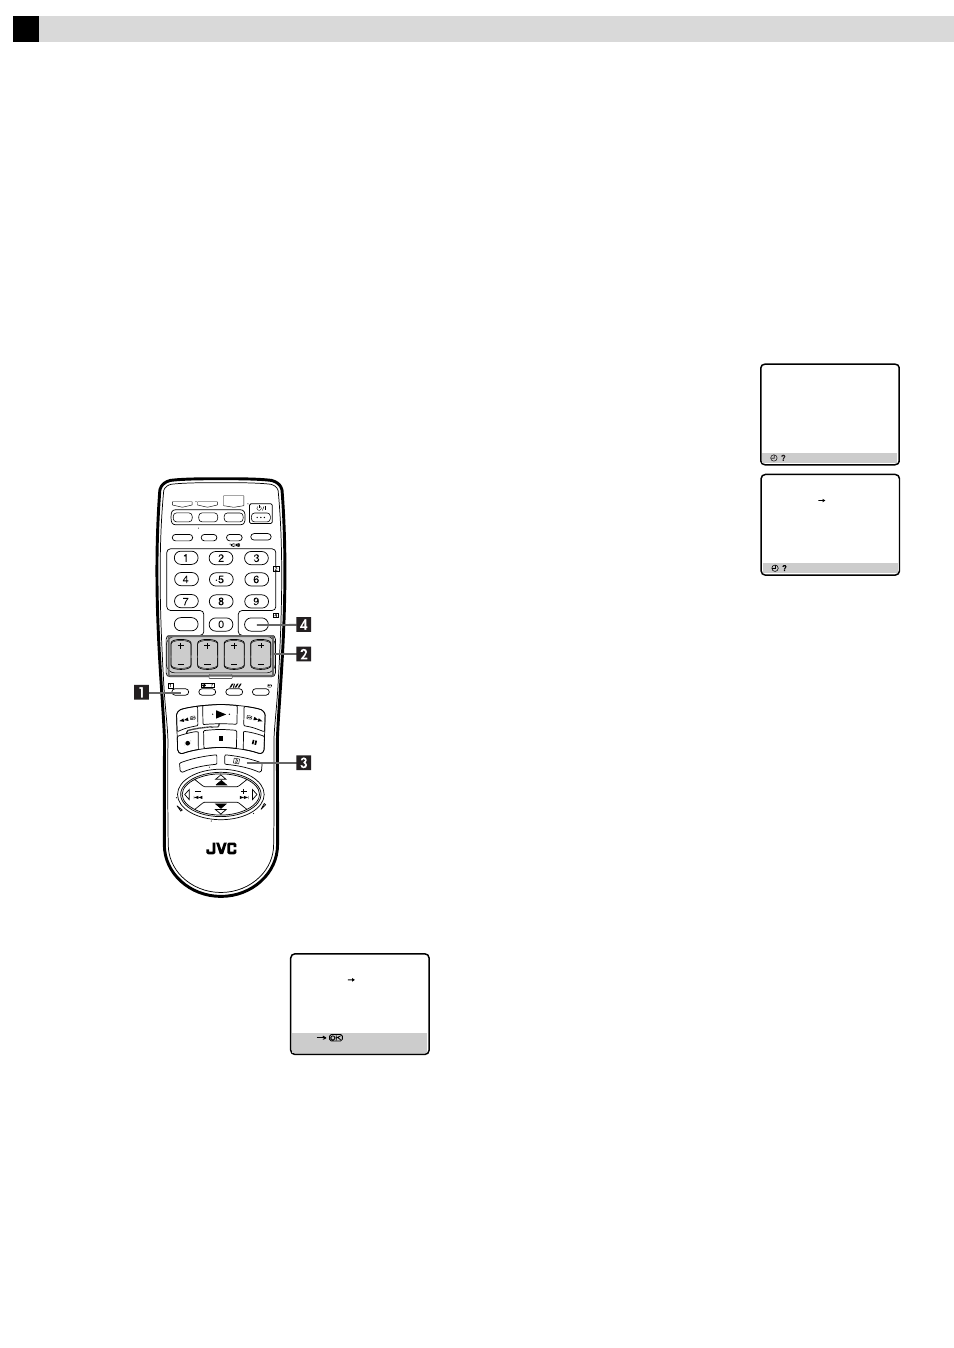
Press PROG on the remote control to access the Program
screen.
B
Press START+/–, STOP+/–, DATE+/–
or PR+/– repeatedly to enter the start
time, stop time, date or channel.
● Press and hold START+/– or
STOP+/– to increase the time in
30-minute intervals.
● To set the tape speed, press SP/LP/
EP (
p
).
● To timer-record daily (Monday–Friday) or weekly serials,
press DAILY or WEEKLY. Pressing the button again makes the
“DAILY” or “WEEKLY” display disappear.
At the programme check screen...
When the weekly serials are programmed, a day of the week
appears. When the daily serials are programmed, “DAILY”
appears.
C
Press OK or PROG.
● If “PROGRAM OVERLAPPED” appears, see “Program
overlap warning display”.
D
Press #. The recorder turns off automati cally and “
#
” is
displayed on the display panel.
● When a tape reaches its and during recording, the recording
stops and
#
, o ,
e
blinks on the display window.
To use the recorder while it is in
timer recording standby mode
Press #, then press 1. After you use the recorder, press # again
to put the recorder into timer recording standby mode.
Checking, canceling or changing
program settings
A
Disengage timer
Press #, then press 1.
● When “AUTO TIMER” is set to “ON”, you do not have to press
#.
B
Access Program Check screen
Press ".
C
Access Program screen
Press " again. Each time you press ",
the next program’s Program screen
appears.
D
Cancel or change program setting
To cancel a program, press & when the Program screen you do
not want is shown.
To change a program, press the appropriate button: START+/–,
STOP+/–, DATE+/–, PR+/–, and/or SP/LP/EP (
p
) when the
Program screen on which you want to make changes is shown.
E
Return to normal screen
Press " repeatedly until no Program screen is shown.
F
Reengage timer recording standby mode
Press #. The recorder turns off automatically and “
#
” is displayed
on the display panel.
● When “AUTO TIMER” is set to “ON”, the timer recording
standby mode automatically resumes when you turn off the
recorder.
[+/–]
[PROG] : EXIT
–
P1 –
START
STOP
21:00
–:– –
SP
DATE
TV PROG
– –.– –
– –
[ ] : NEXT
PR
START
STOP
CH
DATE
1
8:00
10:00
3
24.04
2
10:00
10:45
2
25.04
3
11:30
13:00
1
25.04
4
5
6
7
8
[ ] : NEXT
– P1 –
START
STOP
8:00
10:00
SP
DATE
TV PROG
24.04
3