JL Audio SB-F-EXPDCNSL User Manual
Page 3
➔
➔
➔
➔
➔
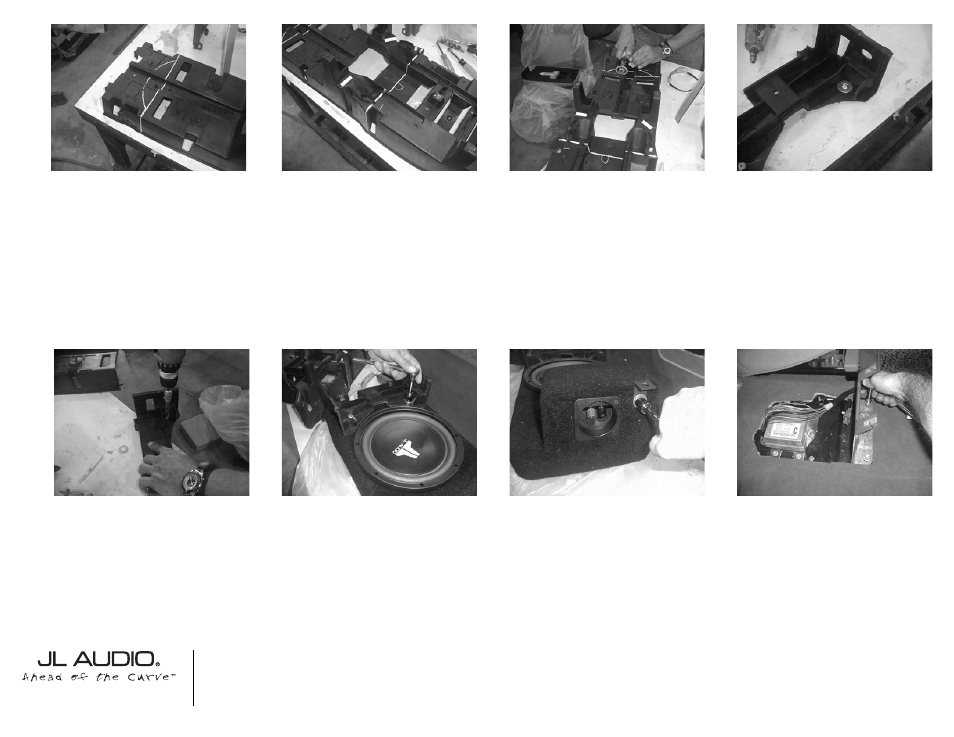
STEP 15: Cut out the template that is found on
Page 6. Place this template across the rear portion
of the black inner console. Mark the correct scribe
lines.
STEP 19: With a drill and 1/2” drill bit, drill holes
at marked location of the washers.
Cont.
From
Previous
Page
Continued on Next Page
➔
➔
STEP 16: Scribe cut lines on the front portion of
the black inner console. Using the picture as a guide.
Same side as the scribe lines from STEP 15.
STEP 20: Using the supplied hardware of (2) 3/8”-
16 x 1” hex bolts, (2) 3/8” flat washers and (2) lock
washers. Attach this drilled out position of the black
console, to the rear of the enclosure.
➔
STEP 21: Using the a supplied 3/8”-16x1” hex
bolt, 3/8”flat washer and 3/8”lock washer. Secure the
supplied L-bracket to the rear of the enclosure.The
longer length of the L-bracket mounts to the enclo-
sure.
STEP 22: Remove the OEM console bracket, that
is mounted to the floor.
STEP 17: Cut the black inner console, following
the scribe lines. A jig saw, air saw or cutting wheel
can be used.
*Hint*
It is easier to cut across the console, then cut the
arch.
STEP 18: With the rear portion of the black con-
sole, now modified. Place the supplied pair of wash-
ers, tucked in the corners. Mark washer’s inner holes
and then remove the washers.
S B - F - E X P D C N S L / 1 0 W 3 v 2 , J L AU D I O, I n c 2 0 0 4
S h e e t S K U # 0 1 1 1 0 6 R ev i s i o n 6 / 3 0 / 2 0 0 4
Pa g e 3
w w w . j l a u d i o . c o m