iOptron SMARTSTAR N114 User Manual
Page 3
iOptron Corp. | 6E Gill Street | Woburn, MA 01801 USA | (781) 569-0200 | Toll Free (866) 399-4587 | www.iOptron.com
Step 5. Attaching optics
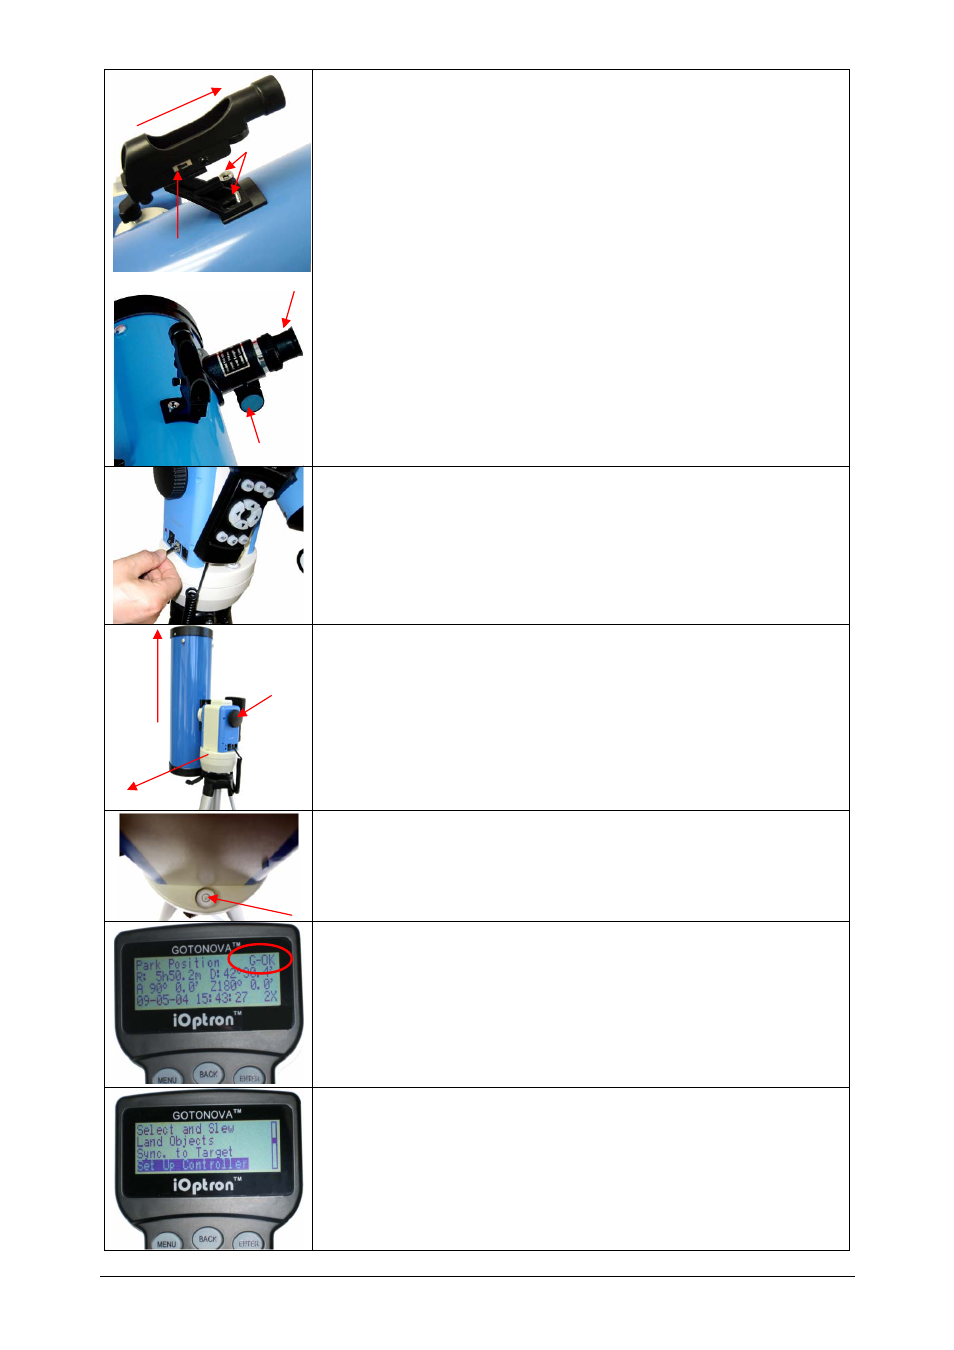
Attaching the red dot finder scope (#6) to the telescope tube (#1)
:
First remove the two washers on the tube. Then place the finder scope
onto the two bolts and re-attach the washers securely. The finder scope
should face towards the open end of the tube (see arrow in diagram).
Turn on the beam using the switch on the side. (note: you may need to
remove the plastic insulation placed next to the battery underneath)
Insert the eyepiece:
Remove the supplied 20mm eyepiece (#7) from
its container and slide it into the open end of eyepiece holder. Tighten
the thumbscrews to a firm feel only.
Remove the round dust cover lid from the end of telescope.
Use the focus knob
to bring objects into focus. You may need to turn
the focus knob quite a few turns to focus your telescope for the first
time. Always start observing using a lower power eyepiece (such as the
20mm eyepiece) to get a wider field of view. Later on you can change
to higher powers. (Eyepieces of higher powers have narrower field of
views; it’s more difficult to locate objects using high-power eyepieces.)
Step 6. Connecting Hand Controller
Plug hand controller into any one of the HBX (handbox) ports on the
mount.
Turn on power. Now you are ready to observe. Use the 4 Arrow keys
(▲▼◄►) to rotate the scope Up, Down, Left, and Right. Use the
SPEED key to change the slew speed from the slowest (2X) to the
fastest (MAX).
Step 7. Set telescope to PARK POSITION
(1) Position the mount so that the “SOUTH” mark is facing south
(a compass may be helpful).
(2) The telescope tube should be pointed directly up at the zenith. If it is
not perfectly straight then loosen the altitude lock (#4) to adjust
telescope.
Step 8. Level the mount
Level the mount using the bubble on side of mount by adjusting tripod
legs. The bubble should be in the middle of the circle. It is also
suggested to use additional levels (such as torpedo levels) to assure
precise leveling.
Step 9.
Press the I/O power switch ON (controller will light up).
For models with GPS: Wait for controller to say “G-OK” or “Stop” in top
right corner —not “G-ON”. GPS provides Latitude, Longitude, and
current time only.
For models without GPS you will be able to manually enter latitude,
longitude, and time in the next steps.
Step 10. Set up controller
Press the MENU key once.
Scroll (with the ▲/▼ keys) to “Set Up Controller”
Press ENTER.
Scroll to “Set Up Time and Site” in the next screen.
Press ENTER.
(1) South
(2)
#4
Alt
lock
Bolts
Switch
Point toward open end
of telescope
Eyepiece (#7)
Focus knob