Step3, Step4, Step1 – Ironman Fitness Exploit 100125 User Manual
Page 7: Step2
www.ironmanfitness.com
Important Information
7
Assembly
61
80
61
80
61
48
3
61
48
2
1
STEP4:
STEP3:
STEP2:
STEP1:
36
53
64
71
42
1
6
7
36
36
37
4
5
38
1
18R
18L
TOOL
USE
TOOL
USE
6 mm
TOOL
USE
5 mm
TOOL
USE
TOOL
USE
6 mm
TOOL
USE
5 mm
53
64
71
42
7
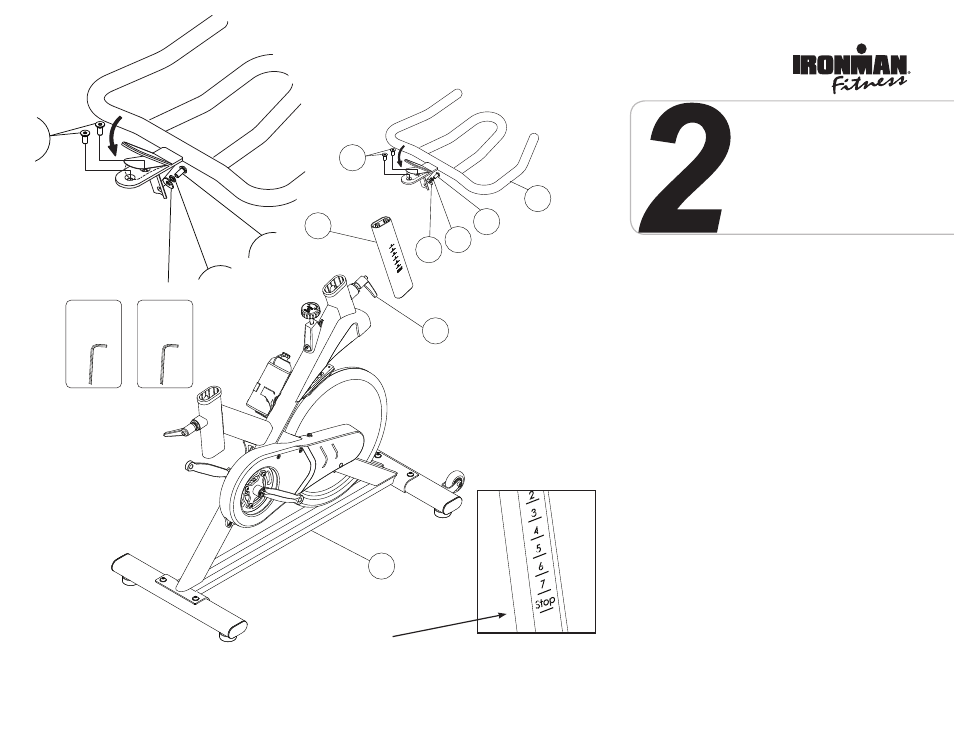
ASSEMBLY FOR HANDLEBAR
Step 1:
loosen the knob (36) and slide the handlebar
support tube (6).
Step 2:
Attach the handlebar (7) onto the handlebar
support tube (6) and secure the top by using 2
shoulder bolts (42). Next, secure the front of the
handlebar using allen bolt (71), spring washer
(53) and arc washer (64).
Step 3:
Remove the protective cover from the backside
of the adhesive tape that is located beneath
the handlebar foam tab. Position tab over flat
section of handlebar bracket and press down to
cover the 2 shoulder bolts (42).
Step 4:
Adjust the position of the handlebar to your
preference and tighten the knob (36).
Note: Do not set the handlebar
post height any higher than the
"SToP" line.