Setting the fpc hdd bat – Matsushita CF-30 User Manual
Page 44
9-22
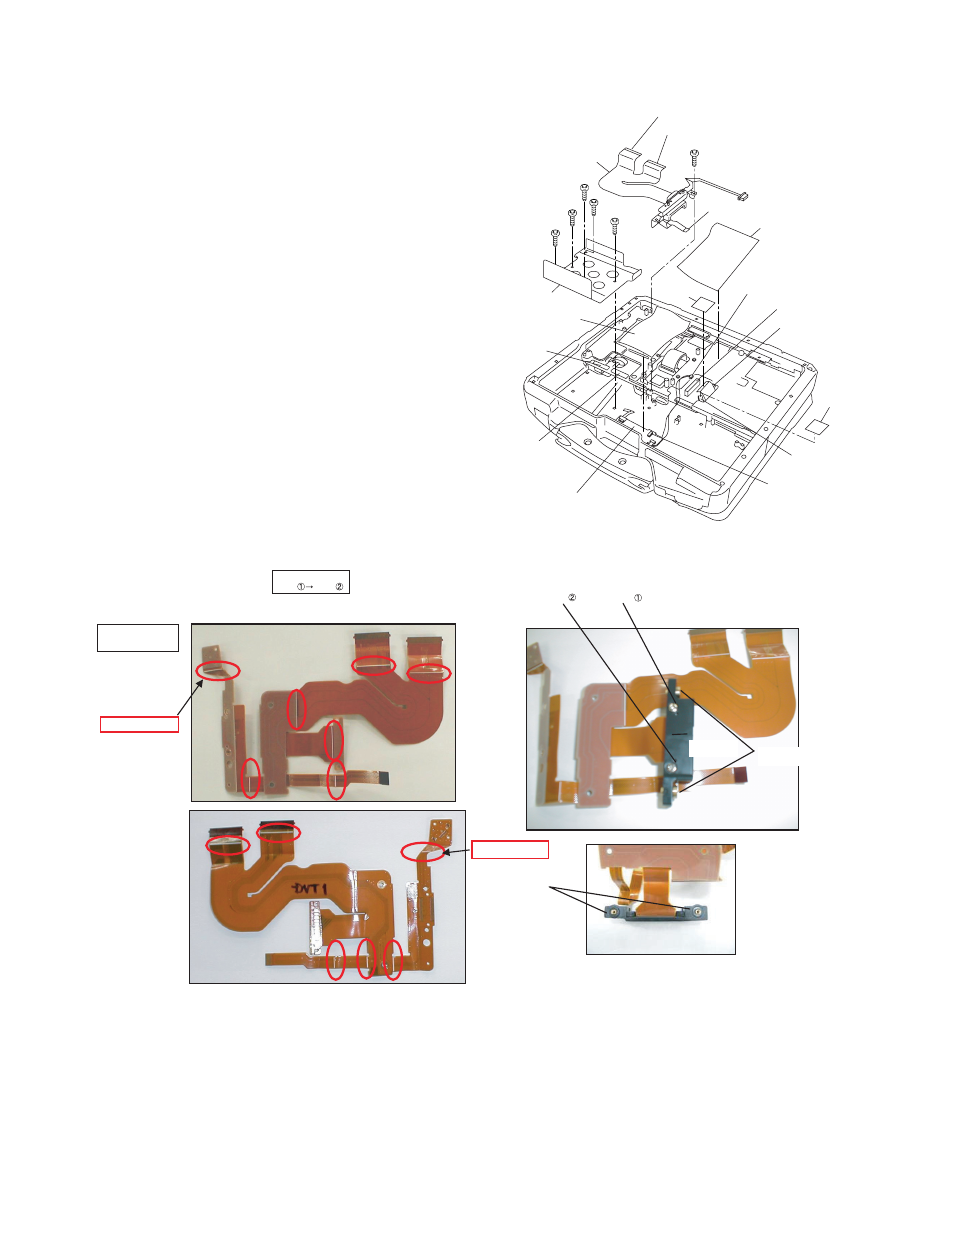
9.2.12. Setting the FPC HDD BAT
1. Fix the FPC HDD BAT using the Screw.
2. Connect the 2 Cables to the 2 Connectors. (CN7,CN8)
3. Connect the Cable to the Connector. (CN800)
4. Attach the PAD Protect Sheet.
5. Connect the Cable to the Connector. (CN9)
6. Attach the Tape.
7. Connect the 2 Cables to the 2 Connectors. (CN10,CN26)
8. Attach the Tape.
9. Attach the Antenna Cable Sheet on the Main PCB.
10. Fix the HDD FPC BAT using the 5 Screws.
No5
Note:
Tighten the Screws in the numbered order (No1 to No5).
Screw
Screw
Q
Preparation of HDD FPC ASSY
Connector(CN10)
Connector(CN26)
HDD Cable Cover
FPC HDD BAT
Antenna Cable Sheet
to Connector (CN800)
Connector (CN800)
to Connector (CN26)
Tape
Connector(CN9)
Pad PCB
Tape
to Connector (CN8)
to Connector (CN7)
Connector
(CN8)
Pad Protect
Sheet
Connector
(CN7)
No.3
No.2
No.4
No.1
No.5
Not to forget folding
Tighten of
Screw
Tighten of
Screw
Battery Connector PIN
Cushion is set
Battery Connector
PIN is set
Battery Guide
is set
Order of fixing
Screw
Screw
Fold mountain based
on the white line.
Not to forget folding