Installing the appliance – Miele K1911SF User Manual
Page 45
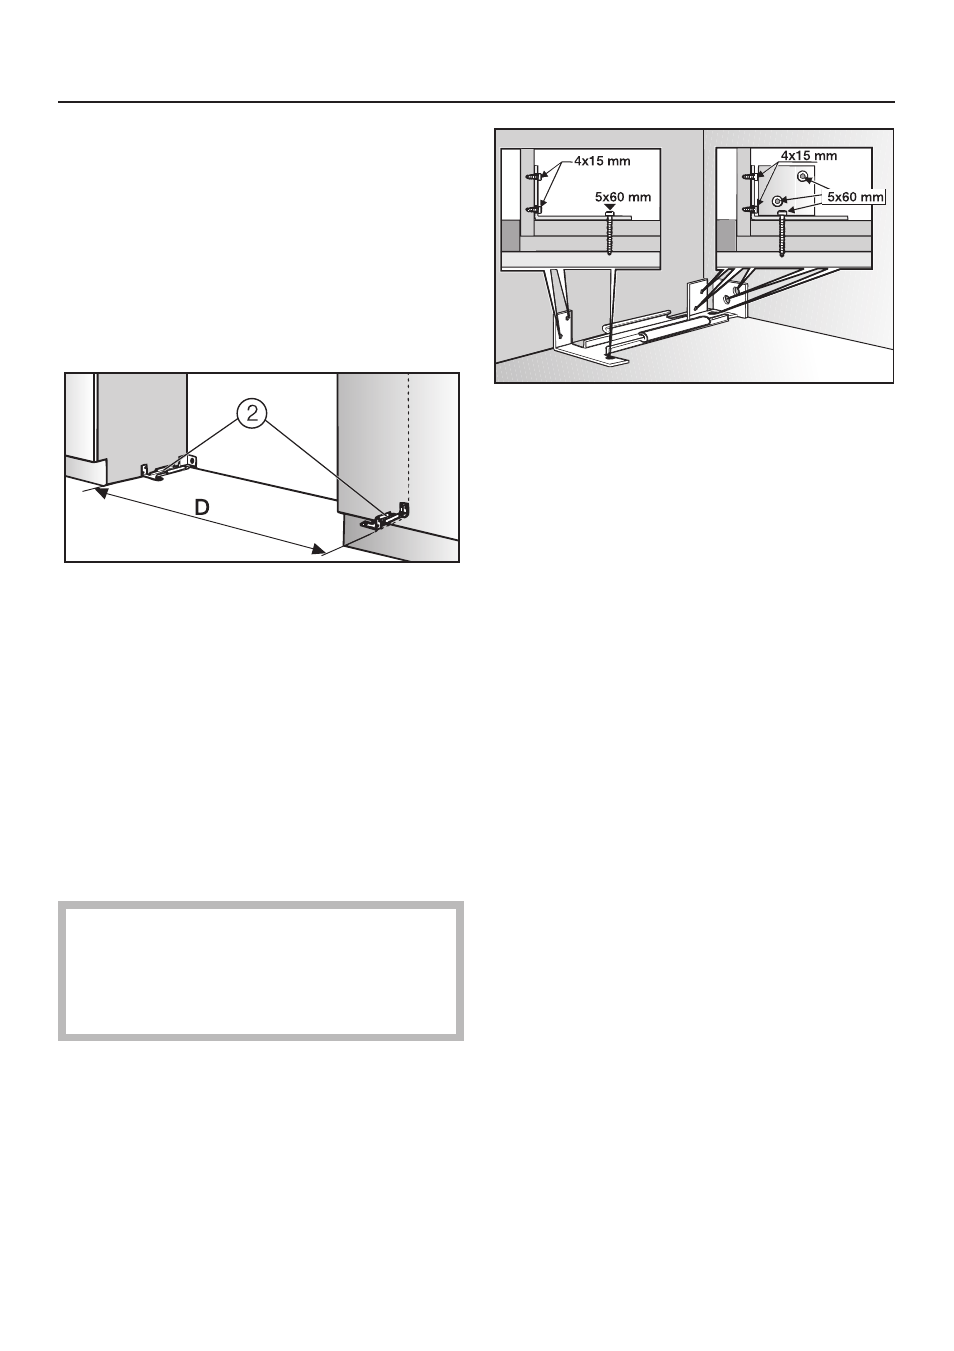
Anti-tip brackets
The anti-tip brackets help keep the
appliance safely attached to the
installation space, which helps prevent
tipping.
Two anti-tip brackets are
recommended for each appliance or
appliance combination (side-by-side).
The distance "D" between the anti-tip
brackets
b is the width of the
appliance.
^ Position the anti-tip brackets b on
the left and right walls of the
appliance niche.
^ Mark the holes through the anti-tip
brackets
b on the floor of the
installation niche.
^ Set the brackets aside.
Assure that there are no electrical
wires in the area which the screws
could penetrate - risk of injury and
damage.
^ Drill pilot holes:
–
1
/
8
" (3 mm) for the 5 x 60 mm wood
screws
–
1
/
16
" (2 mm) for the 4 x 15 mm wood
screws.
^ Tightly secure the anti-tip brackets in
the niche.
Be certain the screws penetrate
through the flooring and into the wall
plate a minimum of
3
/
4
" (19 mm).
Installing the appliance
45