Preparing your projector (continued), Overview – MITSUBISHI ELECTRIC Mitsubishi Electric LCD HC6800 User Manual
Page 7
EN-7
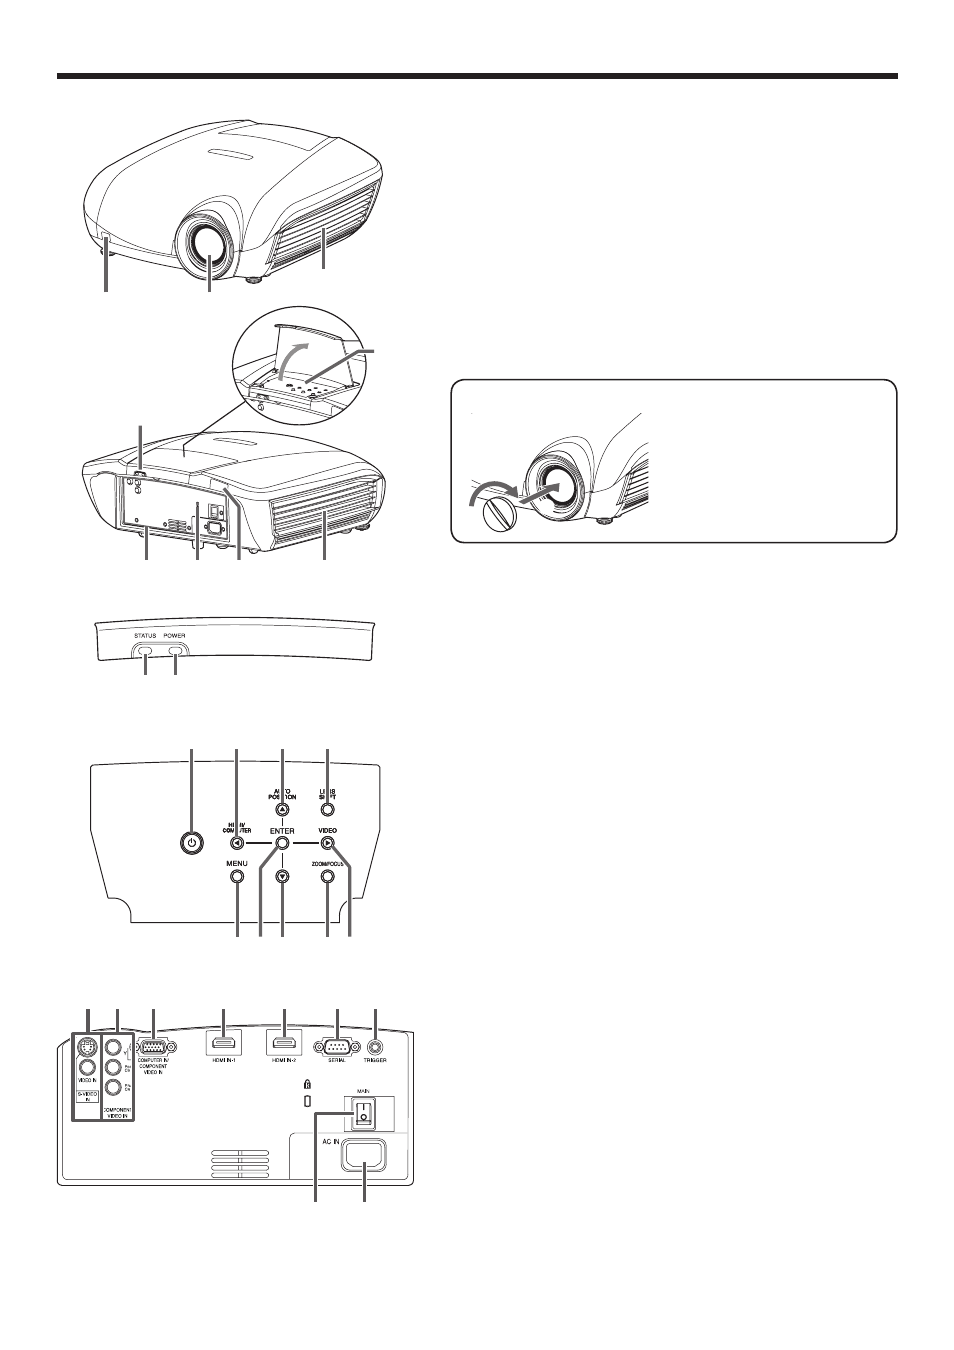
Overview
VIDEO IN and S-VIDEO IN terminals
1
COMPONENT VIDEO IN terminals
2
COMPUTER IN/COMPONENT VIDEO IN terminal (mini
3
D-SUB 15-pin)
HDMI IN-1 terminal (HDMI 19-pin)
4
HDMI IN-2 terminal (HDMI 19-pin)
5
SERIAL terminal (D-SUB 9-pin)
6
Used for projector control by computer. Contact your
•
dealer for details.
TRIGGER terminal
7
Used for the optional electric screen.
•
Main power switch
8
O: OFF
I: ON
Power jack
9
POWER button
1
HDMI/COMPUTER/
2
t
button
AUTO POSITION/
3
p
button
LENS SHIFT button
4
MENU button
5
ENTER button
6
q
7
button
ZOOM/FOCUS button
8
VIDEO/
9
u
button
Remote control sensor (front)
1
Lens
2
Right side panel (air inlet grille/filter)
3
Indicator area
4
Control panel
5
Terminal panel
6
Kensington Security Lock Standard connector
7
Remote control sensor (rear)
8
Left side panel (air outlet grille/lamp cover)
9
Terminal panel
Control panel
Preparing your projector (continued)
9
5
1
6
7
8
2
3
4
1
2
3
4
5
7
6
9
8
1
2
3
4
5
6
7
9
8
Indicator area
1
2
STATUS indicator
1
POWER indicator
2
�
�
Attaching the lens cap
To attach the supplied lens
cap, push it into the lens
section of the projector ()
and then turn it clockwise ().
(For removal, turn it
counterclockwise.)