Connecting weld cable, 10. installing and threading welding wire, 9. connecting weld cable – Miller Electric UWF-SC12RC User Manual
Page 15
OM-215 092 Page 11
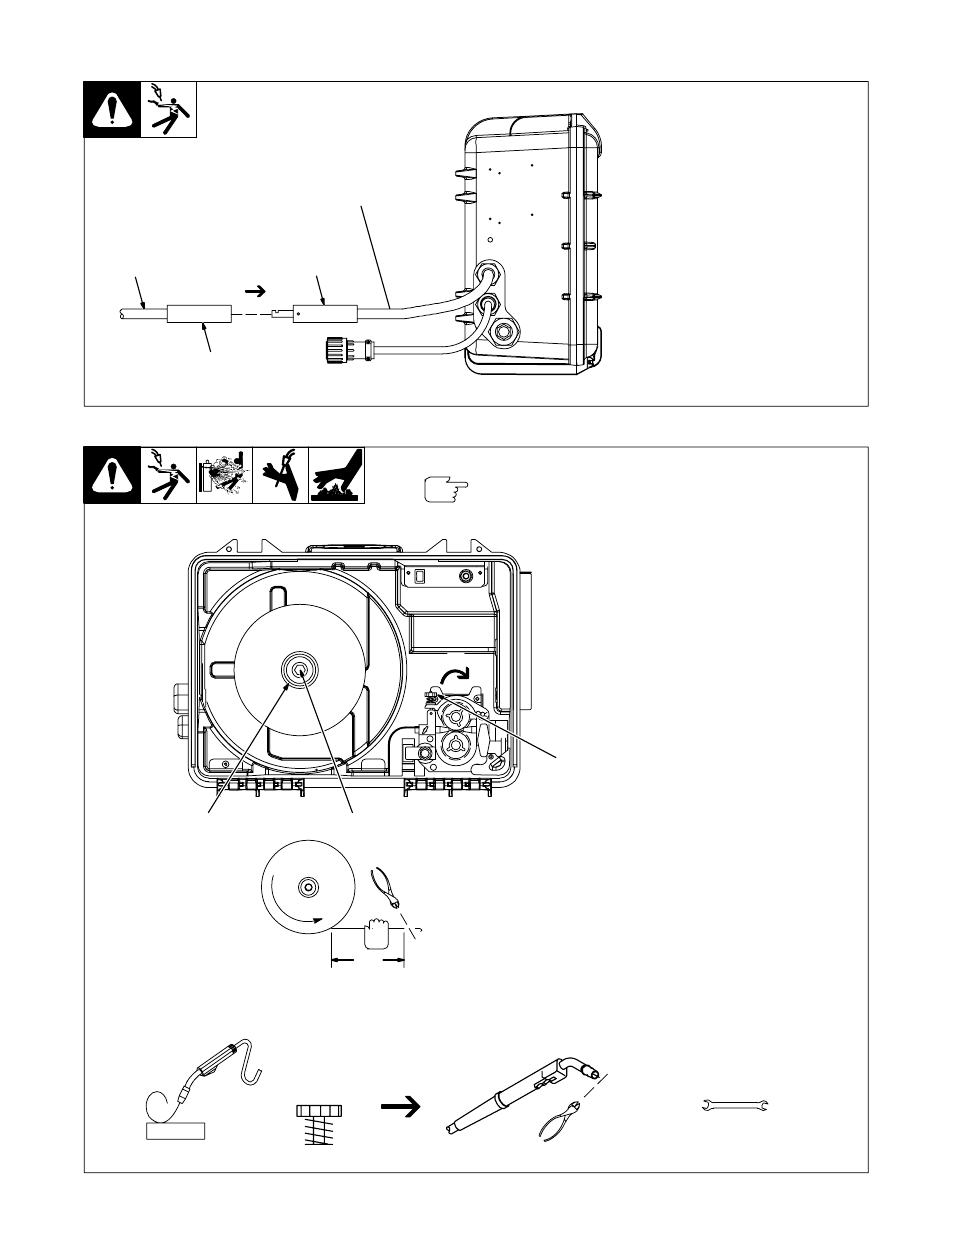
3-9.
Connecting Weld Cable
804 211-A
1
User-Suppled Weld Cable
Follow wire manufacturer’s recom-
mendations for weld cable polarity.
2
User-Suppled Male Connector
3
User-Suppled Female
Connector
Push female connector over male
connector, and turn 1/4 turn clock-
wise.
2
1
3
From Wire Feeder
3-10. Installing And Threading Welding Wire
804 212-A
Installing Wire And Adjusting
Hub Tension:
1
Retaining Nut
2
Hub Tension Adjustment
Screw
Remove retaining ring, and install
spool so hub pin fits spool hole. Re-
install retaining nut.
Adjust tension nut so only a slight
force is needed to turn spool.
Threading Welding Wire:
3
Pressure Assembly
Adjustment Knob
Lay gun cable out straight.
Open pressure assembly, hold wire
tightly, and cut off end. Push wire
through guides into gun.
Close and tighten pressure assem-
bly. Press Jog switch until wire
comes out gun.
Feed wire against wooden surface,
and tighten knob so wire does not
slip.
Cut off wire, and close door.
Tools Needed:
9/16 in
Pull and hold wire; cut off end.
Hold wire tightly to keep it
from unraveling.
6 in
(150 mm)
1
2
3
WOOD
Tighten
Clockwise