Monte Carlo Fan Company 5BGR56 Series User Manual
Page 4
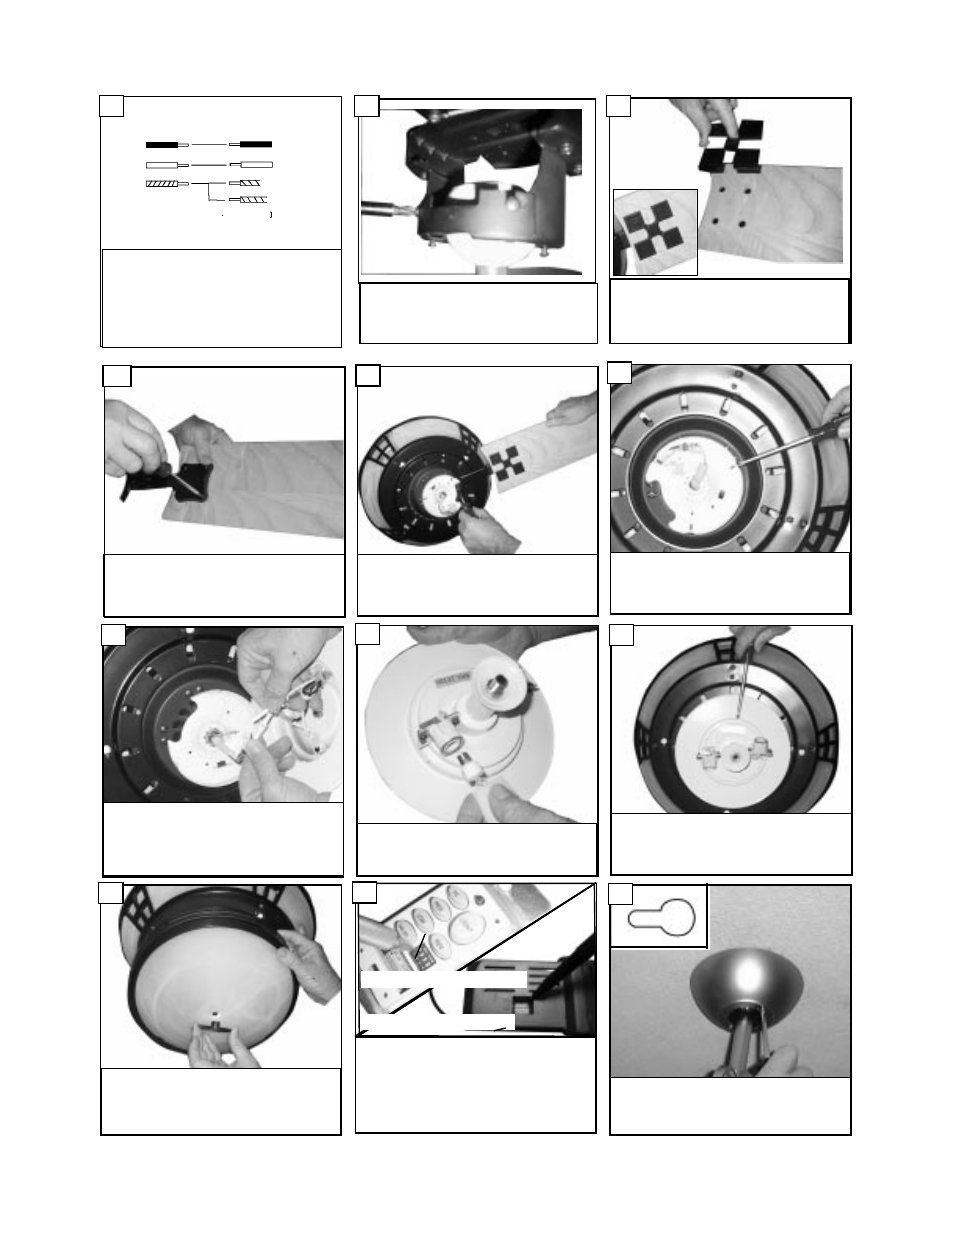
Attach shade to light kit by alignening threaded stem
on light kit to hole in shade. Screw finial nut to
threaded stem (do not overtighten).
Install the 2 50 watt halogen bulbs. Do not
touch bulb surface as oily residue from skin can
cause the bulb to explode.
Place blade arms onto the other side of the
blade and aligning holes. Insert screws with
fabric washers though the holes and tighten
securely.
Install all 5 fan blade assemblies to the motor
as shown above. Tighten screws securely.
Remove the 3 screws from fan.
Plug in electrical connection from fan into the
connectors on fitter.
22
23
24
25
26
28
Lift Canopy to ceiling aligning the key hole slots
with the screws on the bottom of the Mounting
bracket. Rotate the canopy Counter Clockwise
to lock in place. Tighten the screws to secure
the Canopy. See inset for Keyhole shape
30
Use the 3 screws removed in step 21 to put fit-
ter on to fan.
27
Make wire connections as per above diagram.
Connect the white wire from the fan to the
White or Neutral wire from the power source.
Connect the black wire from the fan to the
Black or hot wire from the power source.
Connect all Green / Yellow wires from the fan,
Downrod and mounting bracket to the Ground
wire from the house.
19
House
Fan
Black
White
Green
Black
White
Green(downrod)
Green(Bracket)
Re-install safety bar removed in step. 3 by
placing safety bar on screws, sliding into place,
and tightening the 2 screws.
20
Place floating brackets onto blades aligning
holes in blade with the floating bracket. Make
sure that the floating bracket does not hang
over the edge of blade (see insert).
21
Set dip switches on the Remote Transmitter and Remote
Receiver to the same settings. This must be done so the
units will communcate properly. If you have other fans you
can set to control from one transmitter by setting both
receivers the same as the transmitter. If you have more
than one fan with remote. You can set the dip switches to
different positiosns to have seperate control.
Remote Transmitter Dip swtiches
Remote Receiver Dip switches
29