Appendix #1 – install the hdd, Appendix #2 – replace the hdd – Maxtor 4 CH Digital Video Recorder User Manual
Page 20
Follow these steps carefully in order to ensure correct installation.
19
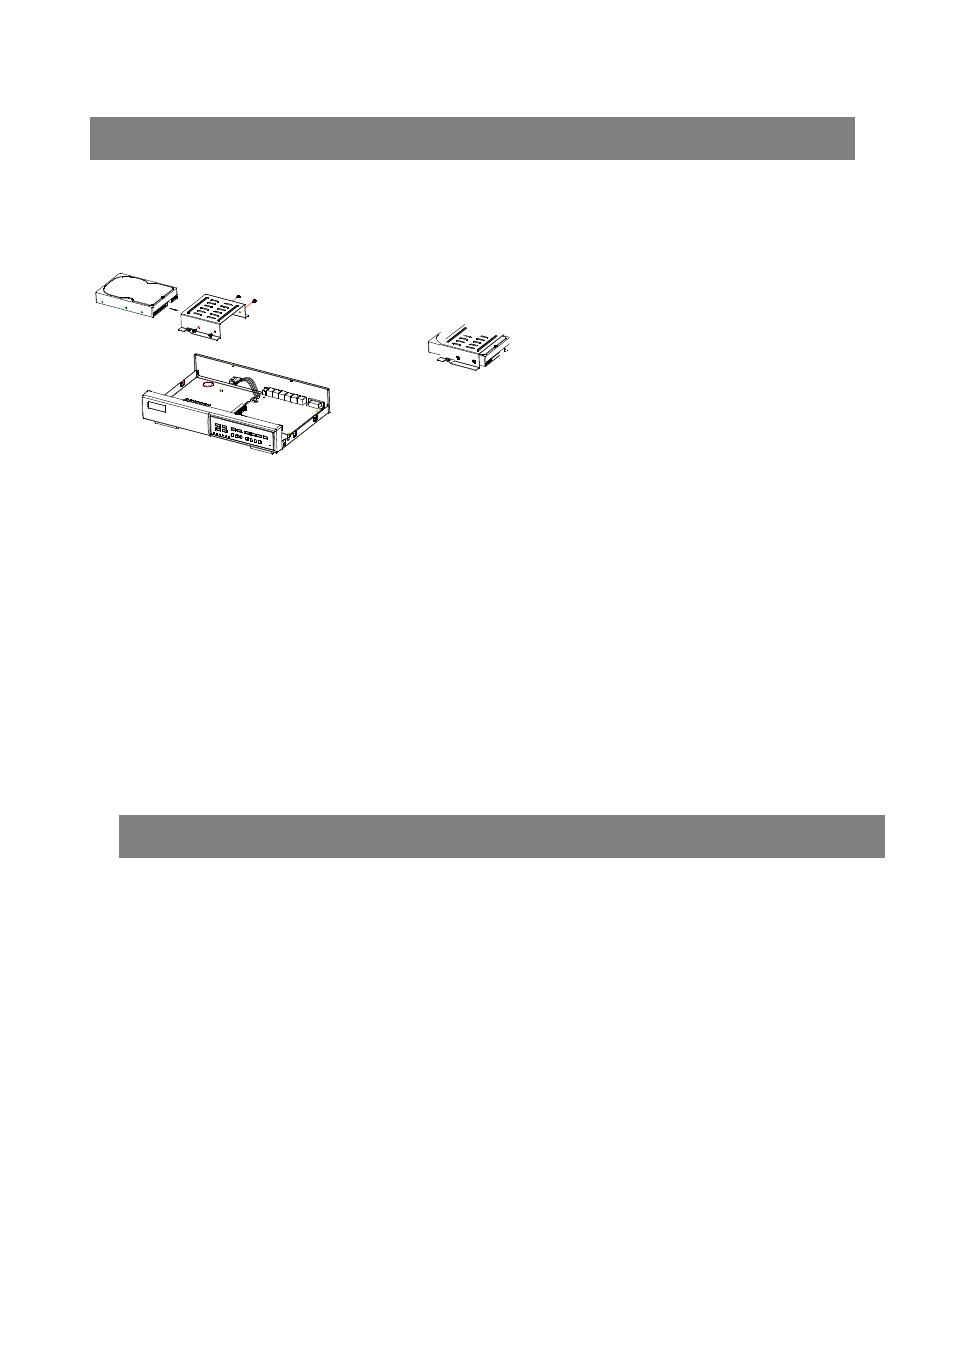
APPENDIX #1 – INSTALL THE HDD
Step 1 Remove the lid and unscrew the screws from HDD bracket module .
Step 2 Insert the HDD into the HDD bracket and screw the four screws.
The bottom side is power side as chart shows (refer to the Fig 1).
Step 3 Connect the HDD power cable to the HDD (refer to the Fig. 2).
Step 4 Attach the HDD connector to the 40-pin pinhead, and screw the HDD and
the DVR machine together (refer to the Fig. 3).
Step 5 Pull the sides of the lid apart slightly and push the lid down.
Note: Do not try to retrieve the HDD data by PC. The video file cannot be read by PC,
operation on PC would damage the FAT table of the hard disk.
Step 1 Remove the lid.
Step 2 Unscrew the screws and take out the HDD from DVR machine carefully
(refer to the Fig 3).
Step 3 Remove the HDD power cable from the HDD (refer to the Fig. 2).
Step 4 Unscrew the four screws connected the hard drive to the bracket and remove the
HDD bracket module. Repeat those steps according to the #Install the HDD$ section for
resetting another HDD (refer to the Fig 1).
Step 5 Pull the sides of the lid apart slightly and push the lid down.
Note: When HDD works for a period of time, the surface temperature will be high, please notice it.
APPENDIX #2 – REPLACE THE HDD
Follow these steps carefully in order to ensure correct installation.