Connecting the radio antenna – Magellan All-In-One Security System V1.0 MG-6060 User Manual
Page 12
10
Reference & Installation Manual
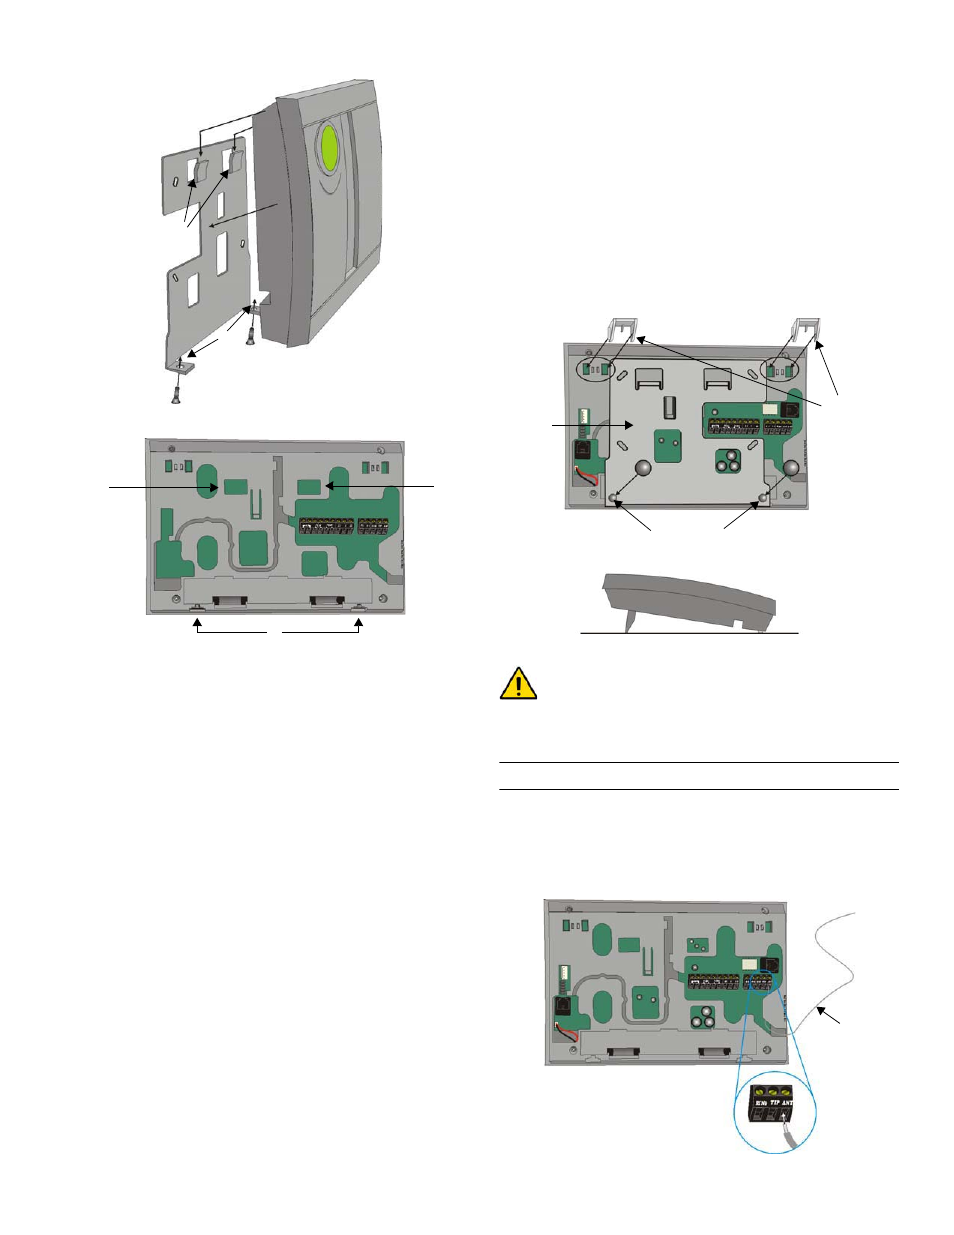
Figure 12: Mounting Magellan onto the Wall Plate
Figure 13: Magellan’s Back Plate
Mounting Magellan on the Wall
Magellan can be mounted on a wall by first securing the wall
plate (see The Wall Plate on page 9) to the wall and then
mounting the Magellan console on the secured wall plate as
shown in Figure 12 on page 10 and Figure 13 on page 10. To do
so:
1. Place the wall plate on the desired spot of the wall.
2. Drill and insert screws into holes labeled A as shown in
Figure 11 on page 9.
3. Place the console back plate flush against the mounted wall
plate.
4. Slide the Magellan’s open slots labeled D (see Figure 13 on
page 10) onto the wall plate’s tabs labeled B (see Figure 12
on page 10).
5. Gently apply downward pressure to insert the wall plate’s
tabs into Magellan’s open slots.
6. Insert two screws through the wall plate’s screw holes
labeled C and into holes labeled E (see Figure 12 on page 10
and Figure 13 on page 10) in the Magellan back plate. This
will secure the console to the wall.
Tabletop Mounting
Magellan can also be mounted on a tabletop. This is a useful
convenience that allows Magellan to be situated on a nightstand,
desk, kitchen counter, etc. Included with Magellan are two plastic
feet as well as two rubber stops. The plastic feet raise the
Magellan console to a slight angle for easy viewing while the
rubber stops prevent the console from sliding when Magellan is
being used. To do so:
1. Place the console back plate flush against the wall plate.
2. Slide the Magellan’s open slots labeled D (see Figure 13 on
page 10) onto the wall plate’s tabs labeled B (see Figure 12
on page 10).
3. Gently apply downward pressure to insert the wall plate’s
tabs into Magellan’s open slots.
4. Insert two screws through the wall plate’s screw holes
labeled C and into holes labeled E (see Figure 13 on page
10) in the Magellan back plate.
5. Attach the plastic feet and rubber stops as shown in Figure
14 on page 10.
Figure 14: Mounting Magellan on a Tabletop
Tabletop mounting may not be an approved installation
method by local regulations. It is recommended that the
local regulations be verified prior to installing the Magellan
console using this method.
Connecting the Radio Antenna
If the radio’s reception is not very good, connect the supplied
radio antenna to the
ANT
terminal on the back of the Magellan
console as shown in Figure 15 on page 10. Move the antenna
around until the spot with the best reception is found.
Figure 15: Connecting the Radio Antenna
B
C
D
D
E
Tabletop
Plastic feet
(x2)
Rubber stops
(x2)
Wall
plate
Radio
Antenna
Back view of the Magellan console.