Helpful hints, Front panel: c – Mesa/Boogie Walk About Bass Amplifier User Manual
Page 7
PAGE 3
HELPFUL HINTS:
(Continued)
and boost these frequencies when the control is set above 12:00. The MID works like a normal passive control and boosts a broad
band of frequencies as it is increased.
5. When using the Parametric EQ keep in mind that cutting (notching) undesirable frequencies is often preferable to boosting
desirable ones. By using this technique you will keep noise to a minimum and ensure ample headroom at all times. The Parametric
is a powerful tone shaping tool when used tastefully, but all too often they are abused and set to their extremes which can result in
an unbalanced tone that is “full of holes” or excessive noise.
6. When using Outboard Signal Processors, the best results are usually found by inserting them into the Effects Loop which provides
a patch point between the preamp and the power section of your WalkAbout. The processors’ Input should be connected to the
WalkAbout
WalkAbout
SEND jack and its Output should be connected to the RETURN jack. Always use the shortest length possible (1-3 feet) of good quality
low capacitance cable to preserve the integrity of your sound.
7. The DIRECT OUTPUT circuit provides a GROUND LIFT that disconnects chassis ground from circuit ground. Should you encounter
a hum or buzz when interfacing to live or recording consoles, try fl ipping this ground lift after you have muted that channels’ input or
zero’ed the fader. Many times (but not all) the hum is created by a ground loop between the WalkAbout and the console and lifting
the WalkAbout chassis to circuit ground will remedy the situation.
Hopefully these hints have helped get you up and running with your new WalkAbout and you are well on your way to having the
best tone you have ever heard! Now that you have a better idea of the layout and features, we are ready to move on to understanding
the individual controls and circuits in more detail.
FRONT PANEL: C
ONTROLS
& F
EATURES
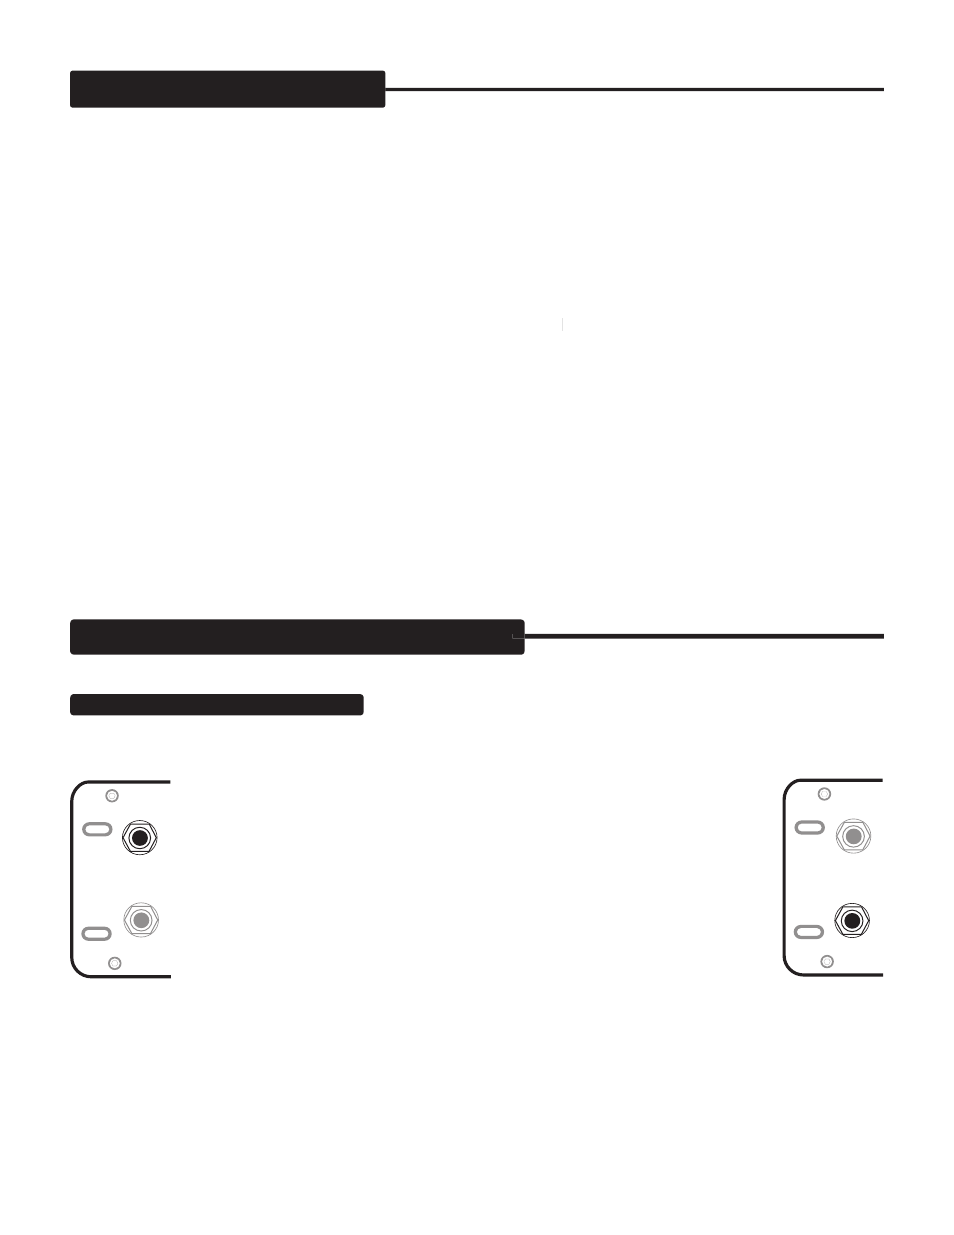
INSTRUMENT INPUTS: ACTIVE / PASSIVE
These are the Instrument Input jacks and between them you can match the signal
output level of virtually any instrument.
The
ACTIVE Input is padded down for greater input stage headroom and this works well
with basses that use an on-board pre-amp with an active tone control circuit. Usually these
instruments put out a much hotter signal than conventional basses, even when their tone
controls are set “fl at”. The added headroom is needed to prevent clipping in the fi rst stage
of the pre-amp and the
ACTIVE Input should be used whenever instruments that utilize
active style pickup/EQ harnesses are used.
You can use the
ACTIVE Input for conventional passive instruments also, for heavy handed
players needing extra headroom or simply a “cleaner” sound. However, note that unless you
have Kong size hands it may be diffi cult to bring the amplifi er to full power with this reduced
front end sensitivity.
The
PASSIVE Input is set up for more conventional basses with passive pickups that produce lower output signal levels. This jack is
more sensitive than the ACTIVE Input and therefore can drive the fi rst stage to clip with a much lower signal. Keep this in mind if you
play with a heavy touch or want a little bit of growl or front end clip. In those scenarios this jack can be quite useful to push the fi rst
stage of the pre-amp.
INSTRUMENT
INPUTS
PASSIVE
ACTIVE
INSTRUMENT
INPUTS
PASSIVE
ACTIVE