Step 1, Rough opening and framing requirements – Marvin Window User Manual
Page 5
Step 1:
Rough Opening and Framing Requirements
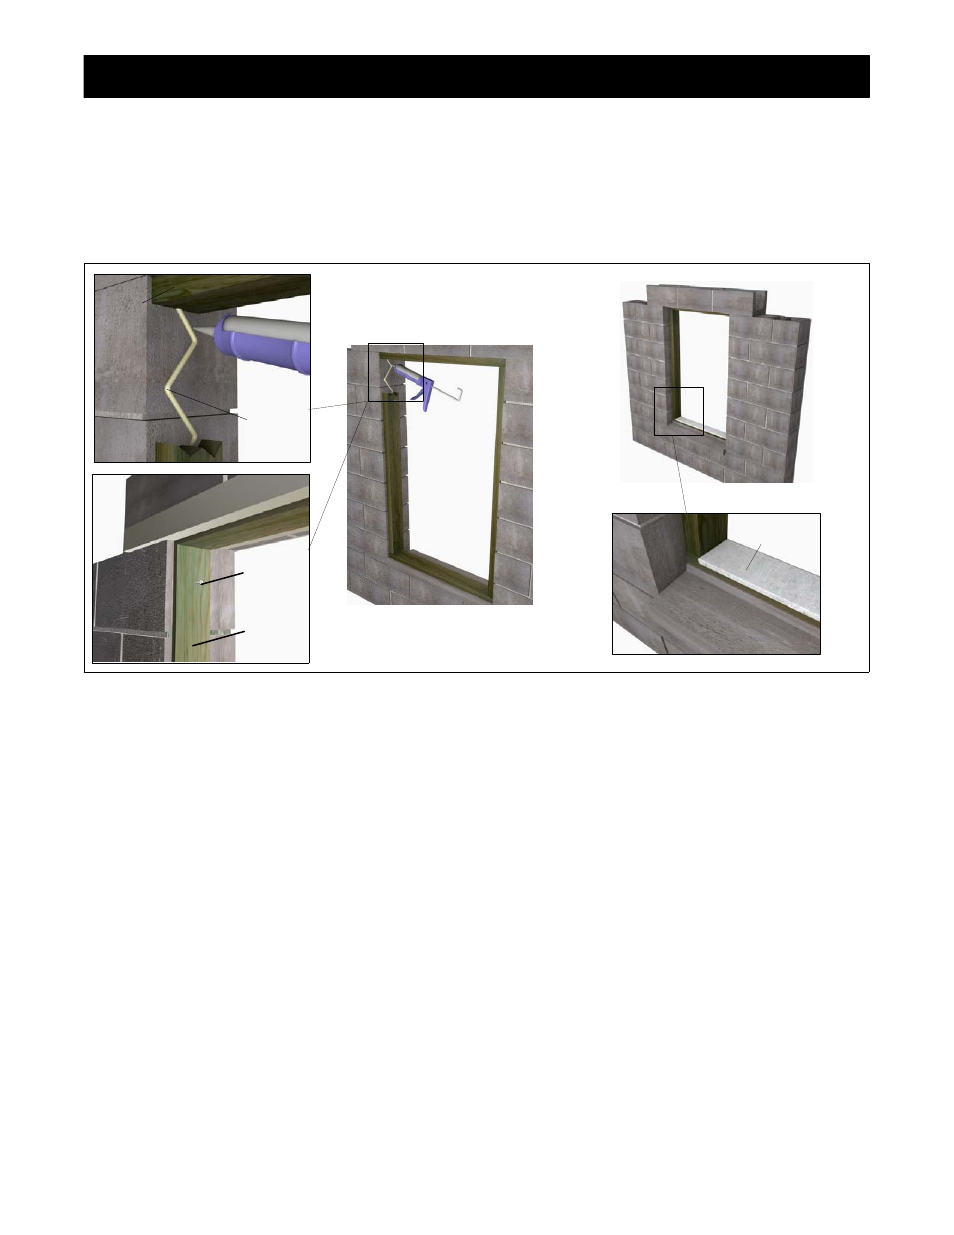
Figure 1: Preparing openings for concrete block openings.
This section gives requirements for framing and rough opening clearances. Masonry or concrete openings must be
lined with a treated wood product (wood buck). You must fasten the buck to the masonry opening in a fashion that
will withstand conditions which would be encountered under the certified and advertised DP ratings for this window.
The structural integrity of this installation is only as good as the bond between the wood buck and the masonry
opening. For more details, contact your Marvin representative.
1. On concrete block, masonry, or similar situations, line
the sides, head jamb, and sill with treated lumber.
Attach the lumber to the masonry opening with
construction adhesive and masonry anchors which
should penetrate the masonry opening by at least
1,−1 1/2,
(25−38)
. See figure1a and 1b.
2. For standard wood frame construction, prepare the
opening following local codes, ASTM E2112−1, or fol-
low the steps in the “Continuous Air Barrier
Systems” section.
3. If rigid panning is used, place a bead of silicone or
construction adhesive over any fasteners used to
hold the panning to the sill.
(a)
NOTE: Wood buck material thickness may vary. Illustrations show a 1/2, plywood and 2 x 4 buck. Installations
using material less than 2, nominal material must use the jamb screw method of attachment and use 3/16, concrete
anchors.
Treated
2 x 4 buck
1/2, treated
plywood
Masonry
anchor
Construction
adhesive
NOTE: If your installation requires screwing through
the sill for structural purposes, place a bead of sealant
where the screws will penetrate the rigid sill panning.
4. The window frame must not come in contact with
treated lumber. If you will not be using rigid panning
or shimming at the sill, apply a barrier such as a self
sealing adhesive flashing to the rough opening sill.
See figure 1 c.
(b)
(c)
Adhesive
flashing
4
Window Installation
StormPlus and Structural Installations
19970019
2013−03−01