Monte Carlo Fan Company 5AHR60 User Manual
Page 3
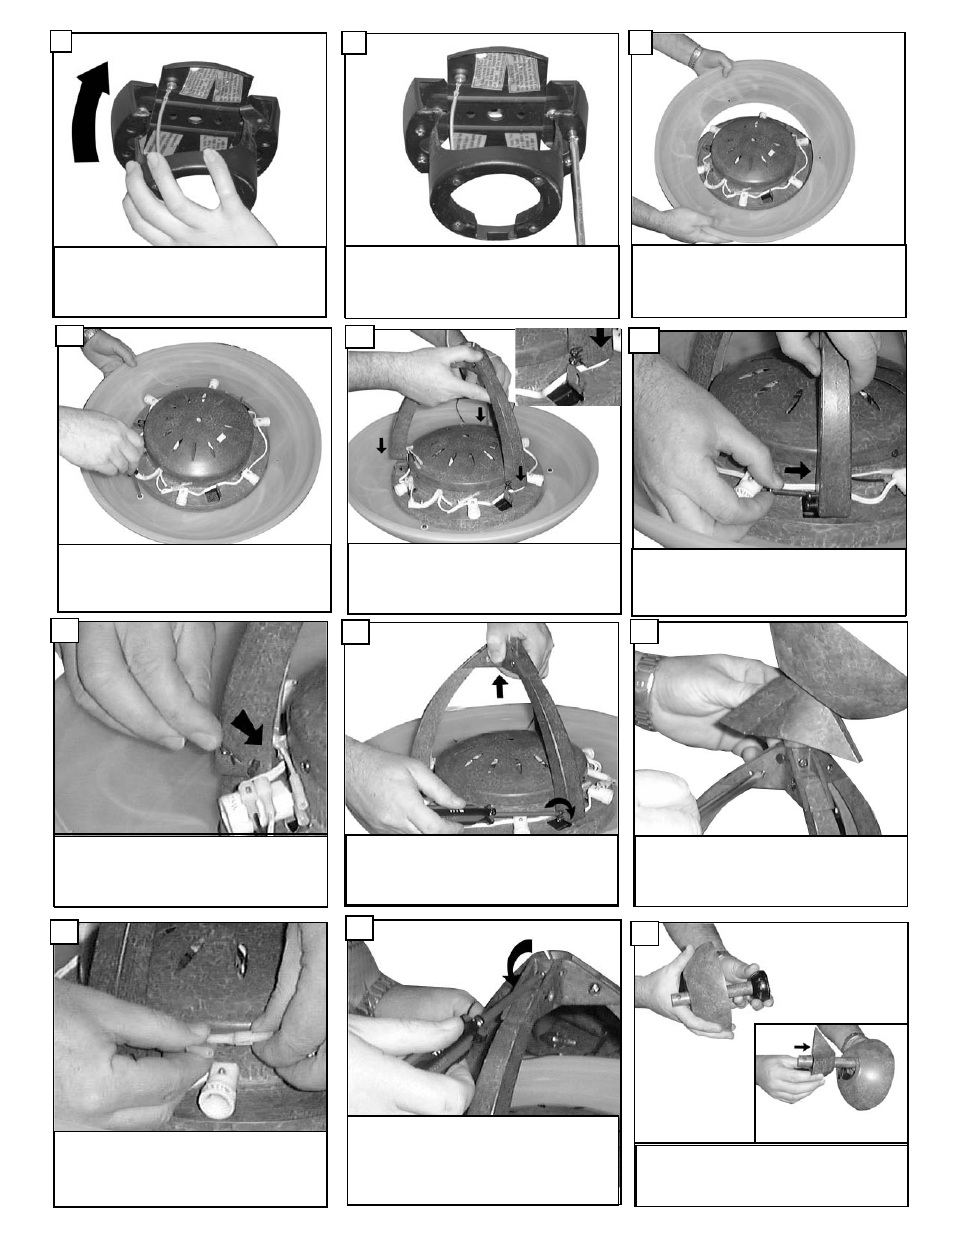
While lifting upward on the arch arm assembly tighten
the 2 set screws next to each cross pin where archs
attach to the fan housing. These set screws can be
loosened and adjusted once fan is in final position on
the ceiling.
Align hole in arch arm and hole in tab the fan
housing. Do this for each of the 3 arch arms.
Install Keeper pin into all 3 cross pins.
Install 3 screws to hold glass to fan housing.
Do not overtighten as this could crack the
glass.
Install and tighten set screws for each arch leg
located on the yoke.
10
15
12
13
Spread 3 arch arms outward and place over the
tabs on fan housing. Make sure the arm with
the electrical connection plugs is next to the
plugs on the fan housing.
11
14
Lower upper glass disk onto fan housing and
align 3 holes in glass with 3 holes in fan hous-
ing.
9
Lift mounting neck to mounting Plate and align
screws.
7
Secure mounting neck to the mounting plate
with four screws to become a complete mount-
ing bracket.
8
Loosen the 2 downrod set screws to allow
downrod intallation to the yoke.
Plug in electrical connection from Arch assembly
to the fan body.
Install canopy and yoke cover over the down-
rod.
16
17
18