Figure 3, Figure 4, Figure 5 – MTD 340 Thru 390 User Manual
Page 6: E figure 3, Attaching clutch control cable(s), Final clutch adjustment
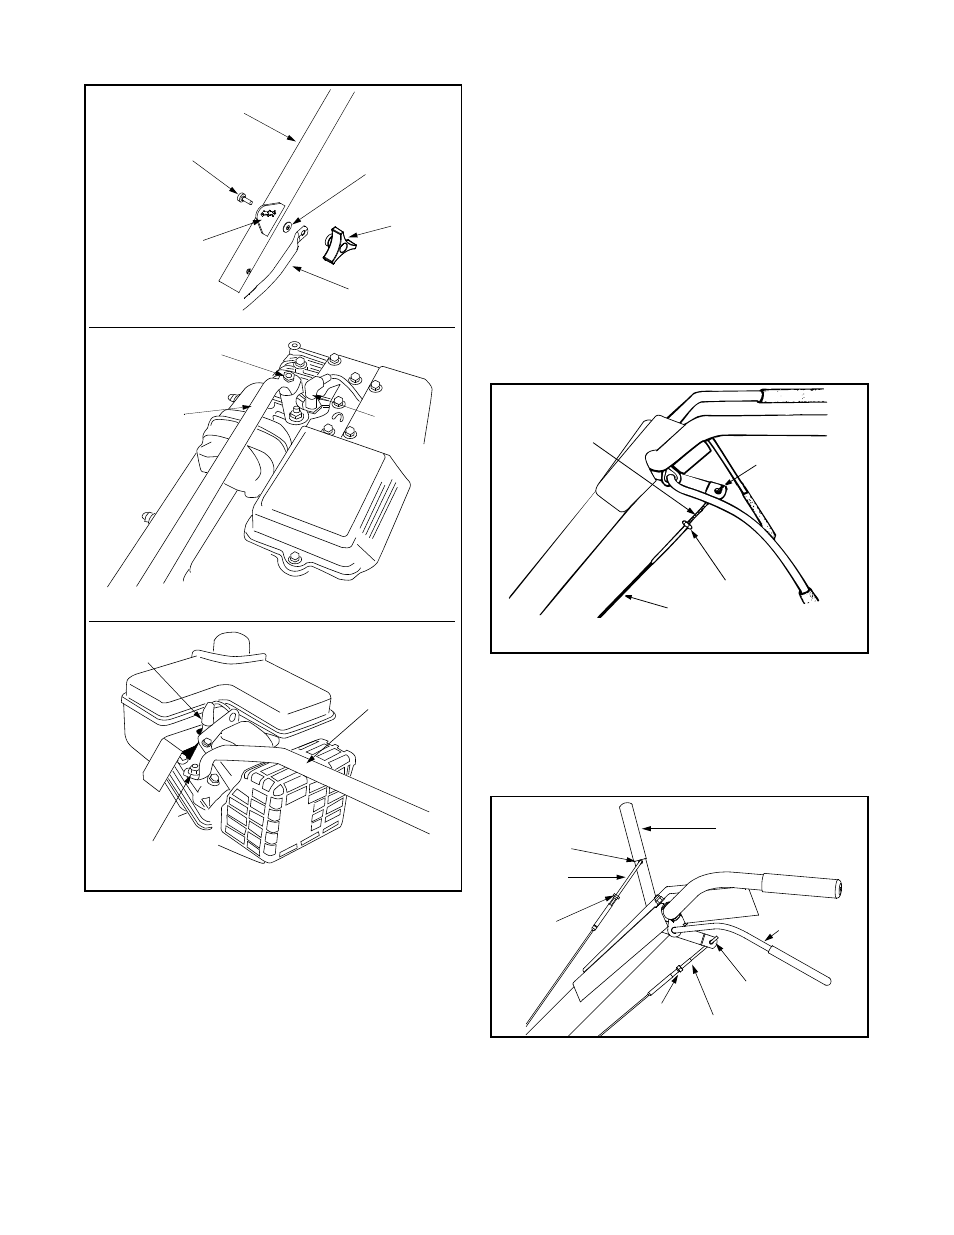
6
Figure 3
Attaching Clutch Control Cable(s)
NOTE: If your tiller’s clutch control cable(s) have been
already assembled before shipping, proceed to the next
section. If unassembled, follow the steps below.
Forward Cable
Attach the end of the forward cable to the bracket
underneath the handle assembly as follows. (On model
series 390, the forward clutch cable is the cable which
is attached closer to the rear of the tiller).
•
Loosen the hex nut on the threaded rod near the
end of the cable, and move it up the rod as far as it
will go.
•
Unthread the rod from the rest of the cable. Hook
the “Z” end of the rod into the bracket underneath
the handle assembly from the right hand side. See
Figure 4.
•
Thread the rod back into the cable until the cable is
straight. Do not tighten it enough to put any tension
on the spring.
•
Thread the hex nut down against the end of cable.
Use a pair of pliers and a wrench to lock the nut
against the rod.
NOTE: Do not overtighten control cable. Too much
tension may cause it to break when engaged.
Figure 4
Reverse Cable
(Model Series 390 Only)
The reverse clutch cable is the cable which is attached
closer to the front of the tiller. Attach the end of the
reverse cable to the reverse tine drive clutch lever,
above the handle assembly, in the same manner as
you attached the forward cable. See Figure 5.
Figure 5
Final Clutch Adjustment
To check the clutch cable adjustment, proceed as
follows:
Hex Lock Nut
Spark
Plug
Handle Brace
Briggs & Stratton Standard Engine
Tecumseh Engine
Honda and Briggs & Stratton Intek Engines
Hex Lock
Nut
Handle
Brace
Spark
Plug
Carriage Bolt
Handle Brace
Hand
Knob
Handle
Bell
Washer
Welded Bracket
“Z” End
Hooked In
Bracket
Hex Nut
Cable
Model Series 340 thru 345
Threaded Rod
Reverse Tine
Engagement Lever
Threaded
Rod
Hex Nut
Z End Hooked
in Bracket
Z End Hooked
in Bracket
Forward Tine
Engagement
Hex Nut
Threaded Rod
Handle