Figure #1) assembly, Pre-ride inspection – Mini BAJA MOTORSPORTS User Manual
Page 4
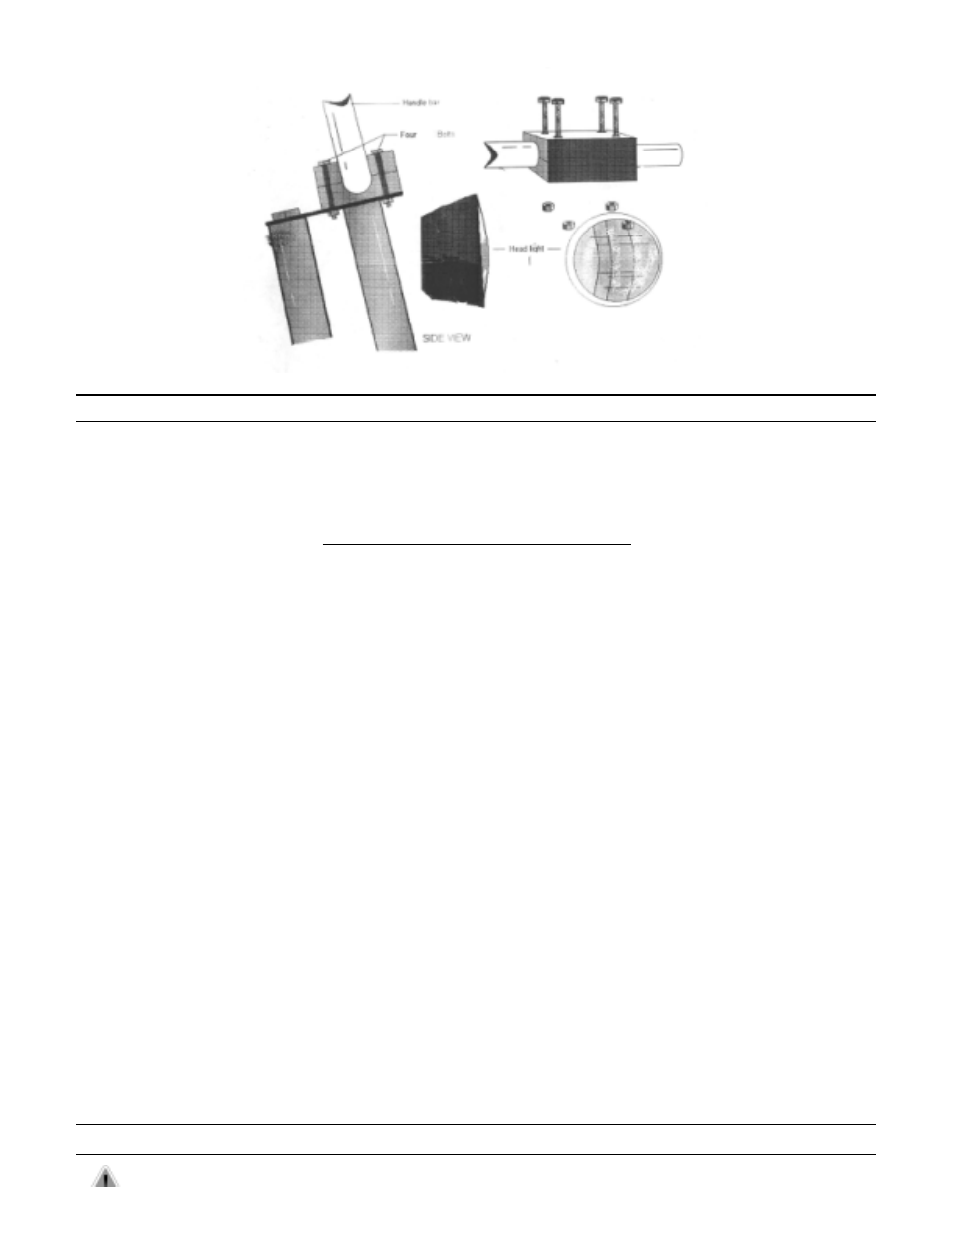
(Figure #1)
ASSEMBLY
Note: Refer to the exploded parts drawing above when assembling the handle bar.
1.
Complete the vehicle information block on the last page of this manual and the warranty card. The information is
required when ordering parts.
2.
Assemble the handle bar as described below:
HANDLE BAR INSTALLATION INSTRUCTIONS
Note: The handle bar comes assembled with throttle and brake mechanisms in place.
Step 1
Remove the nuts from the clamp and remove the top half of the clamp before placing the handle
bar and clamp in position.
(See Figure #1)
Step 2
Using the same bolts in the clamp place the top halves of the clamp over the top of the handle bar
and tighten down the bolts until the handle bar is secure.
Note: Do not over tighten the bolts. The handle bar should not move once tightened.
3.
Front Wheel -
Find the front axle in the packing material. Remove the Nut from one side of the axle and insert the
axle through one side of the front fork, through the front wheel hub and through the other side of the
front fork. NOTE: The washer should be placed on the axle between the nut and the outside of the
front fork. Place the nut which was removed on the other side of the axle and tighten. NOTE: You
must hold the nut on the other side of the axle when tightening.
4.
Bolts - Check the screws, nuts, and bolts on your vehicle to see that all are tightened securely. For safe operating
conditions, do periodic checks and tighten securely.
5.
Engine - Fill the crankcase with oil until it reads full on the dipstick of the engine. For additional information refer to the
engine manual for servicing the engine.
CHECK TO INSURE THAT ALL GUARDS ARE CORRECTLY MOUNTED AND SECURE.
FUELING THE ENGINE: THE FALSE GAS TANK DOES NOT HOLD FUEL. FILL FUEL TANK ATTACHED TO THE
ENGINE WITH REGULAR UNLEADED GASOLINE. DO NOT OVERFILL (NO FUEL IN FILLER NECK). SEE THE
ENGINE OWNER’S MANUAL FOR MORE INFORMATION ON FUELING.
6.
Tire Pressure - See the recommended tire pressure which is printed on the side of the tire.
PRE-RIDE INSPECTION