Overview, Control panel, Terminal board – MITSUBISHI ELECTRIC XD500U-ST User Manual
Page 6
EN-6
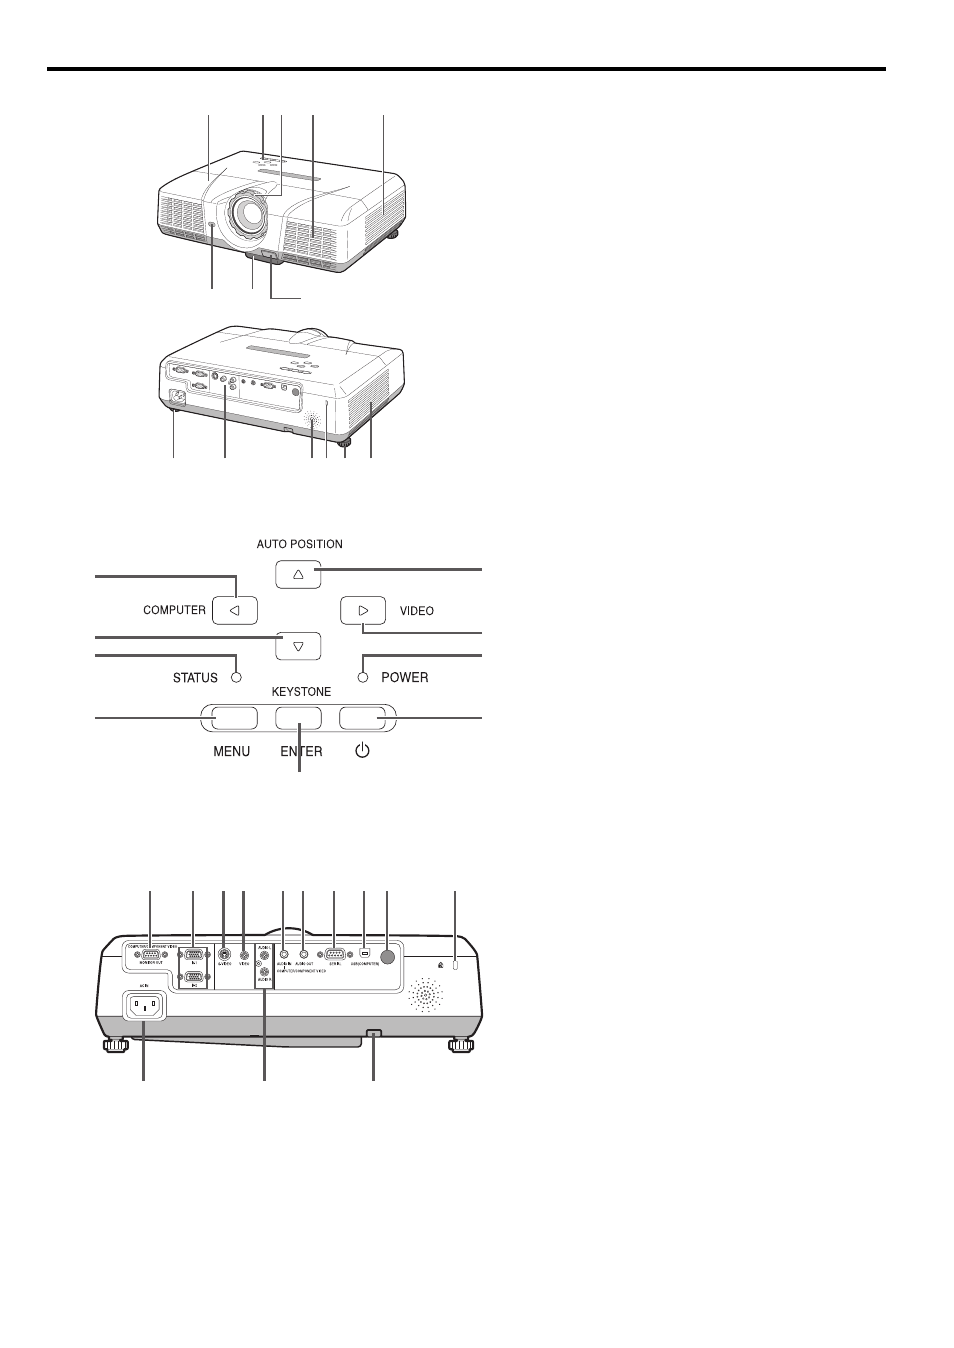
Overview
1
FOCUS ring
2
Control panel
3
Air inlet grille
4
Remote control sensor (Front)
5
Air inlet grille
6
Air outlet grille
7
Terminal board
8
Speaker
9
Adjustment feet (front)
10
Adjustment feet (rear)
11
Lock bar
12
Foot Adjustment button (Front)
13
Lamp cover
Caution:
Do not replace the lamp immediately after using the pro-
jector because the lamp would be extremely hot and it
may cause burns.
Control panel
1
Power button
2
AUTO POSITION /
S button
3
COMPUTER /
W button
4
MENU button
5
STATUS indicator
6
POWER indicator
7
KEYSTONE/ENTER button
8
VIDEO/
X button
9
T button
Important:
•
While the menu or the screen for the keystone adjust-
ment or password entry is being displayed, the COM-
PUTER, VIDEO, and AUTO POSITION buttons
function as the
W, X, and S buttons respectively.
•
While the menu is on the screen, the KEYSTONE but-
ton functions as the ENTER button.
Terminal board
1
Power jack
2
COMPUTER-IN terminal (1, 2) (Mini D-SUB 15-pin)
3
MONITOR OUT terminal (Mini D-SUB 15-pin)
4
Remote control sensor (Rear)
5
USB (COMPUTER) terminal
6
AUDIO-IN terminal (Mini jack)
7
AUDIO-OUT terminal (Mini jack)
8
S-VIDEO terminal
9
VIDEO terminal
10
Lock bar
11
SERIAL (RS-232C) terminal (D-SUB 9-pin)
12
AUDIO-L/R terminals
13
Kensington Lock
Kensington Lock
This projector has a Kensington Security Standard con-
nector for use with Kensington MicroSaver Security Sys-
tem.
Refer to the information that came with the Kensington
System for instructions on how to use it to secure the pro-
jector. Please contact Kensington Technology Group
below.
Kensington Technology Group
2855 Campus Drive
San Mateo, CA 94403, U.S.A.
Phone: +1- (650)572-2700 Fax: +1- (650)572-9675
2
5
3
13
1
9
4
12
10
7
8 11 10
6
7
4
9
3
2
8
6
1
5
3
8 9
6 7
11
5 4
13
2
12
1
10