7. installing welding gun, 8. setting gun polarity for wire type, Changing polarity – Miller Electric M-10 Gun User Manual
Page 17
OM-1330 Page 13
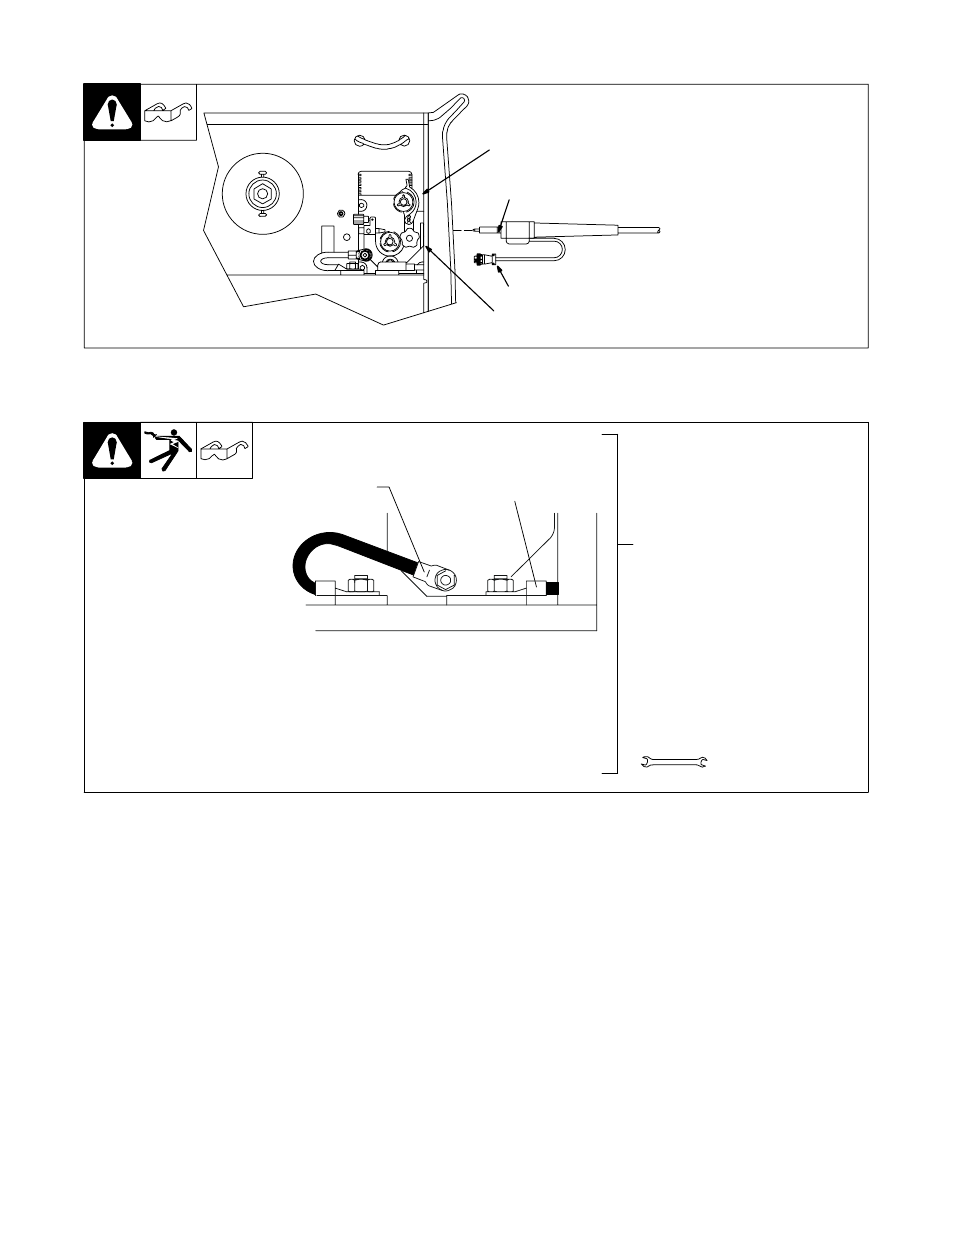
4-7. Installing Welding Gun
1
Drive Assembly
2
Gun Securing Knob
3
Gun End
Loosen securing knob. Insert gun
end through opening until it bottoms
against drive assembly (make sure
gun end does not touch drive rolls).
Tighten knob.
4
Gun Trigger Plug
Insert plug into receptacle, and
tighten threaded collar.
Close door.
803 860-B
1
2
3
4
4-8. Setting Gun Polarity For Wire Type
1
Polarity Changeover Label
Information
Always read and follow manufac-
ture’s recommended polarity.
1
3/4, 11/16 in
Ref. 190 821-A
Changing Polarity
D
D
Wire Drive
Assembly Lead
Work Clamp Lead
+
Positive Terminal
Shown as shipped − Electrode Positive (DCEP): For solid steel,
stainless steel, aluminum, or flux core with gas wires (GMAW).
-
Negative Terminal
Electrode Negative (DCEN): Reverse lead connections at
terminals from that shown above for gasless flux core wires
(FCAW). Drive assembly becomes negative.