Setting up your snow thrower – MTD 769-03250 User Manual
Page 7
3
Setting Up
Your Snow
Thrower
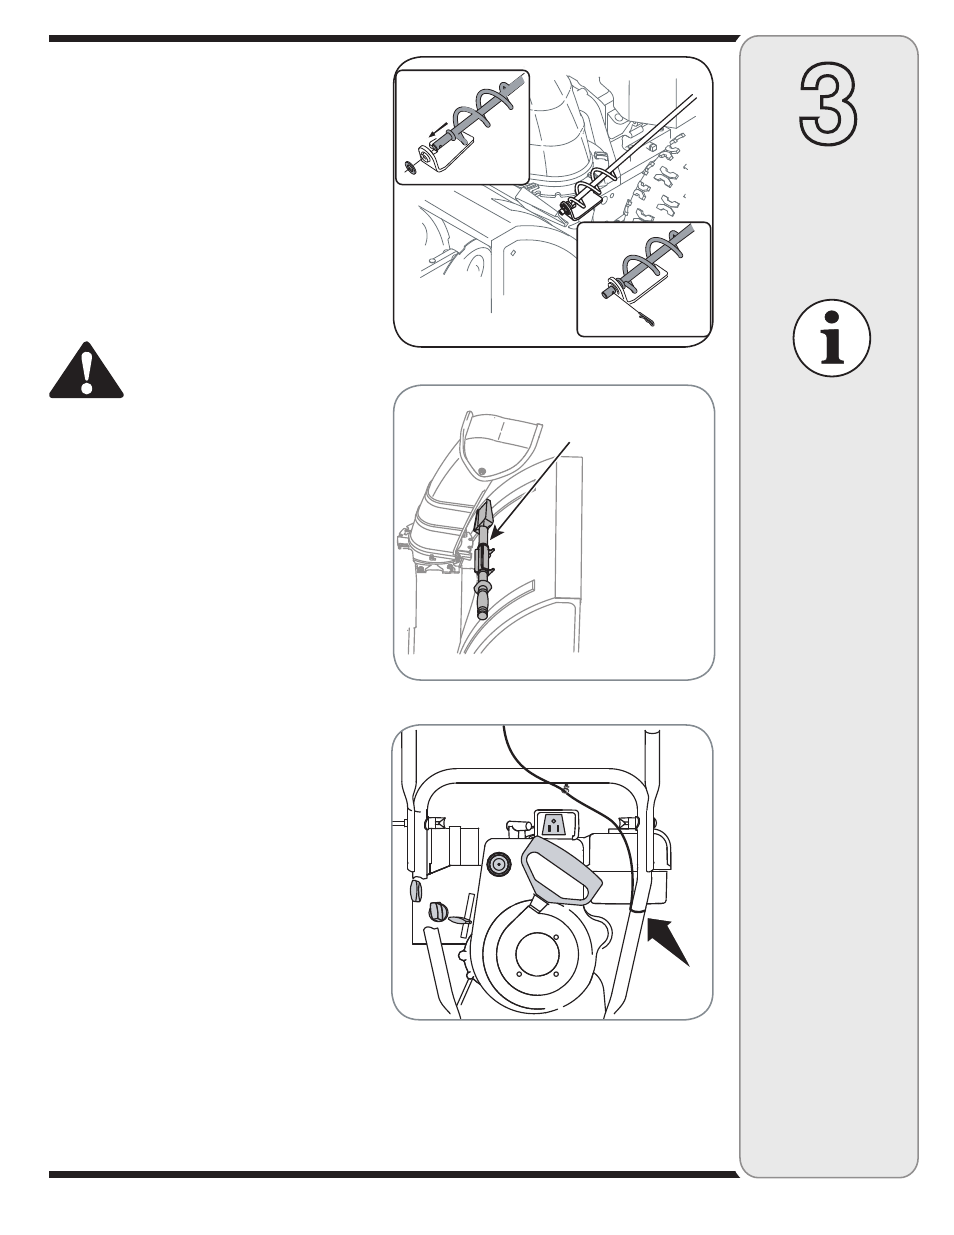
5. Remove the flat washer and hairpin clip from the end
of the chute directional control.
See Figure 3-5.
Insert the end of the chute directional control into the
lower bracket and secure with the flat washer and hair-
pin clip just removed. If necessary, the lower bracket
can be adjusted. Refer to Chute Bracket Adjustment,
in the Adjustment Section of this manual.
IMPORTANT: Prior to operating your snow thrower, refer
to Auger Control Test on page 11. Read and follow all
instructions carefully and perform all adjustments to verify
your snow thrower is operating safely and properly.
Clean-Out Tool
WARNING: Never use your hands
to clear a clogged chute assem-
bly. Shut off engine and remain
behind handles until all moving
parts have stopped before un-
clogging.
The clean-out tool is mounted to the rear of the auger
housing and is designed to clear a clogged chute. Refer
to page 9 for instructions on how to properly use it.
NOTE: This item is fastened with a cable tie to the rear
of the auger housing at the factory. Cut the cable tie
before operating the snow thrower.
Tire Pressure (Pneumatic Tires)
The tires are over-inflated for shipping purposes. Check
the tire pressure before operating the snow thrower. Refer
to the tire side wall for tire manufacturer’s recommended
psi and deflate (or inflate) the tires as necessary.
NOTE: If the tire pressure is not equal in both tires, the
unit may not travel in a straight path and the shave plate
may wear unevenly.
Lamp Wiring Harness (If equipped)
The post on the cable tie attaching the lamp wiring har-
ness to the lower handle should be plugged into the hole
in the lower handle. Pull the slack portion of the wiring
harness through the cable tie to prevent interference with
the recoil starter handle. See Figure 3-7.
Clean-Out
Tool
IMPORTANT
Prior to operating your
snow thrower, refer
to Auger Control Test
on page 11. Read and
follow all instructions
carefully and perform
all adjustments to verify
your snow thrower is
operating safely and
properly.
Never use your hands
to clean snow and
ice from the chute
assembly or auger
housing.
IMPORTANT
Under any circum-
stance do not exceed
manufacturer’s recom-
mended psi. Equal tire
pressure should be
maintained at all times.
Excessive pressure
when seating beads
may cause tire/rim
assembly to burst
with force sufficient to
cause serious injury.
Refer to sidewall of
tire for recommended
pressure.
Figure 3-
Figure 3-6
Figure 3-