Meade Instruments ETX 90EC User Manual
Page 4
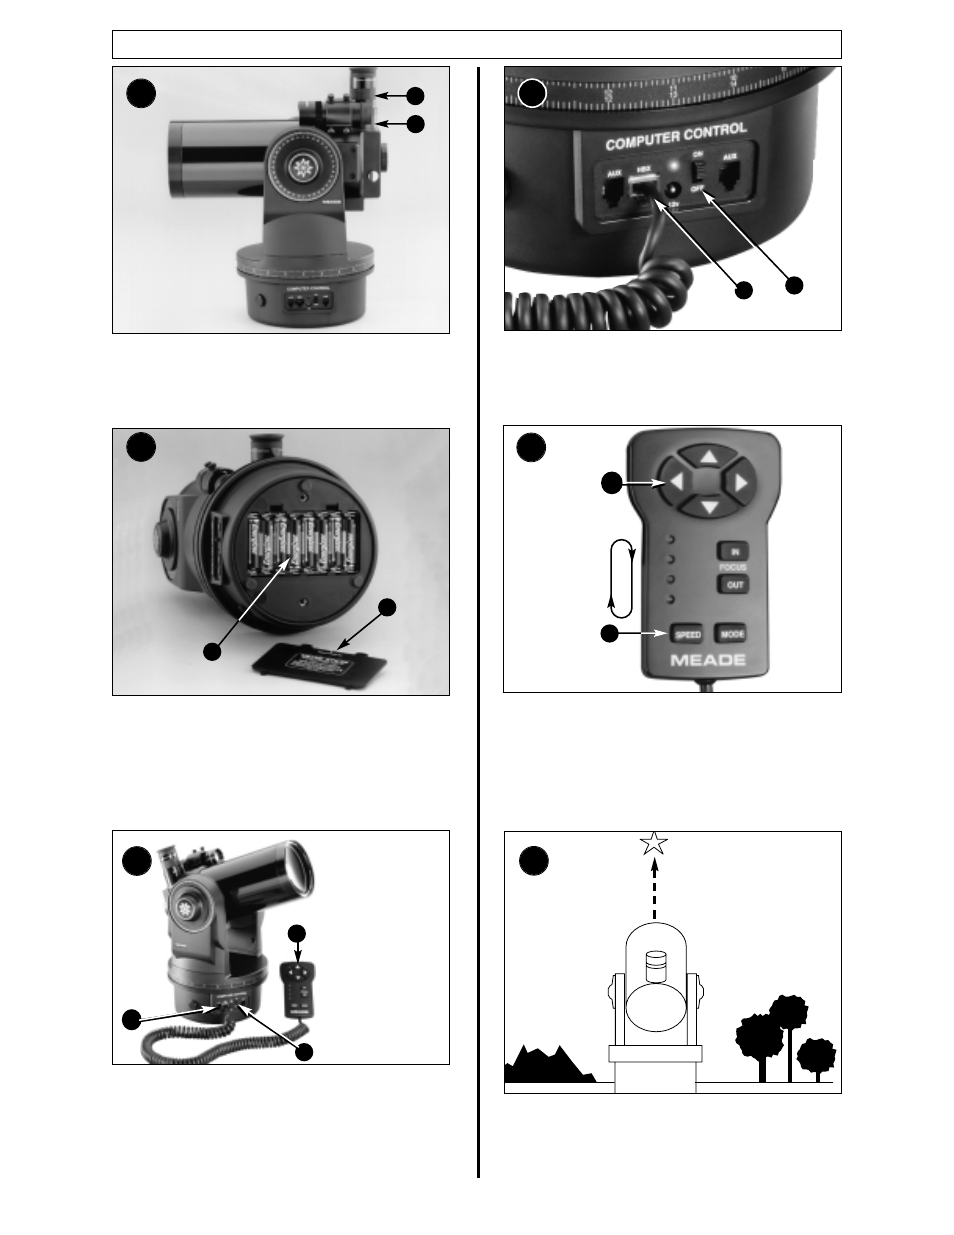
Remove the ETX from its packaging and place it on a
sturdy surface. Place the eyepiece (A) and viewfinder
(B) into their appropriate positions on the telescope
and tighten their respective attachment screws to a
firm feel only.
Securely place the ETX on its side and remove the
battery compartment cover (C) from the underside of
the drive base. Insert eight (user-supplied) AA-size
batteries into the battery compartment (D) in the
proper orientation. Replace the cover and return the
telescope to an upright position.
Verify that the Computer Control panel power switch (E)
is in the
OFF
position. Remove the Electronic Controller
(F) from the packing materials and plug it into the HBX
port (G). Tighten the vertical and horizontal locks (6 and
9, Fig. 1) and then remove the dust cover (19, Fig. 1)
from the end of the telescope tube.
Slide the Power Switch (E) on the Computer Control
panel to the
ON
position. The lights flicker on the
Electronic Controller. Press any key and the motors
briefly move the telescope. The Electronic Controller is
now operational.
Use the Electronic Controller Arrow keys (H) to move
the telescope up, down, left, and/or right. To change
the telescope’s slew speed, press the
SPEED
key (I).
The indicator lights signify the speed, with the upper
light showing the highest speed. Each press slows the
speed down one level, then cycles back to the highest
speed.
Sight along the side of the telescope’s main tube to
locate an object. Practice using the Electronic
Controller Arrow keys to center an object in the
telescope’s field of view. Use the telescope’s focus
knob (8, Fig. 1) to bring the object into focus.
1
3
4
A
B
E
G
QUICK-START GUIDE
5
I
H
Slew Speed:
Fast
Medium
Moderate
Slow
NOTE: The
telescope has
rotational hard
stops in the
horizontal and
vertical axes to
prevent damage to
the telescope. See
page 6, for more
information.
F
G
E
2
D
C
6
NOTE: Before
observing, verify
that the flip-mirror
control (14, Fig. 1)
is in the “up”
position. See
FLIP-
MIRROR CONTROL
,
page 7, for more
information.