Attaching kerfing – Grizzly SOPRANO UKULELE KIT T10458 User Manual
Page 12
-10-
Model t10458 (Mfg. Since 10/11)
attaching Kerfing
4. Determine the final length of the kerfing at the
tail block and cut as necessary.
5. Clamp the kerfing in place and let it dry over
night. this forms the kerfing to the sides and
makes glue-up go more smoothly.
6. using a pencil, mark the kerfing and the sides
for replacing the kerfing in the same position
during the glue-up procedure.
7. once the kerfing is dry remove it from ukulele
body in preparation for gluing the kerfing to
the ukulele.
Kerfing provides increased surface area for attach-
ing the sound board and back to the ukulele.
attaching the kerfing works best if it is shaped to
fit the sides of the ukulele. the kerfing is attached
to the sides as shown in
figure 16.
to glue the kerfing to the ukulele sides:
1. apply a sufficient amount of glue to the block,
the ukulele side, and the back of the pre-
formed kerfing.
2. Clamp the end of the kerfing tight against the
neck block and at the layout line.
3. Clamp the bent kerfing to the contour of the
side adding clamps as you proceed, as
shown in
figure 18.
note: Ensure that the kerfing and side are
in full contact up to the point of each clamp
and that the clamps do not move the kerfing
above the layout line. Use clamps to main-
tain the correct height of the kerfing (see
Figure 18).
4. let glue set for the manufacturer's recom-
mended length of time.
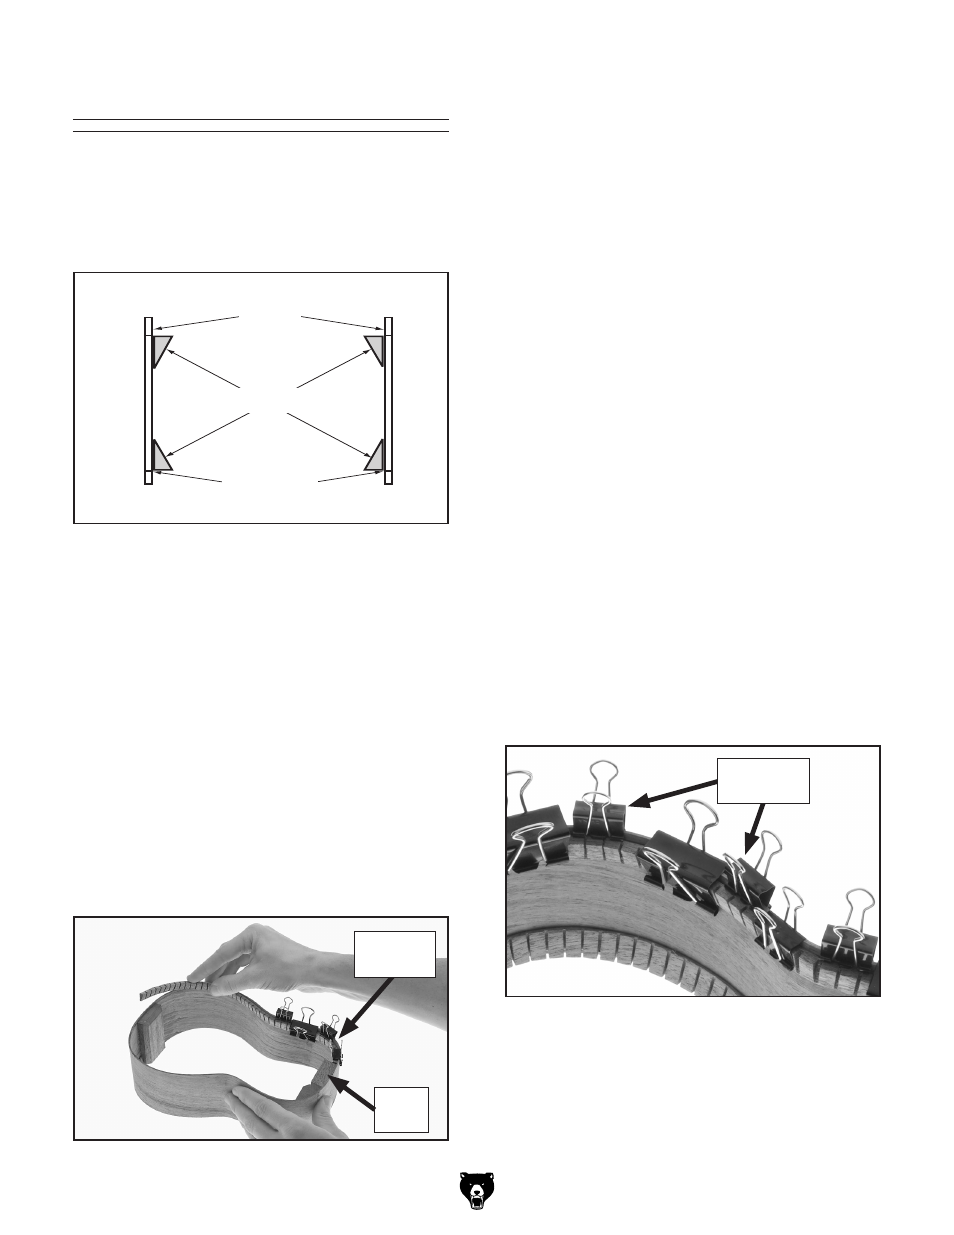
figure 18. Clamps arranged for positioning and
gluing the kerfing to the sides.
positioning
Clamps
to fit the kerfing to the ukulele sides:
1. Soak the kerfing in water for at least two
hours.
2. remove kerfing from the water and pat dry
with a paper towel or rag to remove standing
water from the surface of the kerfing to pre-
vent water from soaking into the sides in the
next step.
3. Clamp the end of the kerfing tight against the
neck block, and gently bend it to the contour
of the side, adding clamps as you proceed,
as shown in
figure 17.
figure 17. Fitting the kerfing to the sides.
neck
Block
Clamped
Kerfing
figure 16. Cross section view of kerfing
attached to the ukulele sides.
Kerfing
Sides
layout line
level