Installation, Operation – Grizzly H8239 User Manual
Page 2
-2-
h8239 safety Locking on/oFF switch
Rear View
of Switch
Hot
Out
Hot
In
Machine
Out
125V Neutral
or 250V Hot
In
125V Neutral
or 250V Hot
KEDU
HY18-XX
Power Source
Verified
Ground*
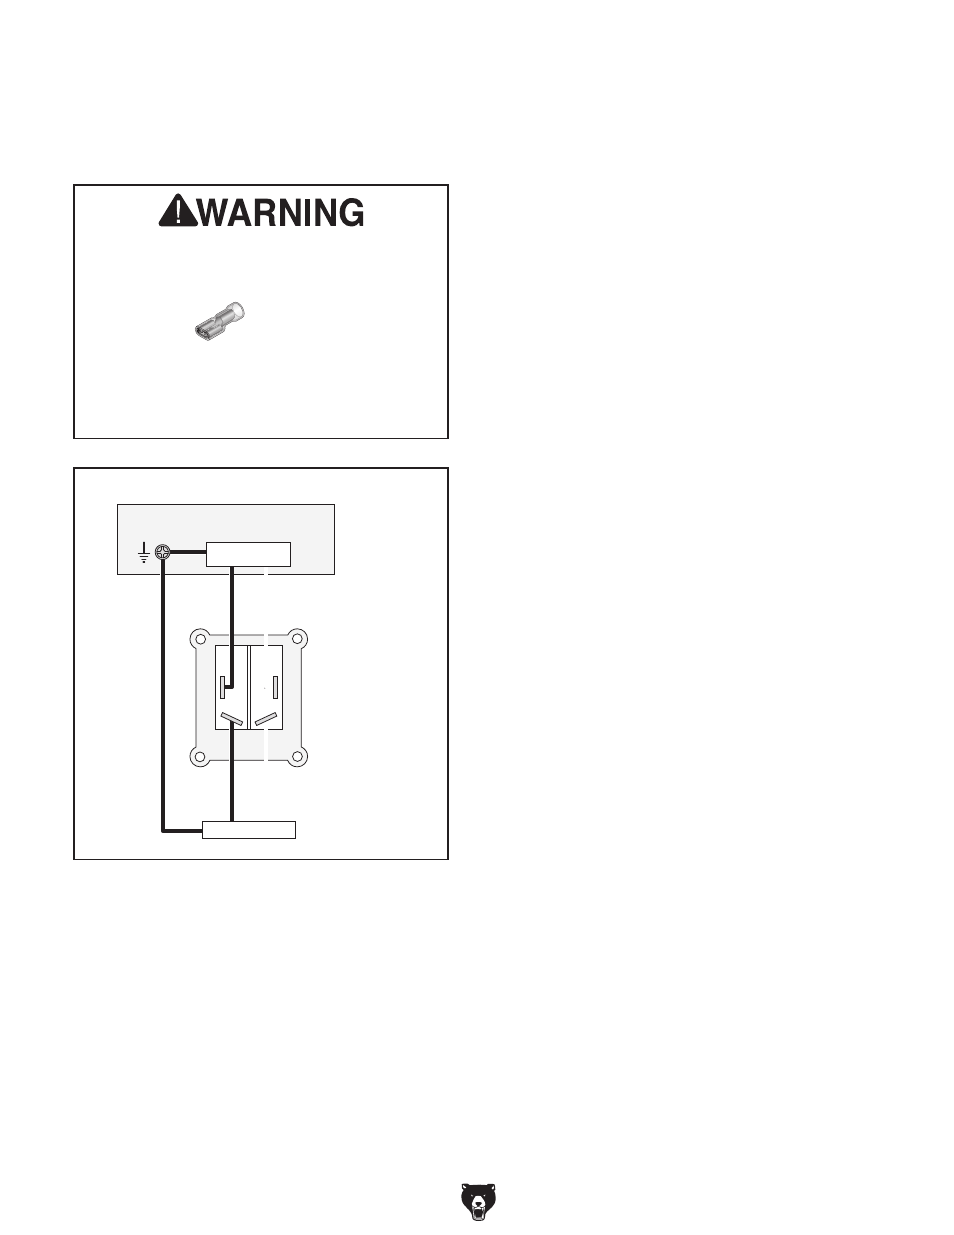
Figure 2. h8239 wiring diagram.
Installation
When installing the h8239 switch, use the wiring
diagram in
Figure 2 to ensure proper wire con-
nections.
Operation
to turn the switch
ON, make sure the safety key is
properly inserted, then flip the paddle up.
to turn the switch
OFF, flip the paddle down.
to disable the switch, turn the switch
OFF, then
pull the yellow key from the switch and store it in
a well hidden or secure location.
This switch is intended to be connected to
stranded wire with insulated quick-discon-
nect crimp-type female wire terminals hav-
ing a
1
⁄
4
" tab.
All crimps must be "pull-checked" to ensure
that wires are securely crimped and will
not fall out with moderate tension or when
exposed to normal machine vibration.
*the machine Must be connected to a verified
ground. in the event of certain malfunctions or
breakdowns, grounding reduces the risk of elec-
tric shock by providing a path of least resistance
for electric current.