Gas burner assembly, Care and cleaning – GE Monogram Component Cooktop System User Manual
Page 26
Care and Cleaning
Component Cooktop System
26
Gas burner
assembly
The burner assemblies should be washed
regularly and after spillovers.
Turn all control knobs to the off (O) position
before removing burner parts. Allow parts to
cool before removing.
CAUTION: DO NOT OPERATE THE
BURNER WITHOUT ALL BURNER PARTS
CORRECTLY IN PLACE.
The electrode of the
spark igniter is exposed when the burner cap is
removed. Contact with an exposed igniter while
a burner is being turned on will cause a slight
electrical shock.
The burner grate, burner caps and burner
support rings can be lifted off, making them
easy to clean. (The drip pan cannot be
removed.) Wash burner parts with an all-
purpose, non-abrasive cleaner and warm water.
Soak stubborn soil. Dry the burner assemblies
with a cloth—don’t reassemble them wet.
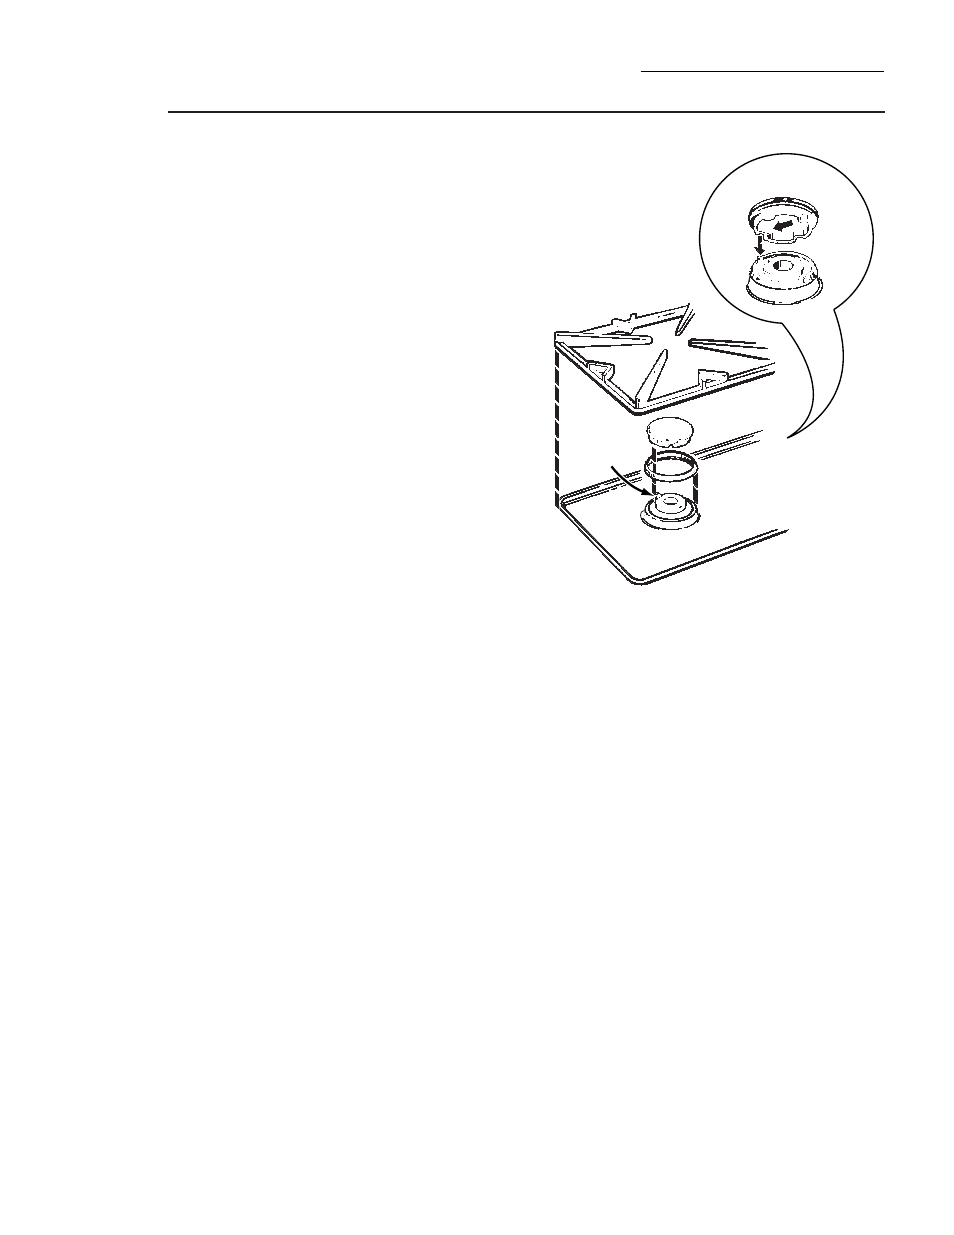
To reassemble:
Place the burner support ring
onto the burner bowl first. Before replacing the
burner cap, first examine the four notches on
its underside. One of the notches, shaped
differently from the other three, includes an
indexing key for the spark igniter—this notch
fits over the spark igniter. When replacing the
burner grate, make sure the bottom of the
burner grate fits securely into a corresponding
ridge in the drip pan.
Burner grates can be cleaned by hand or in a
self-cleaning oven. Although the burner grate is
durable, it will gradually lose its shine,
regardless of the care you take of it. This is due
to its exposure to the high temperature of the
gas flames.
To preserve the porcelain enamel finish as long
as possible, have a pan on the grate before you
turn on the burner, and lower the flame when
food reaches the desired cooking temperature.
Burner cap
Alignment
cap
Igniter
exposed
Burner grate
Burner cap
Igniter
Burner support ring
Burner body
CAUTION: DO NOT OPERATE THE BURNER WITHOUT ALL
BURNER PARTS CORRECTLY IN PLACE.