Shaping headstock – Grizzly H8181 User Manual
Page 9
H8180/H8181 Bass Guitar Kit
-7-
SECTION 4: ASSEMBLY
The headstock for these models comes unfin-
ished so you can cut it to your own design. These
instructions will guide you through designing the
shape of the headstock and placing pegholes.
Components Needed
Qty
Guitar Neck ....................................................... 1
Tools Needed
Sharp Pencil ......................................................1
Paper or Carbon Paper ........................... Various
Bandsaw with a
1
⁄
4
" Blade or a Coping Saw .....1
Round Rasp Files .................................. Assorted
Woodworking Files ................................ Assorted
Drill Press with
1
/
2
" Drill Bit .................................1
To shape the headstock:
1. Trace the headstock on a piece of paper. Test
various ideas for headstock shapes on paper
before cutting into the headstock.
2. Layout pegholes for the tuners. Space the
centers of the pegholes far enough apart so
the tuners will not interfere with each other
when turned and are a minimum of
3
⁄
4
" from
the edge of the headstock.
3. Draw the path of the strings onto the test
paper to ensure that the strings do not inter-
fere with each other as shown in
Figure 6.
Shaping Headstock
Note: To determine the string slot (Figure 5)
locations, you can place the nut on the draw-
ing and mark the slots. If the strings cross the
nut at a sharp angle, this increases friction
and makes tuning difficult. It also increases
the risk of the strings pulling out of the nut
slots.
4. Redraw your final headstock shape onto
the headstock with a pencil or with carbon
paper.
5. Cut the headstock out with a bandsaw or
coping saw. Be sure to cut only to the outside
edge of your pencil line.
Note: To cut sharp corners, cut several slots
perpendicular to the corner, then cut out the
small pieces. This will reduce binding on the
blade.
6. Carefully hand file and sand the headstock to
finalize the shape.
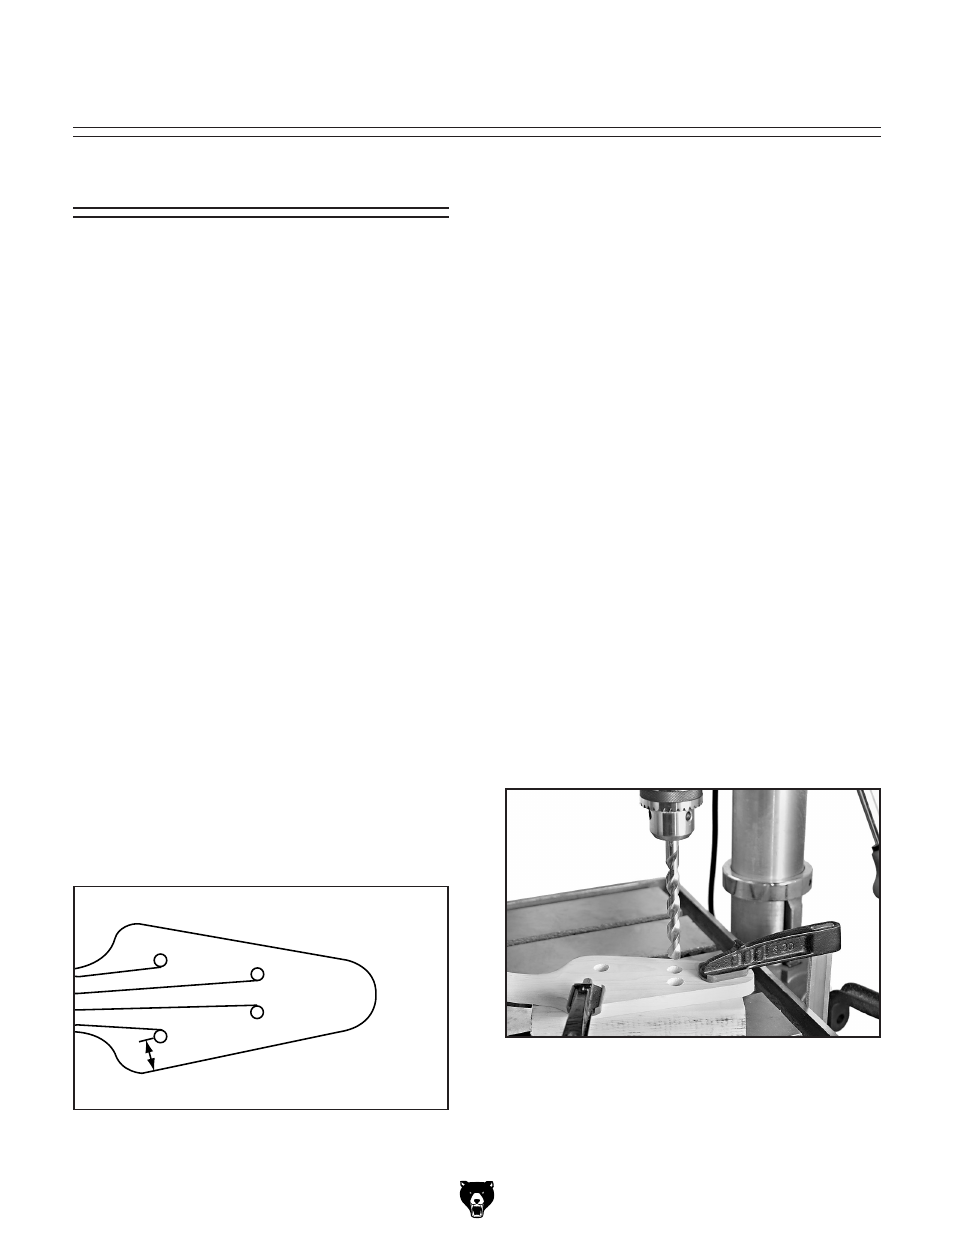
7. Mark the pegholes onto the headstock.
8. Using a
1
/
2
" bit, drill a hole through the top of
the headstock for each tuner shaft, making
sure each hole is perpendicular to the head-
stock surface, as shown in
Figure 7.
Figure 7. Drilling the pegholes.
�
�
�
"
����
Figure 6. Example of string paths and peghole
locations.
9. Carefully use a round rasp to widen the
pegholes enough so the tuner shafts fit snug-
ly in the pegholes.