Global Machinery Company 1700W User Manual
Page 12
12
EMPTYING THE GRASS BOX
1. As the grass collection box
(19) fills with grass, it is
clearly visible through the
translucent material of the
box.
2. Ensure the power button
(2) is in the off position and
disconnect the power cable
plug from the power point.
3. Ensure that you are on a
flat surface and have secure
footing.
4. Press the cover latch (14)
and lift the hinged cover (13).
5. Lift out the grass box (19),
empty it, replace it and close
the hinged cover (13).
CHANGING THE MOWER BLADE
CAUTION.
Never carry out any assembly operations or
adjustments with the power connected to the mower.
Always ensure that the power button is in the off position
and that the power plug is disconnected from the supply.
1. Periodically check the blade (22) for nicks and dull
cutting edges and have it sharpened if needed.
Note:
The blade should be sharpened and balanced by
an authorised repair centre. If there are rounded or broken
ends, thinned metal or other damage, replace the blade.
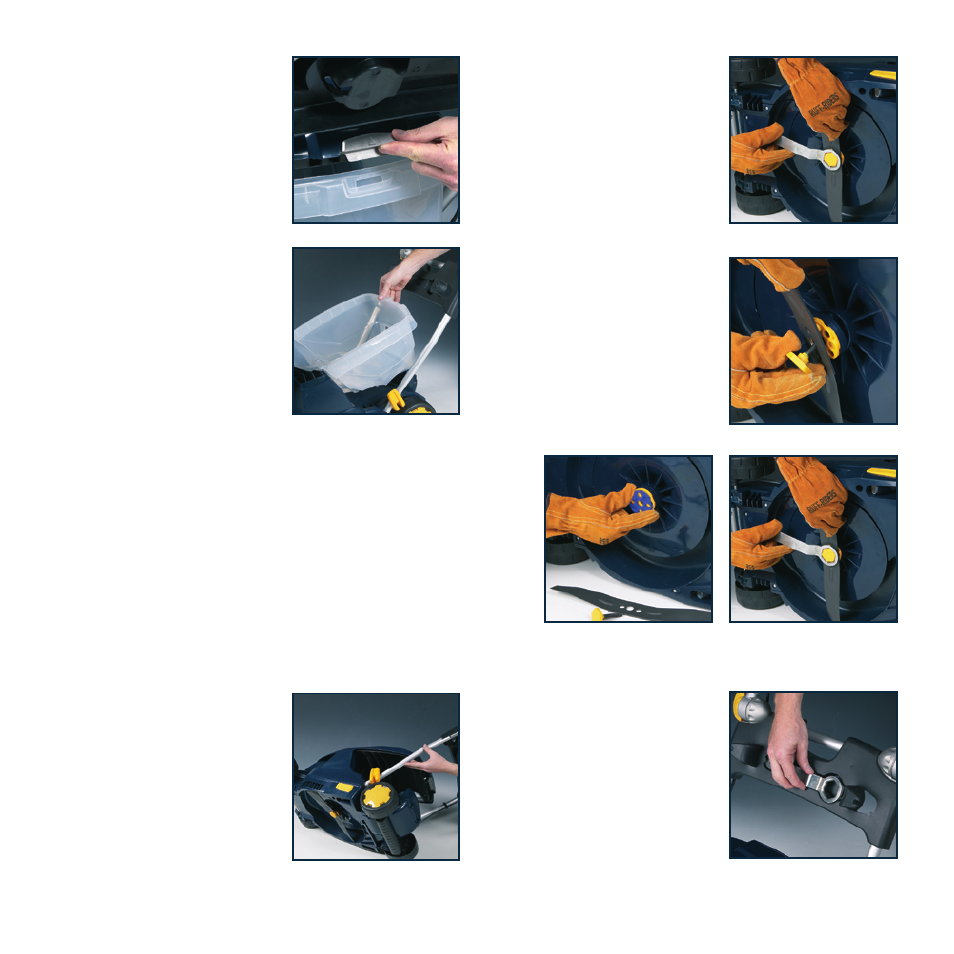
2. With the power button (2)
in the off position and the
power plug removed from the
supply, take out the grass box
(19) and turn the mower on
its side.
3. Put on a pair of sturdy gloves
to protect your hands. Block
the rotation of the blade (22)
and use the blade spanner
(11) to unscrew the blade
bolt (23) in an anti-clockwise
direction (viewed from
underneath).
4. Remove the blade bolt (23)
and blade (22) taking care not
to disturb any blade height
spacers (24 and 25) that
might be fitted.
Note:
The blue spacer (24) can
be removed to increase the
incremental cutting heights by
an extra 6mm at all 5 settings of
the height adjustment lever (16).
5. The mower must not be operated without the yellow
spacer (25) in position under the blade.
6. Check that the blade height
spacers (24 and 25) are
properly located, add the
replacement blade (22) and
screw in the blade bolt (23),
tightening it with the blade
spanner (11).
7. Return the blade spanner (11)
to its storage position in the
cable tidy (10).