Installing the fresco i – Fresco Speaker User Manual
Page 9
Required hardware (included):
(5) wall anchors
(5) 1" Phillips head wood screws
Required tools (included):
6mm Allen tool
Required tools (not included):
Level
Electric drill and
1
/
4
" and
1
/
8
" drill bits
Phillips screwdriver
1 Hold the Fresco i at the mounting location. Examine the
location to assure the wall is free of obstructions.
Test the direction of rotation to assure that the speaker
can rotate toward your listening position. If the speaker
rotates away from your listening position, please refer
to 'Which Direction Should It Rotate?' (page 5) and ‘
Changing the Direction of Rotation’ (page 7).
2 NOTE: These instructions describe the position of the
wall bracket with the Fresco i mounted flush against a
wall (not rotated on its bracket).
NOTE: The center point of the wall-bracket is not the
same as the center of the Fresco i. These directions
describe the location of the center of the wall-bracket,
which you will need to know in order to mount the
speaker at your desired location.
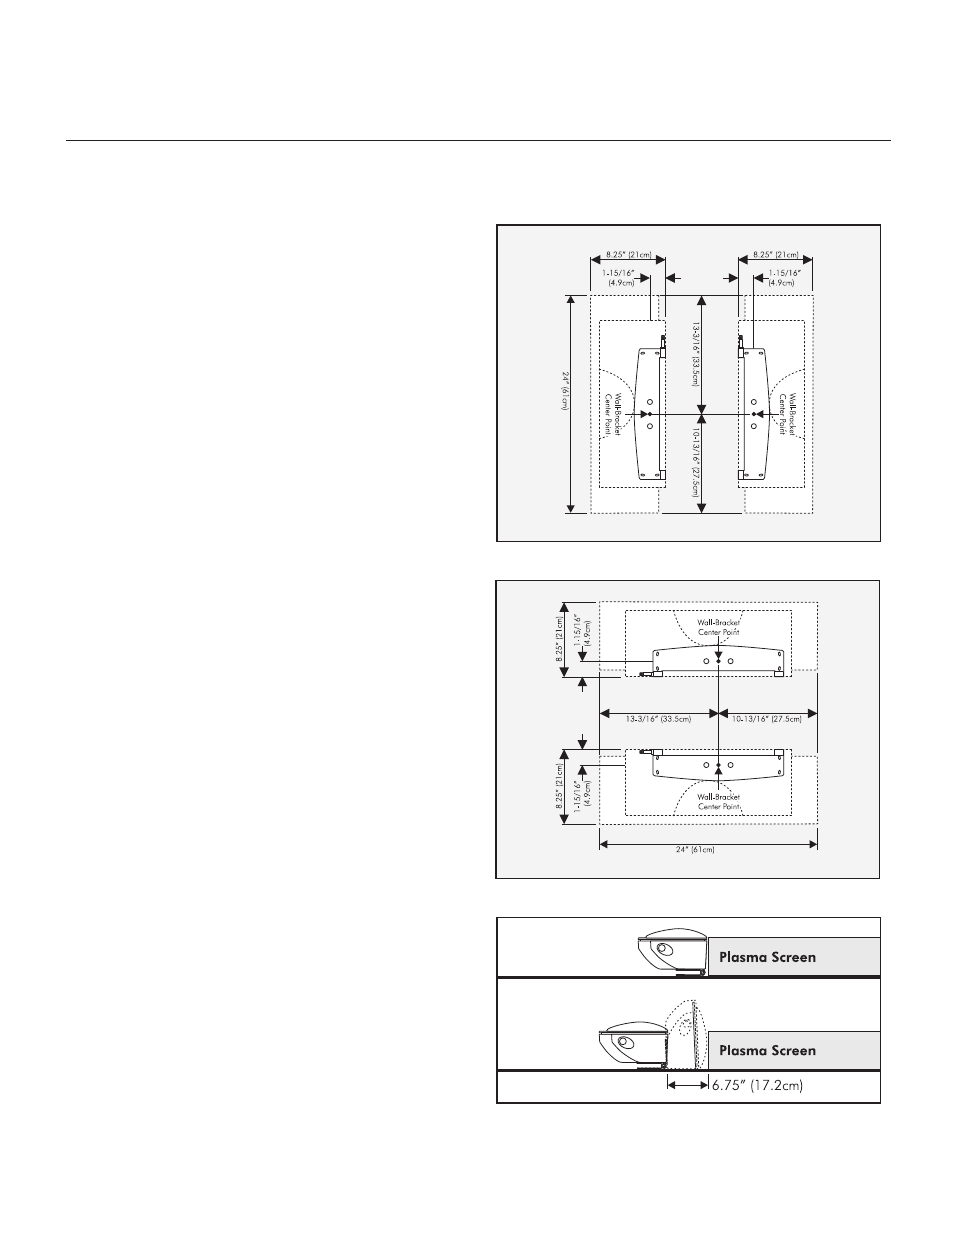
Determine where the center point of the wall bracket
should be marked (see figures 16 and 17).
Will the Fresco i remain flat against the wall? If so,
it can be installed flush against an object such as a
plasma screen (see figure18).
Will the Fresco i be rotated to point towards the
listening position? If so you need to leave space
between the nearest object to allow clearance for
the speaker to pivot (see figure 18). At least 6.75
” (17.2cm) of clearance will allow the Fresco i to
pivot within its full range of motion. Less space is
needed if the Fresco i does not need to fully rotate. As
recommended above, before drilling any holes, hold
the Fresco i at its desired location and rotate it into
place to assure you have adequate clearance.
Installing the Fresco i
Figure 16. Determining the wall brackets center point in a vertical installation.
Figure 17. Determining the wall brackets center point in a horizontal
Counter
Clockwise
Rotation
Down
Rotation
Up
Rotation
Clockwise
Rotation
Figure 18. Clearance requirements to allow rotation of the Fresco i.
Mounting the Fresco i On A Wall or Ceiling 9