3 mounting – Furuno PG-1000 User Manual
Page 10
3
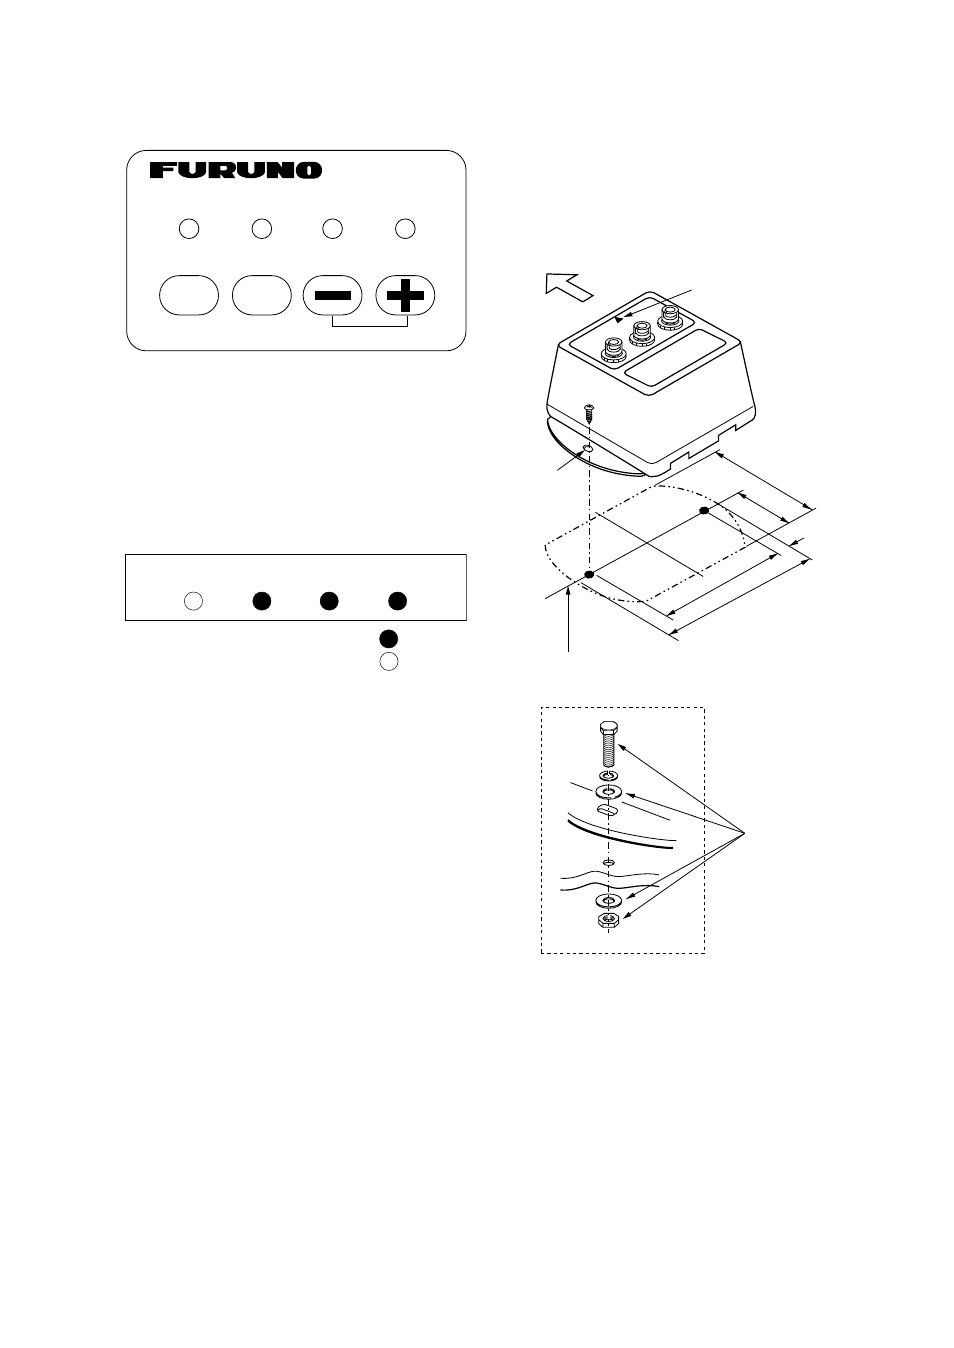
5. Press the [AUTO] and [+] keys together
more than two seconds.
AUTO
TRUE
CALIB
STATUS
PG-1000
INTEGRATED HEADING SENSOR
AUTO
TRUE
CALIBRATION
Figure 5 Key and LEDs
After the TRUE, CALIB and STATUS
LEDs light and AUTO LED blinks, rotate
the equipment 360º slowly, keeping it
uplight. If three LEDs are lighting, the
mounting location is suitable.
;
;
AUTO
TRUE
CALIB
STATUS
: On
: Blinking
;
;
Figure 6
If one or more LED is off, the mounting
location is not suitable. Try to change the
location, and do step 5 again.
6. Press the [AUTO] and [TRUE] keys to-
gether to return to the normal mode. The
STATUS LED blinks while the sensor is be-
ing calibrated and lights steady when the
calibration is completed. Do not operate the
sensor while the LED is blinking; calibra-
tion will be incomplete.
1.3
Mounting
1. Fix the sensor by using screws and washers
(supplied). The size of the fixing hole is ø
4.5 mm.
Ship's bow
Material: Brass
Bow mark
fixing hole
;;;
;;;
141
152
5.5
65
130
;
;;
o All dimensions in mm.
o For added support, use nuts, bolts and
washers.
o Secure sufficient clearance around the
sensor for maintenance and checking.
This line should be at right
angles to the fore and aft line.
Figure 7 Mounting the PG-1000
Note: Do not overtighten the screws or bolts;
the sensor may crack.