Removing, emptying and refitting the grassbox, Cut out device, Starting and stopping – Flymo Electrolux Power Compact User Manual
Page 5: Jk cut out device l, Mn r starting and stopping
4
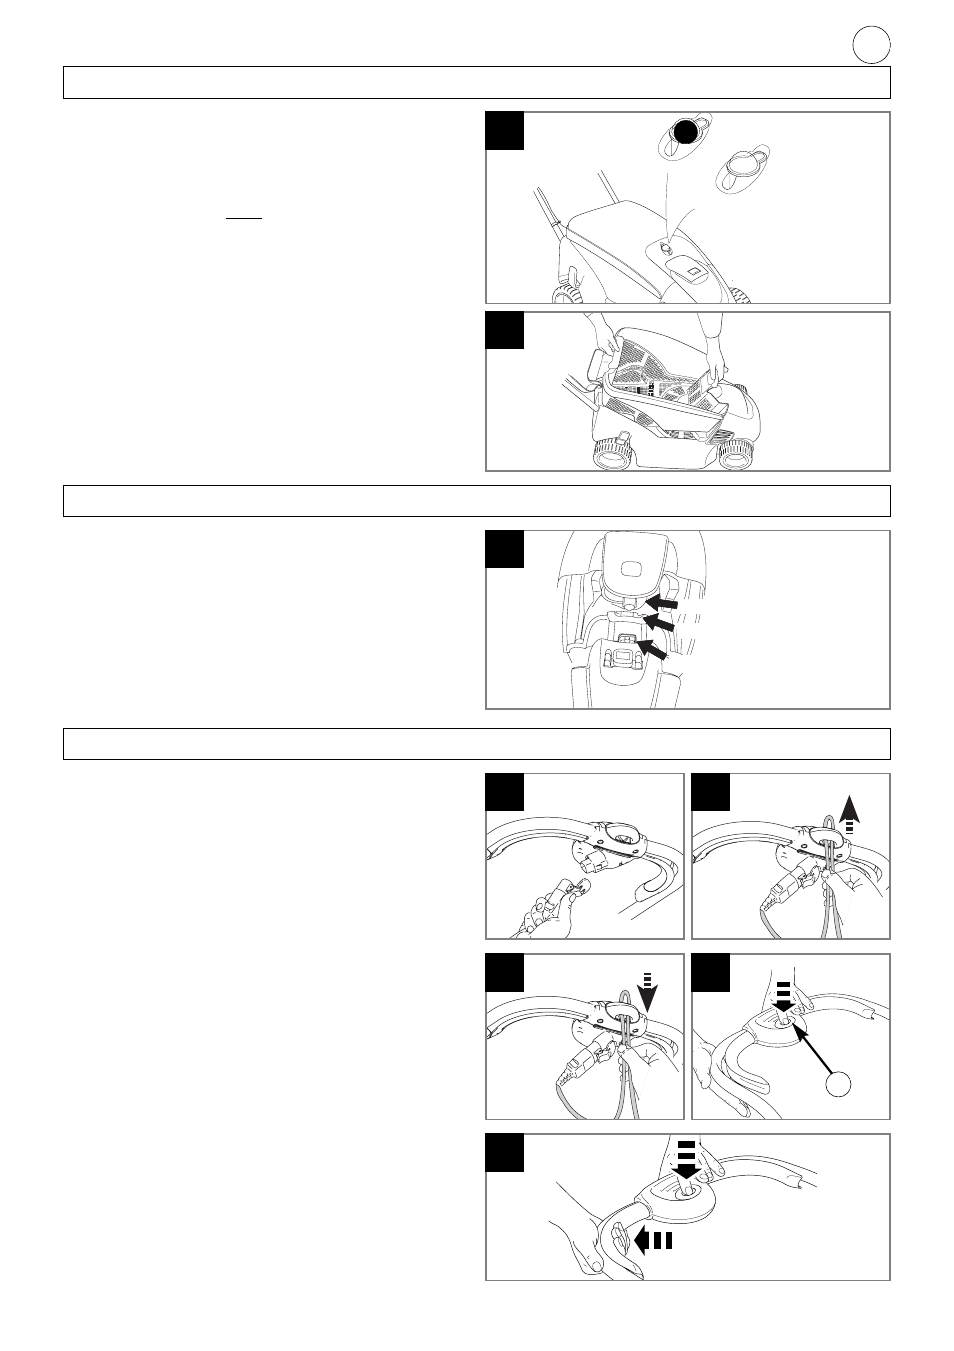
Grassbox Full Indicator
•
IMPORTANT- The machine must be switched
on for the grassbox full indicator to operate
1.
When the ball reaches the top of the indicator
window, it is time to empty the grassbox.
(J)
2.
When the ball is
NOT
visible in the indicator
window, grass is being collected.
(J)
Emptying the Grassbox
•
Stop the lawnmower, as described in ‘To Stop
your Lawnmower’ and wait until the blade has
stopped rotating, BEFORE lifting the grassbox lid.
1.
Release grassbox catch and lift grassbox lid
(B).
See Assembly Instructions.
2.
Rest grassbox lid against lower handle and
remove grassbox
(K).
3.
Empty grassbox.
4.
Replace grassbox and close grassbox lid.
•
If the ball is visible before the grassbox is full,
raise the height of cut until the grassbox is full.
Removing, Emptying and Refitting the Grassbox
grassbox full
grassbox empty
J
K
Cut Out Device
L
•
IMPORTANT
•
The Power Compact is fitted with a device
which will prevent the lawnmower from
being started until the grassbox is securely
located and the grassbox lid is firmly closed.
•
Do not attempt to use your lawnmower with-
out the grassbox in place or with the lid
open.
Grassbox lid actuator
Cut out
Switch actuator
M
N
R
Starting and Stopping
To Start your Lawnmower
1.
Connect female extension cable connector to
the back of the switchbox.
(M)
2. Form loop in mains cable and push the loop
through the slot as illustrated in picture
(N)
3. To secure, position loop over the hook and pull
the cable back through the slot as illustrated in
picture
(P)
.
4.
Connect plug to mains and switch on.
5.
Tilt the handle downwards to slightly raise the
front of the lawnmower and to reduce the risk of
lawn damage whilst starting.
The switchbox is provided with a lock-off button
(Q1) to prevent accidental starting.
6.
Press and hold the lock-off button
(Q)
on the
switchbox, then squeeze one of the Start/Stop
levers towards the upper handle
(R)
.
7.
Continue to squeeze the start/stop lever towards
the upper handle and release the lock-off button.
8.
Lower the lawnmower to its proper operating
position and commence mowing.
•
NOTE: There are two start/stop levers fitted. Either
one can be used for starting the lawnmower.
•
IMPORTANT: Do not use the start/stop levers
intermittently
To Stop your Lawnmower
1.
Release the pressure on the Start/Stop lever.
P
Q
1