Wv10d6_e7a20ud_qg.pdf, Wv10d6, 1connections 2 setup – FUNAI SV2000 WV10D6 User Manual
Page 81: Watching on tv, Initial setup, Remote control, Playable discs region codes recordable discs, Dvd recorder, Input mode names f or common tv brands, Follow to the back side of this sheet
This unit can record to the following disc types.
I
This unit automatically records in +VR mode.
I
DVD+R/DVD-R discs can only be recorded to once. DVD+RW/DVD-RW discs can be recorded to and erased
many times.
I
Discs that have been tested and are proven to be compatible with this recorder:
VERBATIM DVD+R 8x, VERBATIM DVD+RW 4x
VERBATIM DVD-R 8x, VERBATIM DVD-RW 2x, MAXELL DVD-R 16x, JVC DVD-RW 4x
I
We strongly recommend for good recording quality:
TDK DVD+R 4x/8x/16x, SONY DVD+R 4x/8x/16x, MAXELL DVD+R 4x/8x/16x, SONY DVD+RW 4x,
MAXELL DVD-R 8x/16x, MAXELL DVD-RW 4x
1
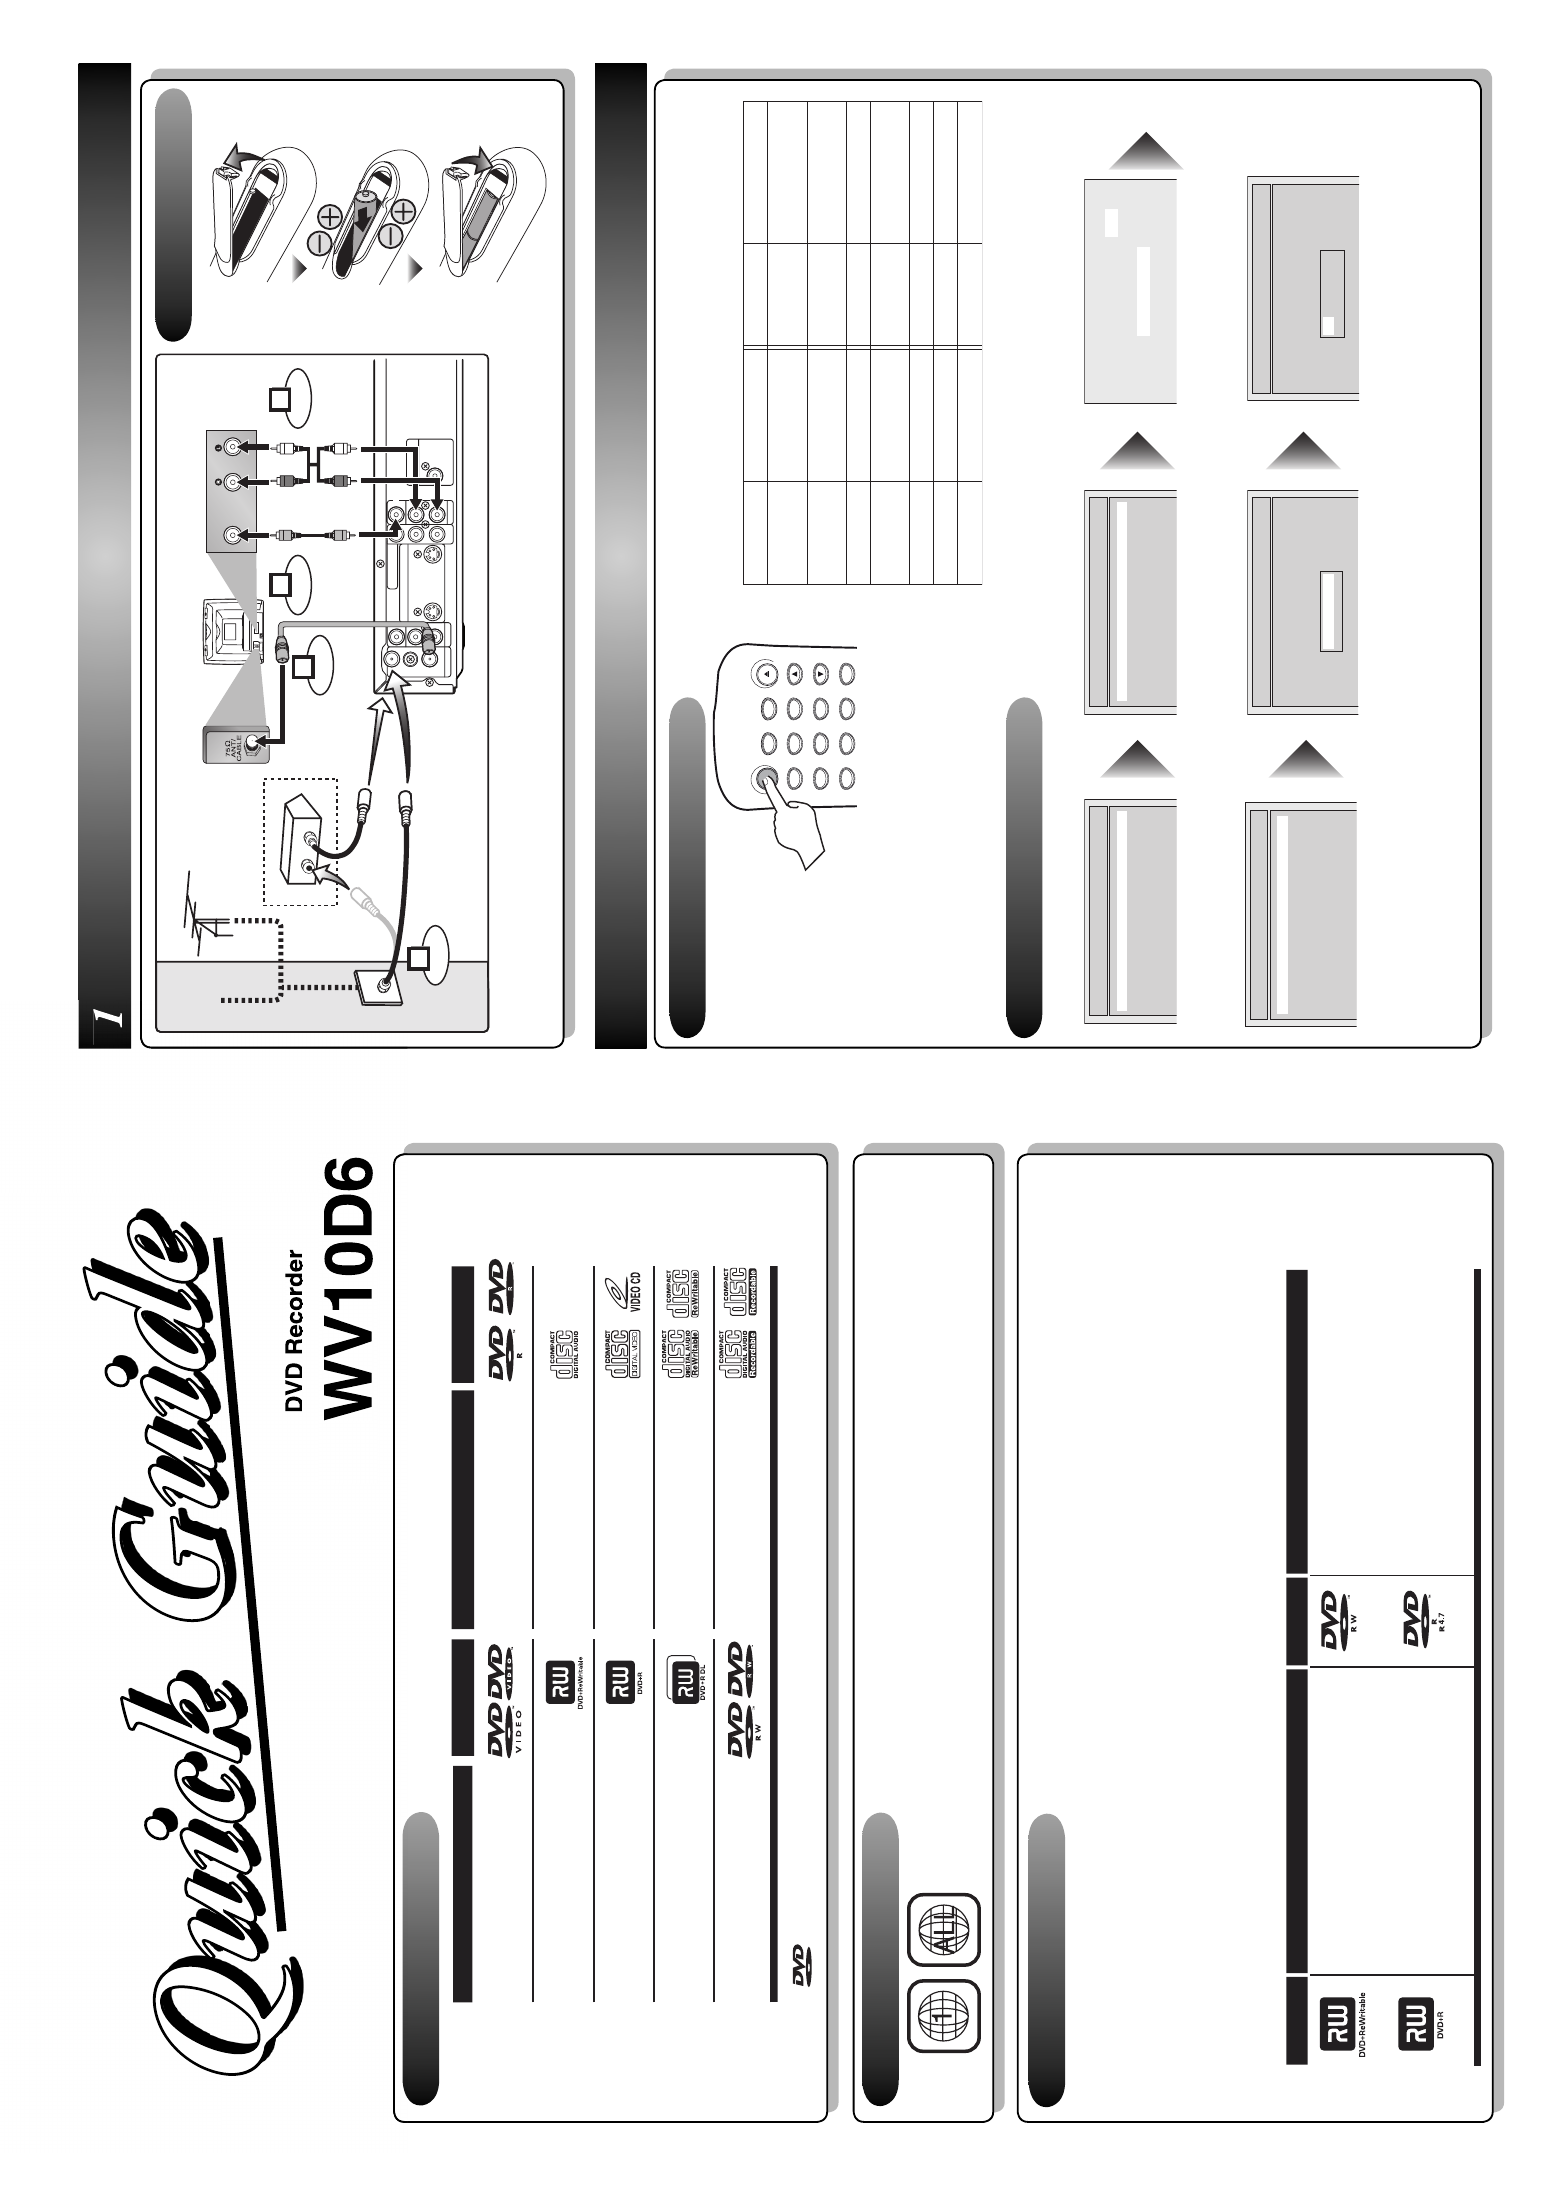
Connections
2
Setup
Follow to the back side of this sheet.
ST
ANDBY-ON
.@/:
ABC
DEF
GHI
OPEN/CLOSE
ZOOM
TIMER
PR
OG.
1
PQRS
4
7
JKL
2
TUV
5
8
MNO
3
WXYZ
6
9
CH
REPEA
T
This unit is compatible to play the following discs.
Logo
Attrib
utes
8cm/12cm, single-sided, single la
ye
r disc
Appro
x
. max.
recording time (SLP mode):
360 min
u
tes (4.7GB) (f
or 12cm)
108 min
u
tes (1.4GB) (f
or 8cm)
D
V
D+R
W
D
V
D+R
8cm/12cm, single-sided, single la
ye
r disc
Appro
x
. max.
recording time (SLP mode):
360 min
u
tes (4.7GB) (f
or 12cm)
108 min
u
tes (1.4GB) (f
or 8cm)
D
V
D-R
W
D
V
D-R
Logo
Attrib
u
tes
DV
D
-R
W
(VIDEO mode, Finalized)
Logo
Disc
D
VD-VIDEO
D
VD+R
W
D
VD+R
D
VD+R Doub
le La
ye
r
DVD-R
(VIDEO mode, Finalized)
CD-D
A (A
UDIO CD)
Logo
Disc
CD-R
(CD-D
A
FORMA
T
, MP3 files)
Video CD
CD-R
W
(CD-D
A
FORM
AT, M
P
3
f
ile
s
)
The number inside the globe refers to region of the world.
This unit can play DVDs that are labeled for ALL regions or for Region 1.
WV10D6
2
– 1
Watching on TV
2
– 2
Initial Setup
Press
[STANDBY-ON]
to
turn the unit on.
1.
Switch the input selector on your TV to an
appropriate external input channel
(usually near channel 0).
2.
Press a button on the TV’s original remote control
(see the table) to select an external input channel
until the DVD recorder’s picture appears.
Admiral
Cur
tis Mathis
GE
Hitac
hi
JVC
K
enw
ood
LXI-Series
Ma
gna
v
o
x
AU
X
LINE1, LINE2, 00, 90,
91, 92, 93
INPUT
,
TV/VCR, 00, 90,
91, 92, 93
INPUT
, A
U
X
VIDEO
, VIDEO1, VIDEO2,
VIDEO3
AU
X
00
A
UX CHANNEL
Input Mode Names f
or Common
TV Brands
P
anasonic
RCA
Samsung
San
y
o
Sharp
Son
y
T
oshiba
Zenith
TV/VIDEO
INPUT
,
TV/VCR, 00, 90,
91, 92, 93
TV/VIDEO
VIDEO
00
VIDEO1, VIDEO2, VIDEO3
TV/GAME
00
DVD Recorder
Playable discs
Region codes
Recordable discs
is a tr
ademar
k of D
VD F
o
rmat/Logo Licensing Cor
por
ation.
I
Both A/V and RF cables must be connected to the TV for operation.
I
See front page of the Owner's Manual for the connection with the RF modulator.
Set up the following items when turning on the unit for the first time.
Press
[OK]
to Clock Setting.
Using
[
K
/ L
], enter the date
(month / day / year).
Press
[
{
/
B
]
to move the cursor.
Press
[OK]
.
TV Program will automatically
appear. (usually near channel 0)
ANTENNA
A
U
DIO IN
VIDEO IN
L
R
A
U
DIO OUT
VIDEO OUT
(E1)
IN
IN
OUT
OUT
S-VIDEO
COMPONENT
VIDEO OUTPUT
L
Y
P
B
/C
B
P
R
/C
R
R
DIGIT
A
L A
UDIO OUTPUT
PCM / BITSTREAM
CO
AXIAL
A
U
DIO IN
VIDEO
RF cab
le (supplied)
RF cab
le (not supplied)
Video
cab
le
(supplied)
A
udio
cab
le
(supplied)
(Bac
k of
TV)
or
Cab
le
TV signal
Connect
Connect
Connect
Connect
Antenna
(Bac
k of this unit)
2
1
3
4
IN
OUT
(Cab
le bo
x or
Satellite bo
x)
Remote Control
Initial Setup
Français
Español
English
Initial Setup
Channel Preset
A
uto Presetting No
w
CH 1
Using
[
K
/ L
], select your desired
language and press
[OK]
.
Press
[OK]
to Channel Preset.
Then the unit will start getting available channels in your area.
---- / -- / ---- ( ---- )
-- :
----
Initial Setup
J
AN / 01 / 2006 ( SUN )
12:
00 AM
Initial Setup
Press
[OK]
again.
Initial Setup
Cloc
k Setting