FELLOWES SB-83I User Manual
Page 4
AUTO
AUTO
AUTO
AUTO
AUTO
AUTO
18
AUTO
AUTO
AUTO
18
AUTO
18
2
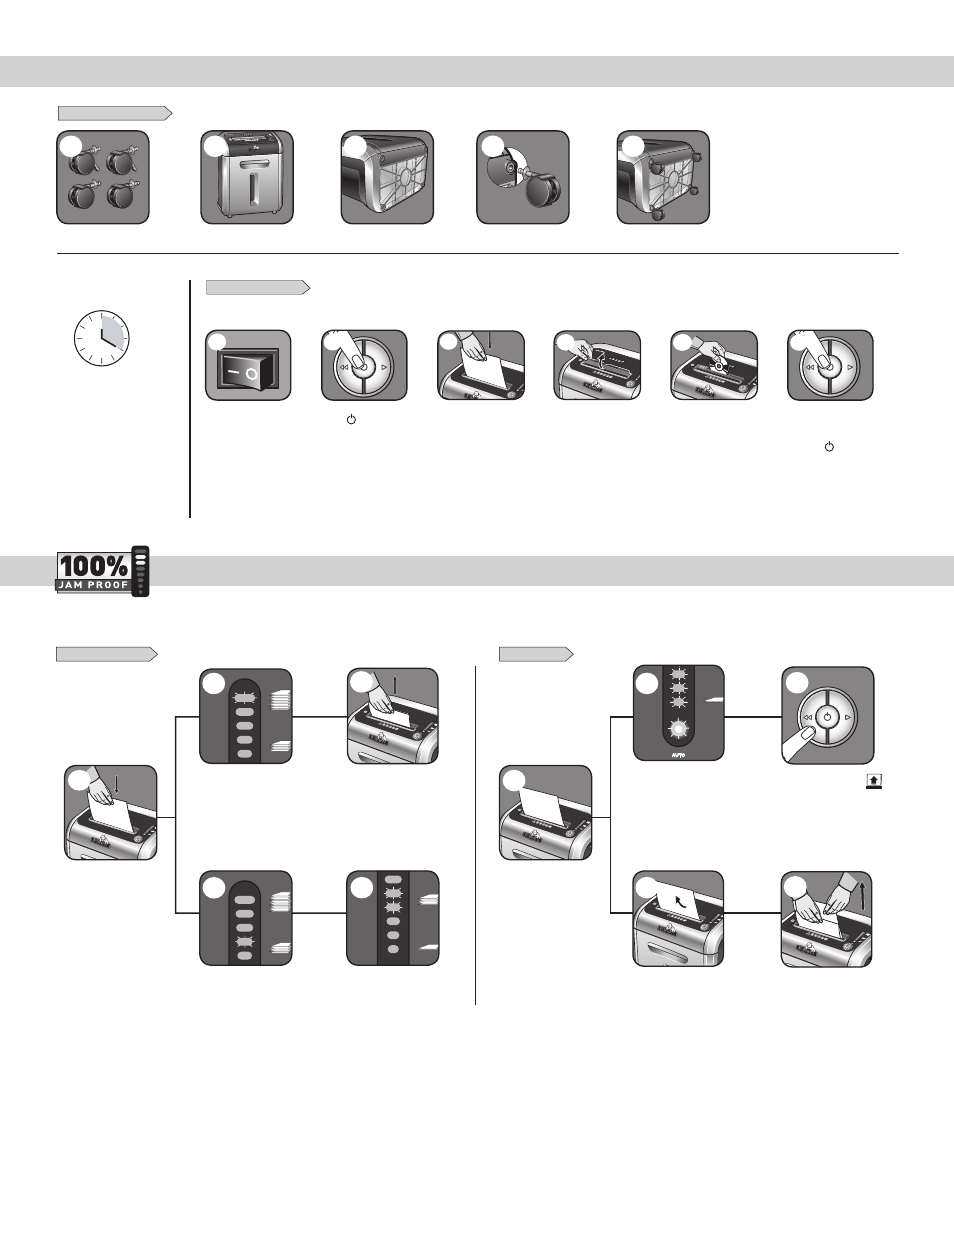
Press ( ) ON to
activate (blue)
PAPER OR CD/CARD
1
To shred CDs rotate
CD flap into place
4
Feed into paper entry
and release
Shredder will take fewer sheets,
but if indicator is below yellow,
you can add more sheets without
fear of jamming
2
Increase the number of sheets
being fed up to the top yellow light
to maximize your productivity
If there is too much paper for
the shredder to power through,
it will reverse the paper out for
easy removal
Reduce paper quantity to an
acceptable amount and refeed into
paper entry
If too many sheets, indicator will
light up to red and shredder will
not take paper
Remove several sheets until the
indicator is below red and the
shredder will take the paper
Automatic correcting action
will power through the misfed
paper, so shredding can
continue (do not add more
paper during flashing)
3
SET-UP AND TESTING
MISFED PAPER
2
AUTO
18
3
2
AUTO
18
3
1
3
3
Feed paper straight into
paper entry and release
1
3
Plug in and put
disconnect power
switch in ON (I) position
Continuous operation:
20-minute maximum
NOTE: Shredder runs briefly
after each pass to clear entry.
Continuous operation beyond
20-minutes will trigger
40-minute cool down period.
Hold CD/card at edge,
feed into CD/Card flap
entry and release
5
When finished
shredding set
to OFF ( )
6
2
AUTO
18
2
Eliminates frustrating jams by preventing overloads and powering through misfed paper.
JAM PROOF SYSTEM OPERATION*
BASIC SET UP AND SHREDDING OPERATION
CASTER INSTALLATION
If Remove Paper icon ( ) is
illuminated, press reverse and
remove paper
If paper is misfed and
stops shredding, all
indicator lights will
illuminate and shredder
will pause for 3-6
seconds
*100% Jam Proof when used in accordance with user manual
AUTO
1
2
3
17
AUTO
1
AUTO
1
2
3
17
AUTO
2
AUTO
1
2
3
17
AUTO
3
AUTO
1
2
3
17
AUTO
4
AUTO
1
2
3
17
AUTO
5